Formax FD 670 User Manual
Page 10
6
FORM SET-UP PROCEDURE WITH
AND WITHOUT TRACTORS
1.Turn on machine. Measure form length using form
length scale on sequence stacker. (Fig. 6)
2- Press form length switch to align alignment mark
with form length on form length scale. (Fig. 4)
3. Place form stack on pull down tray on front of
table.
4.If friction feeding use left, right and center paper
guides. If feeding with tractors, use center paper
guide only. (Fig. 7
)
5. Center leading edge of form at i nfeed end of
machine so that outer edges of form extend equally
beyond guide straps on each side. If you find that the
edges come within 1/4” of the guide straps, offset form
in either direction to avoid this condition. (Fig. 5)
NOTE: For friction feeding omit steps 6-10.
6. Position tractors to proper form width by releasing
thumbscrews on top of tractors and sliding tractors to
proper width. Raise tractor gates
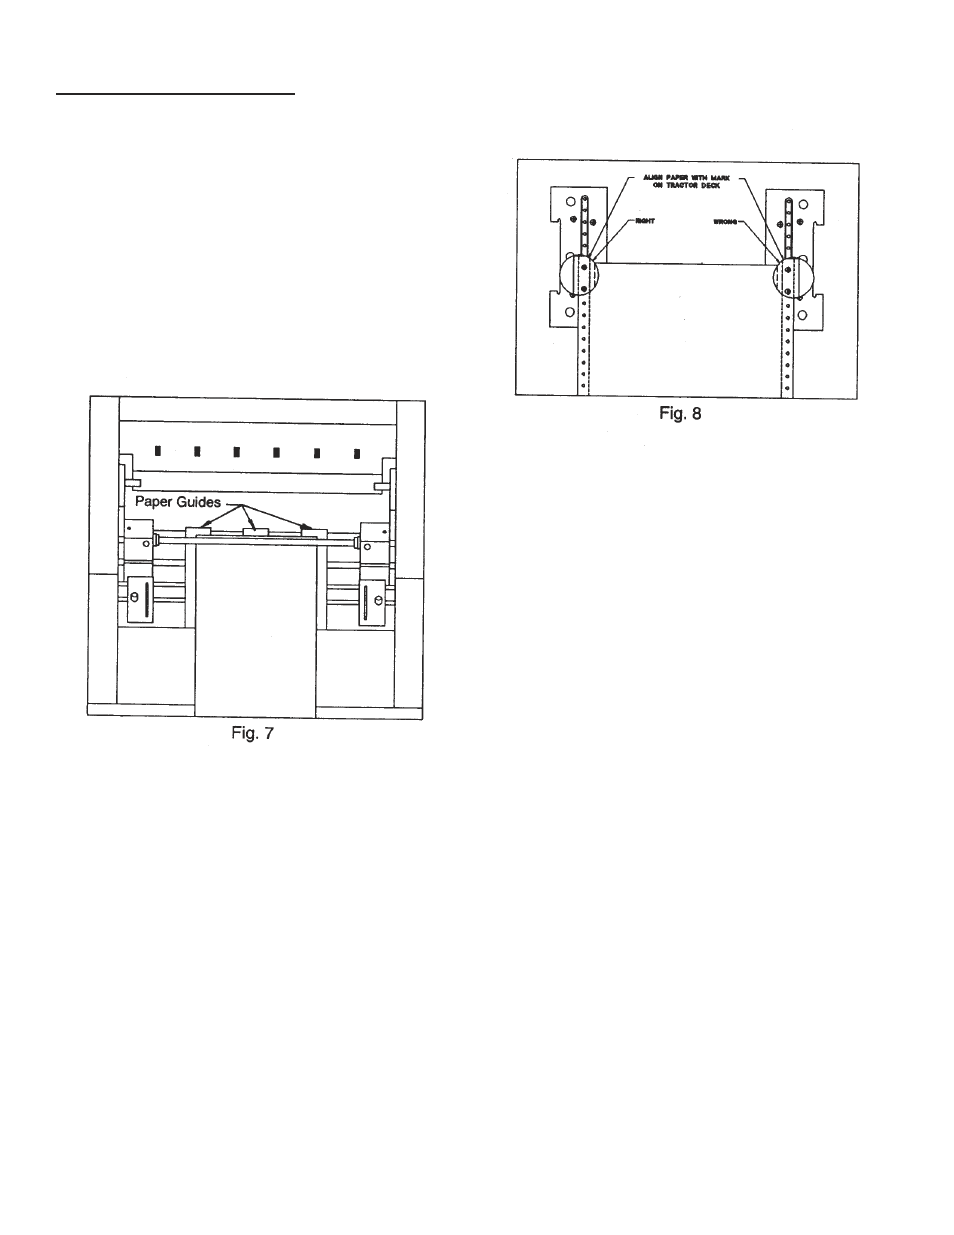
7. Lay margin holes of form over feed pins. (Fig. 8)
NOTE: Do not stretch form too tightly between
pins;
pins should be centered in margin holes.
8. Close tractor gates and lock tractors by tightening
thumbscrews.
9. If using edge slitters, position alignment mark where
you wish to slit. (Fig. 5)
10. 1f slitting, be sure that slitter blades are
engaged. This is accomplished by rotating wedger
in a counterclockwise direction as far as they will go
without force. (Fig. 5)
11. Lock edge slitters in place by tightening
thumbscrews clockwise. (Fig. 5)
NOTE: If you do not want to slit, push edge slitters
away from form and tighten thumbscrews.
12. By pressing jog switch in forward position,
advance form through feed rollers until snap rollers
grab the form.
13. 1f necessary, adjust form length so that form starts
to burst when perforation is just under tear points.
NOTE: Tear points can be moved to allow operator
to position them at any location along tear bar. Tear
points should be set between perforations that run
vertically the length of the form. (Fig. 10)