Operating hints, 7” forms imprinting set-up – Formax FD 540 User Manual
Page 14
10. Turn Handwheel until Signature is printed on second check.
11. Located at the right end of the Imprint Cylinder shaft is the
timing collar. Loosen setscrew and align timing mark on Collar
with arrow on right side of machine. This will be your timing
mark.
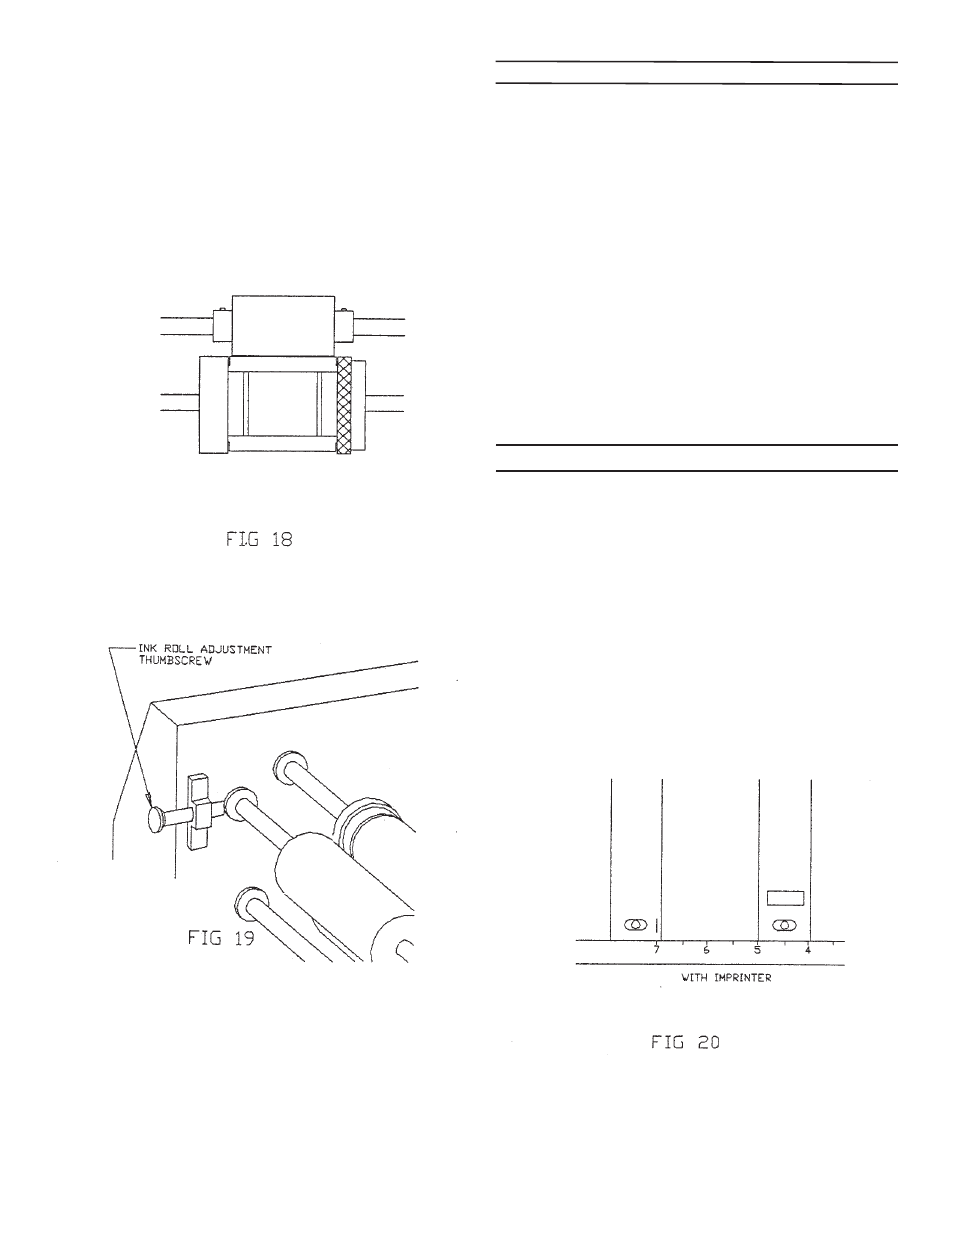
12. Position Ink Roller in front of Signature Saddle and tighten
set screws.
13. Adjust the tension of the Ink Roller so that it lightly
touches Signature Saddle, by rotating Ink Roller Adjustment
Thumbscrews uniformally. (Fig. 19)
14. To load checks after burster has been set up;
A. With handwheel, turn forward until timing mark of collar (step
11) aligns with arrow on side of machine.
B. Place forms on tractors so leading edge is at top of tractors.
C., Rotate forms forward until they enter into the burster, set
speed and turn on.
OPERATING HINTS
1. Some paper has a natural curve. Sometimes thia curve tends
to catch air and sail. If this occurs try running them upside down.
2. Perforations vary in strength. If the forms are bursting
hard, tearing or breaking behind the tear bar, vary the Carriage
Adjusting Knob setting up to 1/2” ahead or behind the actual form
size setting.
3. Multiple part forms with hard-glued edge can be burst by
positioning the tear point over the glued edge.
4. The Stacker Wheels should not stop the form until it clears the
Snap Rollers.
5. Carbonized forms will generally stack better when ran with the
coated side up.
7” FORMS IMPRINTING SET-UP
1
. 7” Forms Imprinting Set Up is the same asfor 3-1/2” forms,
except that one saddle is used instead of two.
2. Set the form length adjustment to “7” w/imprint”.
3. Reposition the tear bar to the “7” w/imprint setting”.
4. To assure that the Burster rollers are timed, rotate the
forms advance handwheel until the “timing marks” appear
simultaneously through the slots in each roller cover. (See Fig.
20).
12