Flowserve Marathon-Mach 1 User Manual
Page 9
9
Flow Control Division
Section 1.0
1. Mount body (Part 1) on arbor press or table vise holding
one flange.
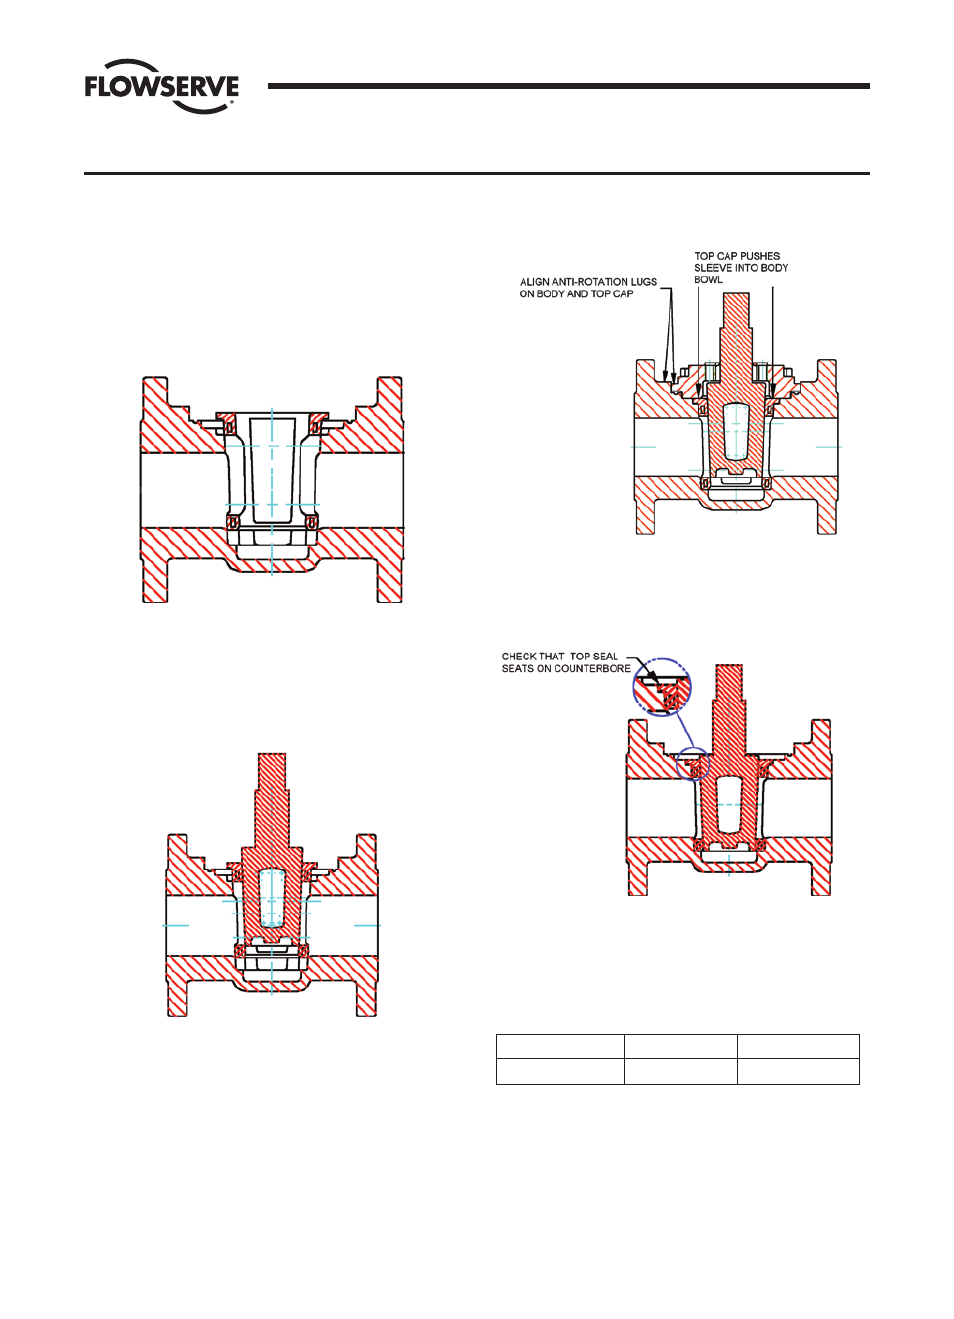
2. Place the sleeve (Part 3) into the bowl of the body.
WARNING: Sleeve port must be aligned with body port.
(See Figure V-B-1)
FIGURE V-B-1
3. Apply a thin film of lubricant on the plug (Part 4).
4. Place the plug in the closed position into the sleeve which
is in the body. (See Figure V-B-2)
FIGURE V-B-2
5. Position the top cap (Part 9) over the plug with the anti-
rotation lugs aligned with the body lugs, making sure the
top cap is free to move downward (Figure V-B-3). Using
all top cap fasteners (Part 10), tighten evenly in a cross-
cross method until the top cap bottoms on the body
counterbore.
SECTION V
B. VALVE ASSEMBLY 1"- 6" MARATHON-MACH 1 WITH SLEEVE
FIGURE V-B-3
6. Check that the top seal of the sleeve is seated into the body
counterbore. (See Figure V-B-4) Remove the top cap fas-
teners and top cap.
FIGURE V-B-4
7. Push the plug downward, while still in the closed position,
until the top of the plug taper is 1/16" above the top of the
sleeve surface. Allow the plug to remain in this position for
the time listed in Table V-B-I.
TABLE V-B-I
SLEEVE SIZING TIMES
VALVE SIZES
1" - 3"
4" - 6"
TIME (min) 5 8
8. Remove the plug.
9. Continue with assembly as in V-A, Valve Assembly of 1"-6"
Marathon-Mach 1 with port seals, starting at number 6,
assembling diaphragms on plug stem.