Reassembly of the univalve – Flowserve V-370 R3 Edward Valves User Manual
Page 14
EDWARD UNIVALVE USER INSTRUCTIONS ENGLISH 12-13
14
REASSEMBLY OF UNWELDED BONNET UNIVALVES
GENERAL: Be sure all parts are clean of dirt, rust or scale.
• Always install a new stem-disk assembly into the bonnet
if the one is damaged, e.g., the disk seat damaged or
stem scratched, worn or pitted. Make sure all dirt is
removed from old stems.
• Apply a light coating of a good high-temperature
lubricant to the bonnet-body threads, such as Bostik
Never-Seez™ – Regular Grade; stainless Univalves
should use Nickel Special Nuclear Grade. Do not use
excessive amounts, and keep it off the gasket seal faces
of unwelded Univalves.
• Next, install a new graphitic gasket seal ring – it should
always be replaced – by slipping it onto the bonnet and
placing it snugly against the off-set. A light film of oil (not
Never-Seez™) helps hold it in place.
• Slip the locking collar over the bonnet from the body end,
with the lug toward the body. Install the capscrew and
nut on the collar, but do not tighten.*
• Next carefully screw the bonnet and stem-disk assembly
into the body, making certain the disk is off the body
seat (valve is open). Using the Bonnet Torquing Collar
assembly, tighten the threads to the torque shown for
unwelded bonnet Univalves.
THIS IS VERY IMPORTANT FOR UNWELDED BONNET
UNIVALVES.
• Verify that the bonnet shoulder does not bottom out on
the body.
• Rotate the locking collar counterclockwise so the lug is
against one of the body lugs. Tighten nut to the torque
value for the yoke bolts, as shown in the next column.
• Install the packing if the original is to be replaced. See
“Packing Installation,” pg. 16.
• Making sure the stem is clean, apply a light coat of
extreme pressure grease, such as American Oil Rycon
EP-2 or equivalent on the threads. Screw the yoke onto
the stem, then onto the bonnet, turning it down snugly
against the bonnet shoulder. Lubricate and then tighten
the yoke bolt as follows:
3/8 dia. bolt
16/20 ft-lb
25/30 N-M
7/16 dia. bolt 30/35 ft-lb
45/50 N-M
• Tighten the gland bolts. IMPORTANT: per “Torque Range
for Packing Gland Bolts,” pg. 17.
• Install the handwheel or actuator. For safety reasons,
make sure the self-locking stem nut is tight on the
handwheel valves.
NOTE: Univalves with “B” prefix or no prefix have a different
type of locking collar which is installed after the bonnet has
been tightened into the body.
REASSEMBLY OF WELDED BONNET UNIVALVES
GENERAL: Be sure all parts are clean of dirt, rust or scale.
• Always install a new stem-disk assembly into the bonnet
if the old one is damaged, e.g., the disk seat is damaged
or stem scratched/worn or pitted. Make sure all dirt is
removed from old stems.
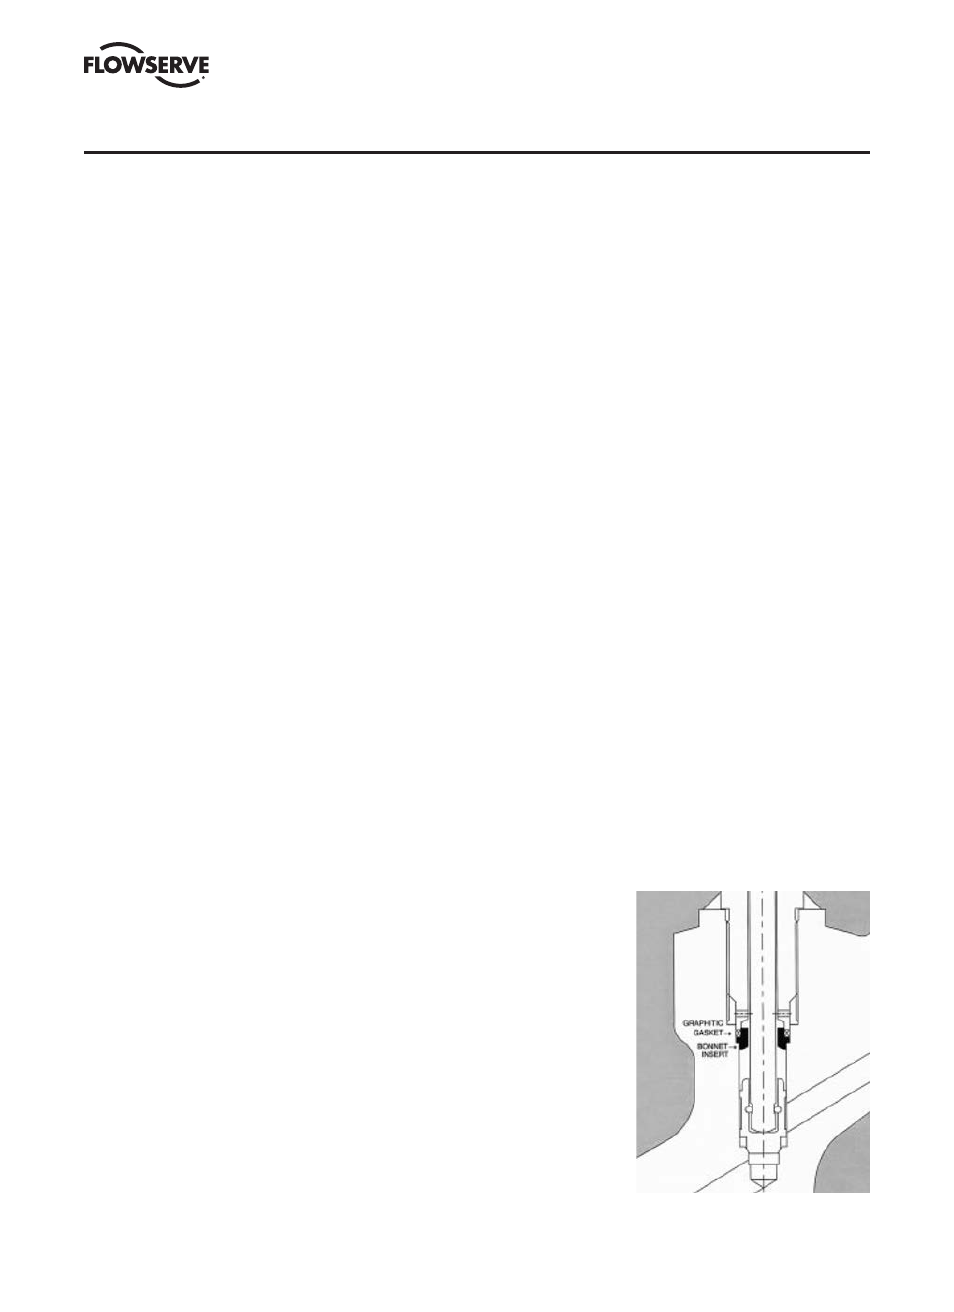
• Class 4500 welded bonnet Univalves (only) should have
both the bonnet insert and graphitic gasket seal ring
replaced. Do this by removing the stem-disk assembly
from the bonnet, placing the new bonnet insert and
graphitic gasket seal ring over the stem, then installing
the stem back into the bonnet.
• Apply a light coating of a good high-temperature
lubricant to the bonnet-body threads, such as Bostik
Never-Seez™ Regular Grade; stainless Univalves should
use Nickel Special Nuclear Grade. Do not use excessive
amounts.
• Next, carefully screw the bonnet and stem-disk assembly
into the body, making certain the disk is off the body seat
(valve is open). Apply a nominal torque, as specified on
pg. 16 for welded bonnet Univalves.
• Seal weld the bonnet; refer to pg. 18.
• Install the packing if the original is to be replaced. See
“Packing Installation,”
pg. 16.
• Making sure the stem is clean, apply a light coat of
extreme pressure grease, such as American Oil Rycon
EP-2 or equivalent, on the threads. Screw the yoke onto
the stem, then onto the bonnet, turning it down snugly
against the bonnet shoulder. Lubricate and then tighten
the yoke bolt as follows:
3/8 dia. bolt
16/20 ft-lb
25/30 N-M
7/16 dia. bolt 30/35 ft-lb
45/50 N-M
• Tighten the gland bolts. IMPORTANT: per “Torque Range
for Packing Gland Bolts,” pg. 17.
• Install the handwheel or actuator. For safety reasons,
make sure the
self-locking
stem nut is tight
on handwheel
valves.
REASSEMBLY OF THE UNIVALVE