Flowserve Circulator User Manual
Page 10
12. Slide fitting nuts into place and finger tighten.
13. Remove the fitting nuts and ferrules from the fittings
on the right side of the heat exchanger and the filter.
Slide them onto the “L” shaped tubing.
14. Insert the “L” shaped tube into the right side of the heat
exchanger and the filter. Verify tubing ends are the
correct length. Cut to fit if required. Proceed to the next
step once the tubing is the correct length.
15. Slide tube fitting nut and ferrule onto each end of the
tubing.
16. Insert tubing into the fittings on the heat exchanger
and filter.
17. Slide fitting nuts into place and finger tighten.
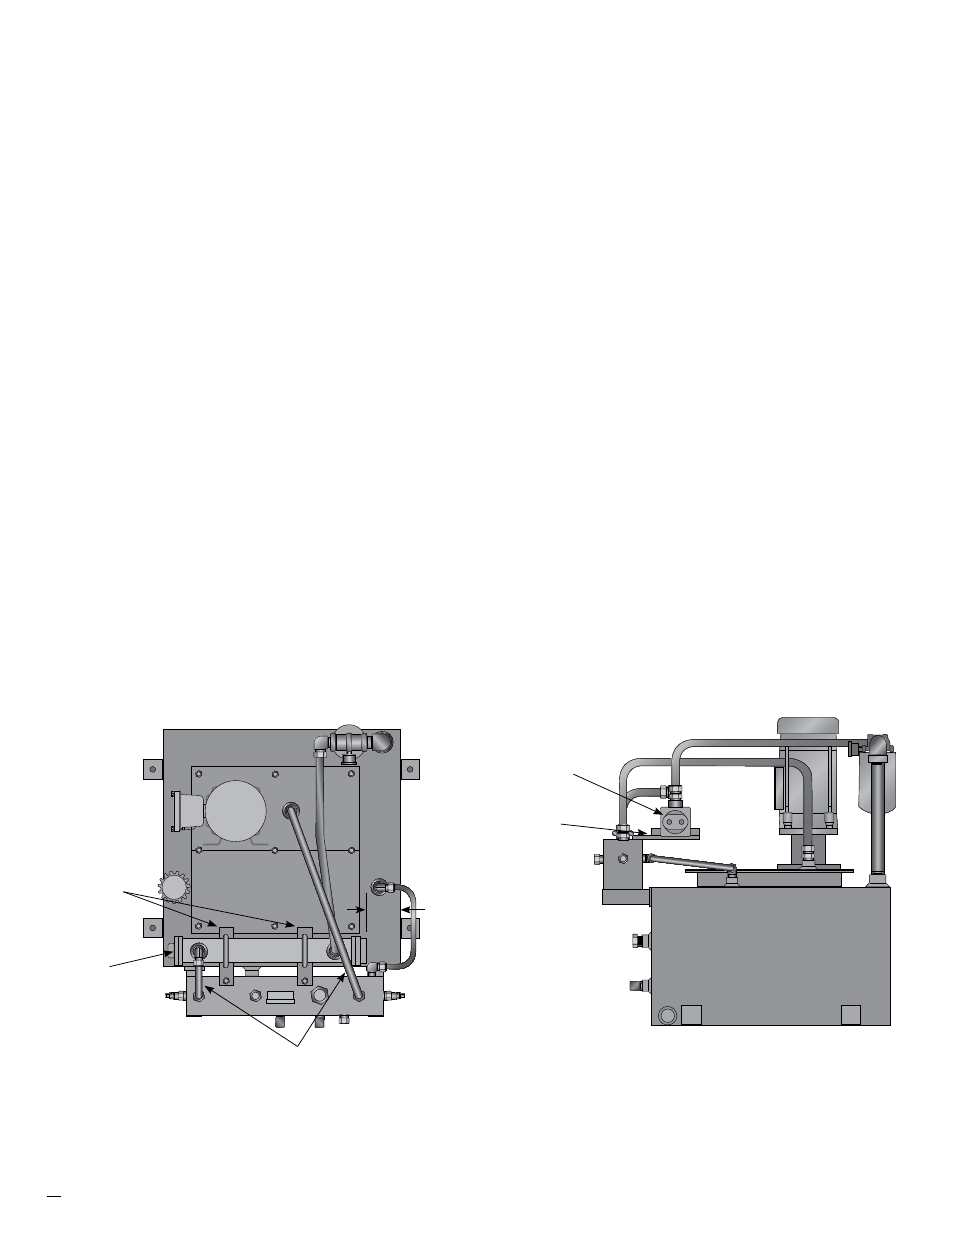
18. Square the mounting brackets with the manifold block.
See Figure 4. Tighten the mounting bolts and the U-
bolt nuts. Do not over tighten.
19. Hold tubing into position and tighten each nut with a
wrench until tight. Do not over tighten.
20. Disconnect the existing cooling media lines from the
reservoir’s internal heat exchanger.
21. Apply Teflon tape and/or Jomar pipe dope or equal to
the 1/2” NPT plug threads. Start no closer to the end
of the threads than the 2nd thread.
22. Thread the plugs into the reservoir’s internal heat
exchanger and tighten. Do not over tighten.
23. Installation is complete.
24. It is the responsibility of the customer to connect to the
heat exchanger cooling media ports.
Note: For additional cooling capacity run cooling media
through both the internal and external cooling coils
in series.
10
mounting
bracket
4.50"
tubing and
fittings
heat
exchanger
cooling port
orientation
mounting
bracket
Figure 4
Figure 5