Patio mount installation – Fire Magic Choice Post Grills C430s User Manual
Page 12
12
PATIO MOUNT INSTALLATION
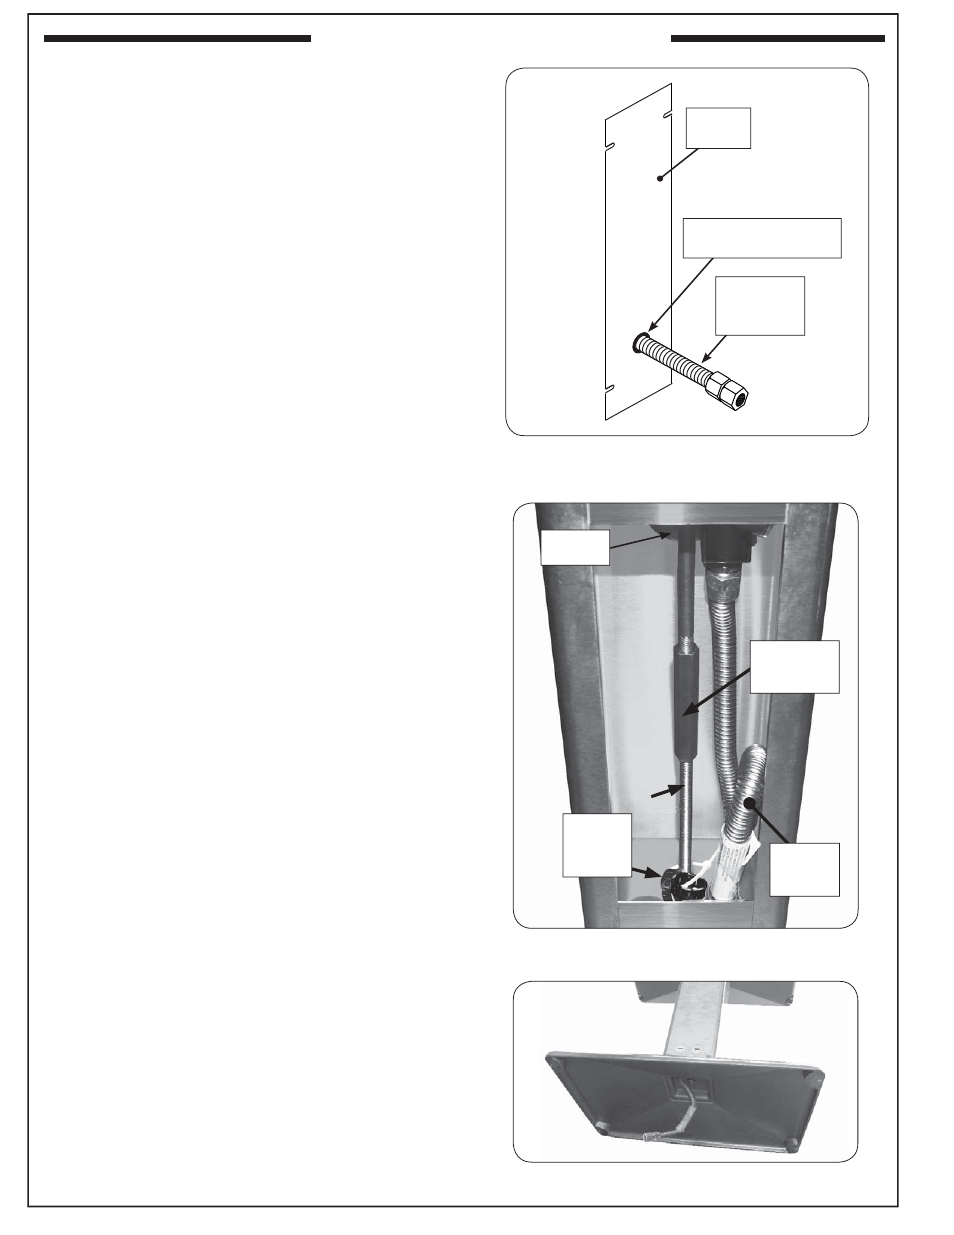
Fig. 12-3 Post base option
REV 0 - 1412020855
L-C2-462
Fig. 12-1 Access plate view & install orientation
Access
plate
Fig. 12-2 Post interior detail
Grommet
& bushing
attached
with tie
Tension
Bolt
Back of
timer valve
Adjustable nut
(turn to tighten
if needed)
Gas supply knock-out
(grommet installed)
Flex
connector
(w/ adapter)
Flex
connector
(w/ adapter)
PREPARE FOR INSTALLATION
Consult a qualifi ed professional installer.
The fl ex connector can be routed out the back of the
post, under the post base, or inside the post.
To gain access to the inside of the post, unscrew and
carefully open the access plate on the rear of the post
using a medium Phillips-head screwdriver. Retain the
screws.
ROUTE FLEX CONNECTOR
The gas supply line will need to be run to the post install
location as appropriate for the desired setup.
To route fl ex connector through rear of post:
1. Remove a knock-out disk at the bottom of the access
plate with a large fl athead screwdriver. (Insert the
screwdriver into the notch provided in the center
of the knock-out.)
2. Remove the plastic grommet fastened to the inside of
the post and insert it into the newly created opening.
Then route the fl ex connector through the opening.
See Fig. 12-1 and 12-2.
To route fl ex connector beneath post base:
Route the fl ex connector through the hole found beneath
the center of the post base (see Fig. 12-3).