Fenix ECOFLOOR Comfort Mat User Manual
Page 11
11
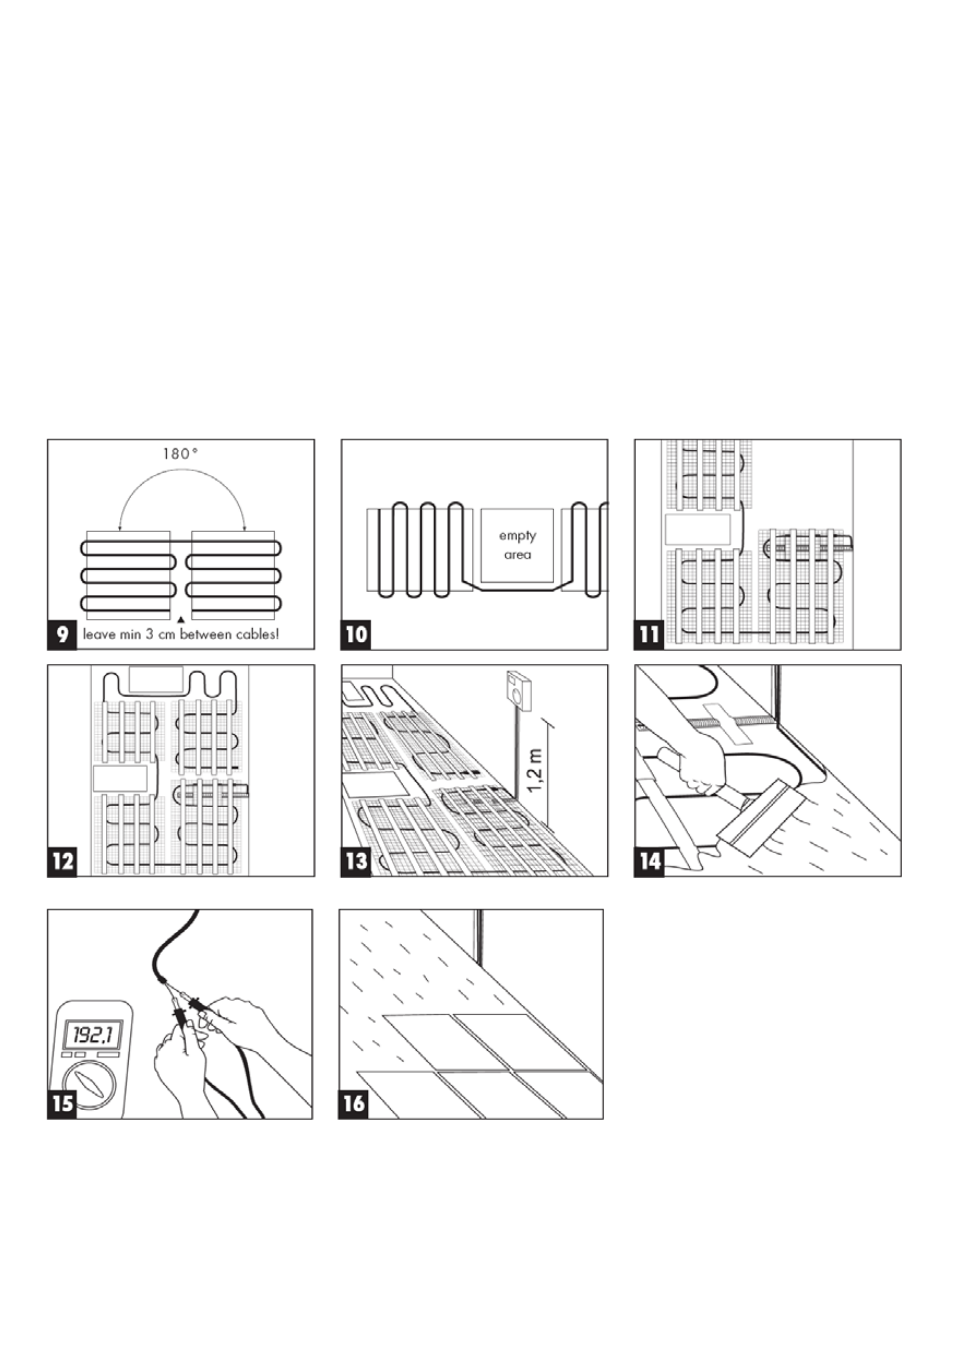
On no account must heating cable be cut! You can adjust only woven fibreglass base
fabric. If you will need neccessarly to adjust cable loops, note that dimension of
loop must be more than 3 cm (See fig. 11, 12, 13).
6) Now that you have laid the mat and placed the probe, you may apply the adhesive * (sometimes called the
"screed") with a palette knife or similar implement (See fig. 14). Make sure, in the process, that the adhe-
sive permeates the mat. When applying the adhesive, follow its manufacturer's instructions.
Use a smooth palette knife or similar implement to level out the heating mat.
7) Before laying tiles, re-measure the resistance of the heating circuit (See fig. 15). For small areas (up to 4
m
2
), tiles can be applied immediately (See fig. 16); for larger areas, wait 24 hours first. Draw and mark the
following on the warranty certificate: the placement of the "connector", the direction and spacing with
which the cable was laid, and the values measured in this point and point 1).
8)
Before you bring the heating floor into operation, wait the amount of time specified by the manufacturers of the
adhesive and the grout (the material for filling gaps).
*)
Suitable materials for installation:
glue ADESILEX P4 suitable for concrete
base (producer — MAPEI),
lissom taping cement
FLEX (producer — MUREXIN),
FLEXKLEBER (producer — KNAUF).