Installation instructions – Fenix ECOFLOOR Comfort Mat User Manual
Page 10
10
Installation Instructions
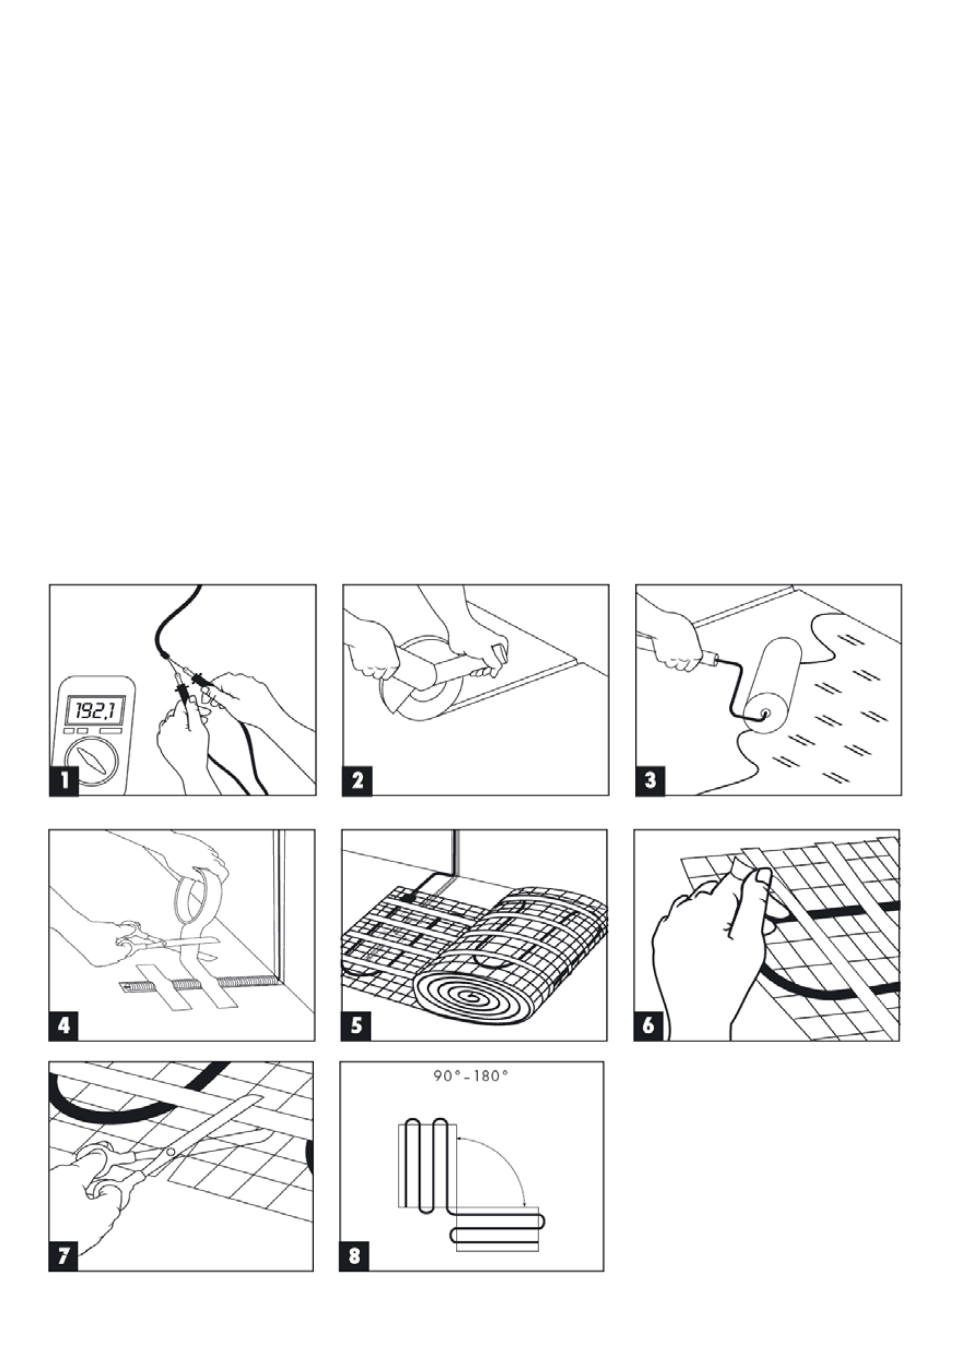
1) Check that the contents of the Ecofloor Comfort Mat kit comply with the included contents sheet.
Measure the resistance of the heating cable circuit (See fig. 1) and record the resistance value in the warranty
certificate.
2) Check that the heating area corresponds to the heating mat's type and to the required density (160 W/m
2
in
e.g. bathrooms, 100 W/m
2
for other areas). Choose, and mark on the floor, the location for the
"connector" (see Important Notices, pt. 2) and the thermostat probe. Incise grooves in the floor in the places
you marked (See fig. 2).
3) Clean the floor well and prime it with a suitable primer * (See fig. 3).
4) Insert the probe into its protection tube, seal the tube with tape (to prevent the tile adhesive from leaking in),
place the tube into the incision you made (see the Description and Connection Instructions section), and fix
it in place with tape (See fig. 4).
5) Remove the LDTS heating mat from its carton and prepare it for placement. Take care that the probe protec-
tion tube lies in the middle of a cable loop (See fig. 5).
Peel the protective paper layer off of the edge tape-strips (See fig. 6) and gradually stick the mat to the base
surface in accord with the layout you selected. Heating mat LDTS can be adjusted according to fig. 7, 8, 9,
10.
*)
Suitable materials for priming:
MAPEPRIM SP suitable for concrete
base (producer — MAPEI),
taping emulsion
(producer — MUREXIN),
HAFTEMULSION (producer — KNAUF).