Configuration – Exacq exacqVision Server/Client OS: Linux Active Directory User Manual User Manual
Page 3
www.e
x
acq.com
Page 3 of 14
4/30/2015
3
Configuration
NOTE: The domain controller must run on Windows Server 2003 operating system or later.
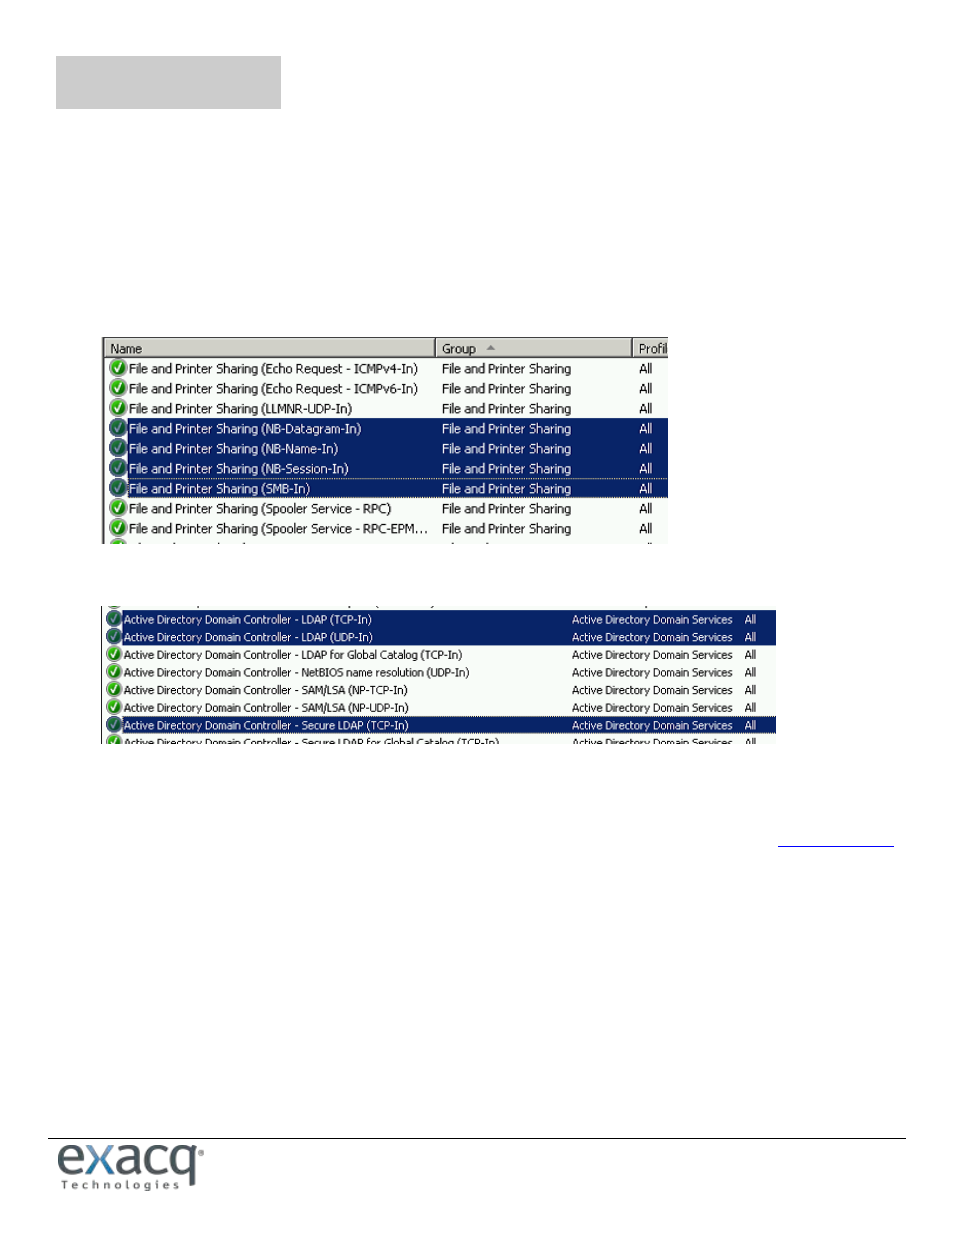
1. On the AD server, open the Windows Firewall control panel and then Advanced settings. Confirm File and Printer
Sharing for Inbound and Outbound, and verify that all four rules are listed, usually:
TCP port 139 (NB-Session)
TCP port 445 (SMB)
UDP port 137 (NB-Name)
UDP port 138 (NB-Datagram)).
2. Add and confirm rules for TCP/UDP ports 389 (standard clear text LDAP) and 636 (standard SSL LDAP).
3. On the AD server, enter 127.0.0.1 as its own DNS server address.
4. On the exacqVision server, download and install the exacqVision server and client software from
You must be logged in with Local Administrator privileges to do this.
5. License the exacqVision server as an Enterprise system using following steps:
Run exacqVision Client and connect to the local server (127.0.0.1) using the default admin account.
Open the System Setup page for the exacqVision server you want to license, and then select the System tab.
Enter the valid Enterprise license as generated by Exacq Technologies, and then click Apply in the License
section.
6. In exacqVision Client, configure the IP address and designate the AD server as the preferred DNS server, or use a
preferred internal DNS server.