DR Power Walk-behind 12.5 Premier User Manual
Page 17
CONTACT US AT www.DRpower.com 17
1. Remove the Belt Guard by unscrewing the black Knob and pulling the Guard
up off the Stud (Figure 9).
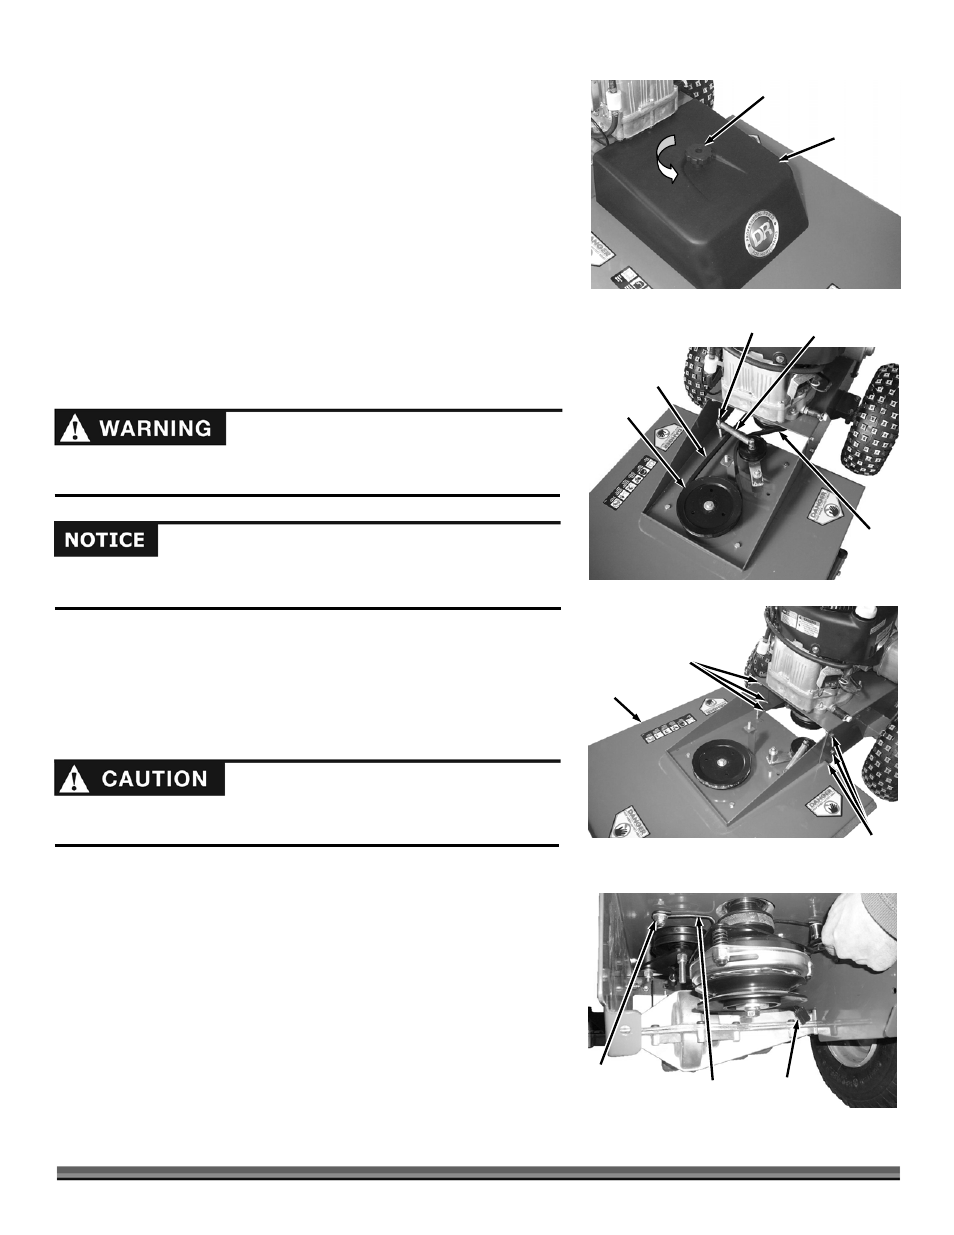
2. Remove the top nut from the Tensioner Spring Bolt (Figure 10) with a 9/16"
Wrench. Remove the Tensioner Spring from the Bolt Threads by gripping
the Spring with your gloved hand, pulling the Spring toward the Bolt, and
lifting up off of the Bolt Threads.
3. Remove the Belt from the Electric Clutch Pulley below the machine and then
remove it from around the Blade Pulley.
4. To mount the Belt, follow the above procedure in the reverse order.
NOTE: Make sure to route the new Belt on the right hand side of the Idler Pulley as
shown in Figure 10.
To Replace the Drive Belt
Tools Needed:
7/16" Wrench
Two 1/2" Wrenches
Gloves
1. Remove the Blade Belt as described in the previous instructions.
2. Remove the six Bolts and Locknuts that secure the Deck with two 1/2"
Wrenches and remove the Deck (Figure 11).
3. Disconnect the Harness from the Electric Clutch (Figure 12).
4. Remove the two Locknuts and Washers from the Belt Guide Studs with a
1/2" Wrench and remove the Belt Guide.
NOTE: Remember how the Belt Guide in oriented for installation procedures.
Make sure that the Handlebars are supported before removing the Deck to
prevent the machine from tipping over.
Use only DR belts on your machine. They have been thoroughly tested and
proven for many hours of use.
Shut down the engine, remove the spark plug wire and wait 5 minutes before
performing any maintenance procedure or inspection on the Mower.
Blade
Belt
Figure 10
Blade
Pulley
Tensioner
Spring
Locknut
Electric
Clutch
Pulley
Deck
Deck
Figure 11
Bolts and
Locknuts
Bolts and
Locknuts
Belt
Guard
Figure 9
Knob
Harness
Connector
Figure 12
Belt Guide
Locknut
and Washer