Manually assigning dante channels – Digital Audio Labs Livemix LM-DANTE-EXP Dante Option Card User Manual
Page 10
LIVEMIX DANTE OPTION CARD (LM-DANTE-EXP)
7
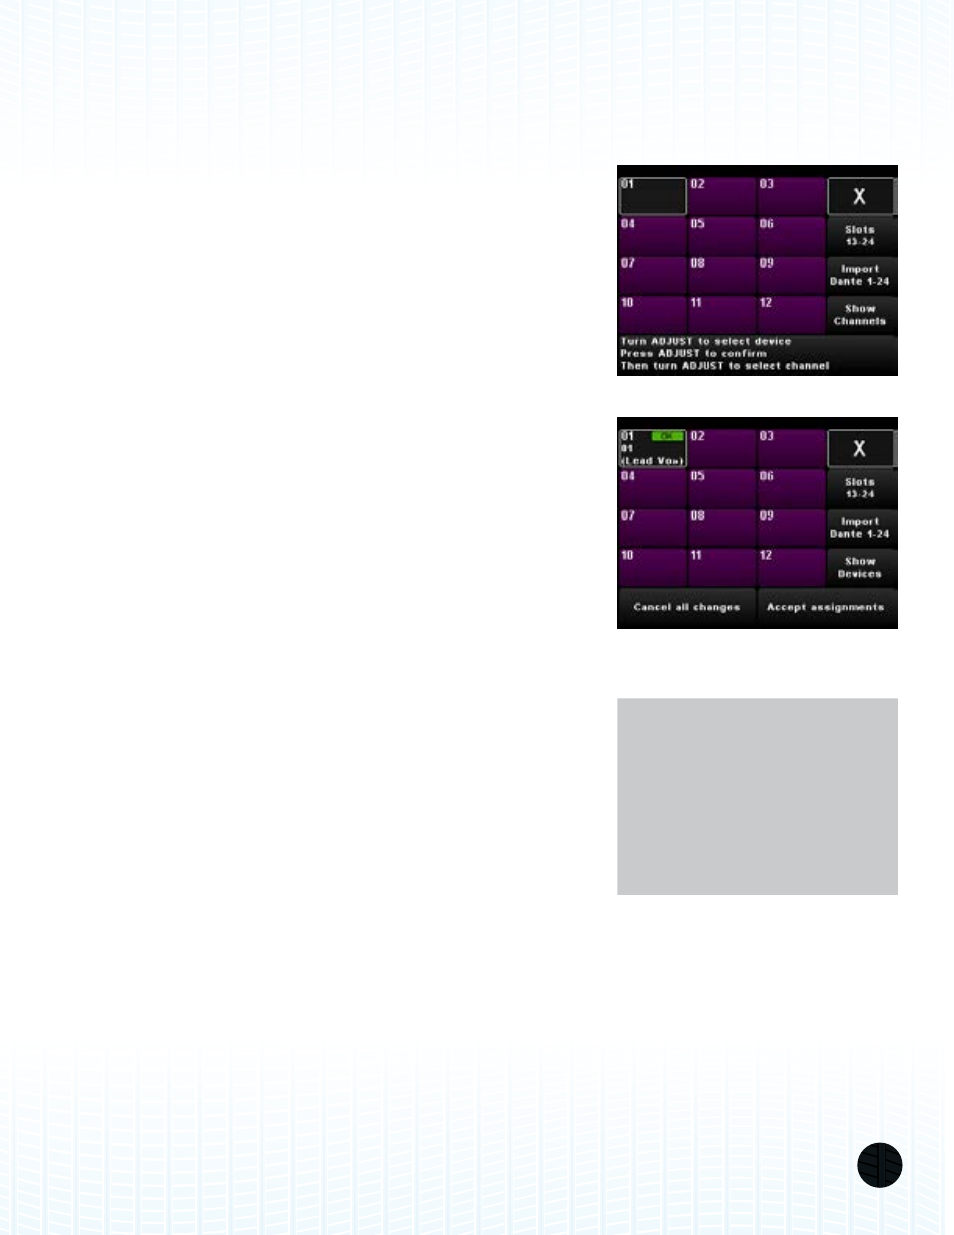
MANUALLY ASSIGNING DANTE CHANNELS
You may want to manually subscribe to channels on a Dante network. Using the manual assign
feature will allow you to connect to multiple devices, or to change the order of connected devices,
for example, connecting Dante transmitter channel 24 from a console to channel 4 on the Livemix
personal monitor system.
1. Enter the Mix Tools menu and PRESS Global Setup.
2. PRESS Input Select and Digital Configuration.
3. You will be prompted with a warning. PRESS the Continue
button to continue.
4. PRESS Dante Channel Setup to enter the Dante setup
configuration screen.
5. PRESS a Channel to assign to a Dante channel. A popup will
appear on the bottom of the window.
6. Select a Device by rotating the ADJUST knob. PRESS the
ADJUST knob to accept a selected device. If you have
previously assigned a device to this channel, the selector
may be on channel select, if so, PRESS the ADJUST knob to
change to the device selector.
7. Select a Channel on the selected device by rotating the
ADJUST knob. After a few second, the highlighted channel
will be automatically selected.
8. Repeat steps 5-7 as necessary. Press the Slots 13-24 button
to access additional channels.
9. PRESS the Accept Assignments button to accept the
assigned channels.
DEVICE/CHANNEL VIEW TOGGLE
The Show Device/Show Channels button toggles what
information is visible in each channel cell. By default, the names
of the assigned channels are visible. PRESS the Show Devices
button to see which devices are assigned to each Livemix
channel. To go back to viewing the channels, PRESS the Show
Channels to toggle it to the Show Devices view.
NOTE:
After making a device and
channel selection, it may
take a few seconds for the
network to recognize the
change and update.