Back panel – Diamond Amplification MAC-2 User Manual
Page 8
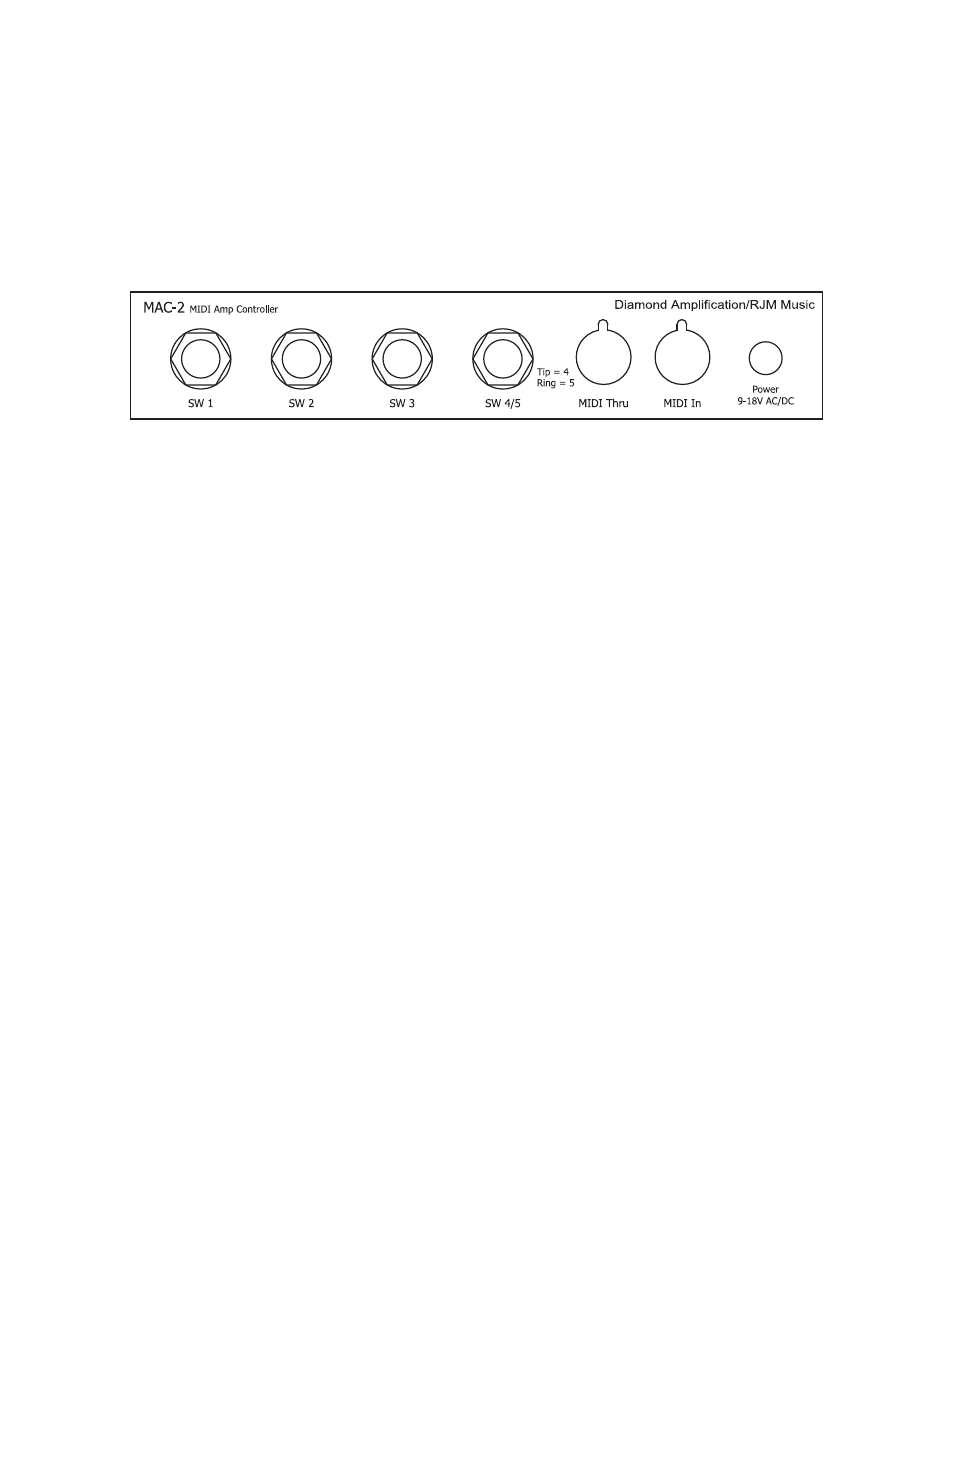
Back Panel
SW1, SW2, SW3 – These jacks are for switches 1, 2 and 3, controlled
by Function buttons 1, 2 and 3 on the front panel. When a Function
LED is lit on the front panel, the tip and ground of the corresponding
jack are connected together. You may plug any standard ¼” mono
cable here (like a guitar cable) and connect it to one of your amp’s
switching jacks.
SW4/5 – This jack is for switches 4 and 5, controlled by Function
buttons 4 and 5 on the front panel. When the Function 4 LED is lit on
the front panel, the tip and ground of this jack are connected together.
When the Function 5 LED is lit on the front panel, the ring and ground
of this jack are connected together. If you plug a standard ¼” cable in
this jack, only switch 4 will work. If you plug a stereo (also called
TRS) ¼” cable in this jack, you’ll have access to both switch 4 (on the
tip conductor) and switch 5 (on the ring conductor).
MIDI Thru – All of the MIDI commands that are received at the MIDI
In jack are sent out through this jack. This jack also doubles as a MIDI
output for the purpose of dumping the MAC-2s settings over MIDI (see
the Data Backup section for more details). Bring your MIDI in through
the MIDI In jack, then send it to the next piece in line through the
MIDI Thru jack.
MIDI In – Jack for incoming MIDI commands. Connect your MIDI
foot controller here. The MAC-2 will provide phantom power to a
compatible MIDI controller if you use a 7-pin MIDI cable. The AC
adapter provided with the MAC-2 can phantom power most MIDI
controllers provided that they can run on a 9V DC supply. However, if
3