Uncrating the vortek hoist, Using the installation blocks – Daktronics Hoist Installation Manual User Manual
Page 8
6
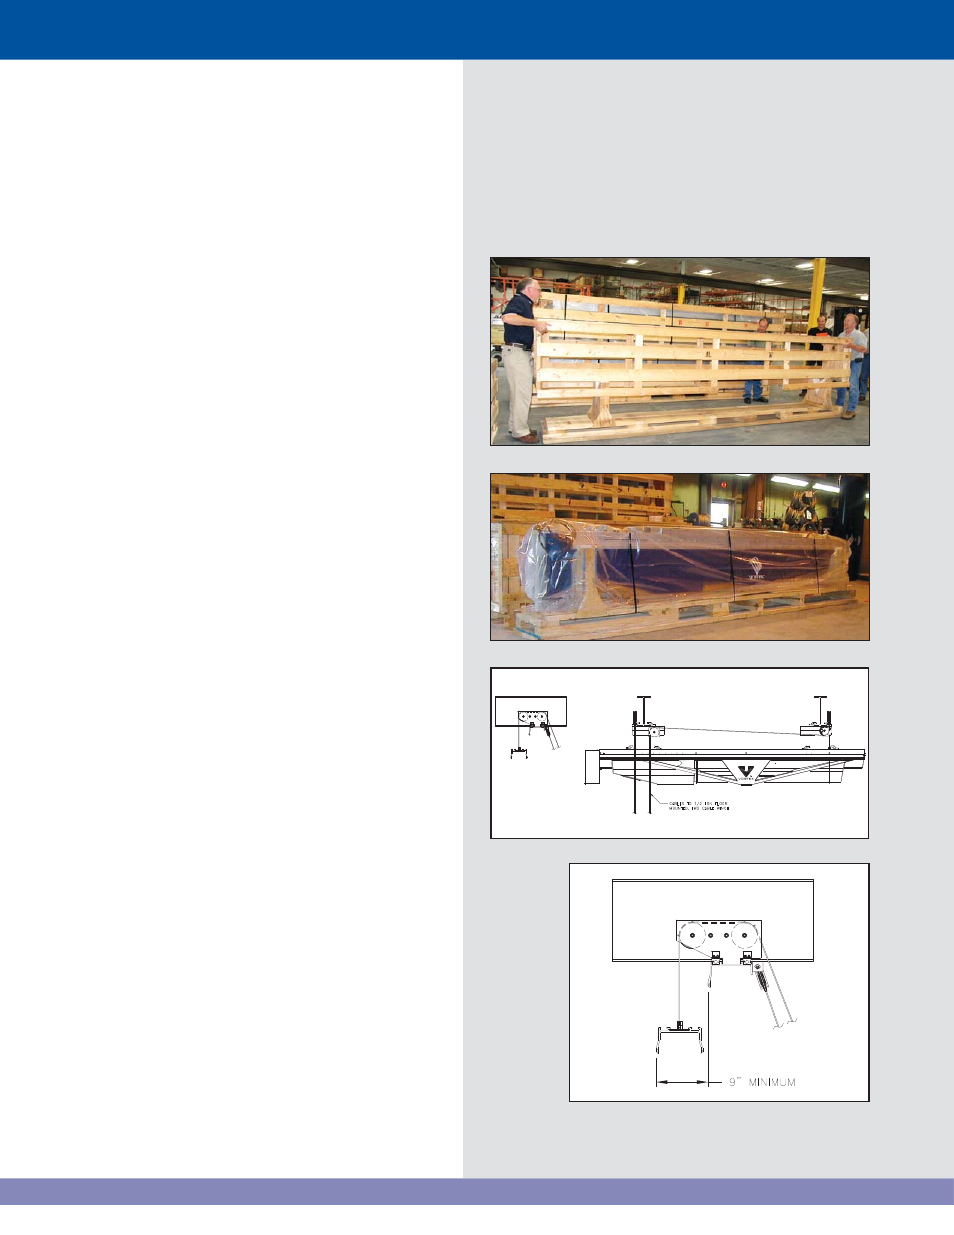
Uncrating the Vortek Hoist
The wooden shipping container is a two-piece
unit. The top portion that consists of the top,
ends, and sides are one unit (
Figure 8
). There
is a bottom skid that the Vortek hoist rides on.
Simply clip the banding and lift the top portion
of the crate off for easy unpacking.
Please return the shipping crates
to Daktronics for re-use.
Cut the remaining banding and remove the
poly sheeting from the hoist (
Figure 9
). There
will be either two backbone stiffeners loosely
attached on top of the unit or two extra beam
clamp assemblies pre-installed at the factory.
This will depend on a two or three-beam
installation.
Using the Installation Blocks
Daktronics offers optional installation blocks
that will assist in lifting and mounting the Vortek
hoists. These may be purchased from Daktronics
if needed. Figure 10 illustrates mounting of
the installation blocks.
The installation blocks go on the offstage side
and the onstage side of the steel beams. This
allows the space for the backbone stiffeners to
be placed into the backbone channel.
The installation blocks require a minimum of 9"
of adjacent space on the steel beams as the
hoist is lifted into place (Figure 11).
Figure 8: Lift crate top off bottom skid
Figure 9: Cut banding and remove sheeting
Figure 10: Installation block with pivoting sheave and fixed sheave
Figure 11: Maintain spacing between steel beams