Computer-to-vip communication setup – Daktronics VIP-4060 User Manual
Page 2
VIP-4060 Quick Guide
2 of 6
DD1733958 Rev 04
08 December 2014
201 Daktronics Dr. P.O. Box 5128 Brookings, SD 57006
tel: 800-325-8766 fax: 605-697-4700
www.daktronics.com
Connecting Sensors
1. Connect the sensor cable to the Light/Temp port. Refer to Figure 5.
2. Rotate the connector
1
/
4
turn clockwise to lock.
Connecting to Network
1. Connect one end of the RJ45 network cable to the network port. Refer
to Figure 6.
2. Connect the other end of the cable to the computer or network.
Connecting Power
1. Connect the power cord to the power jack. Refer to Figure 7.
2. Plug the other end of the cord into an outlet.
Computer-to-VIP Communication Setup
Connecting to VIP-4060
1. Dowload the DisplayFind application.
a. Navigate to dakfiles.daktronics.com.
b. Click venus1500>Utils>DisplayFind>DisplayFind.exe.
c. Click Run to download the program or Save to save the file for later use.
2. Launch DisplayFind by double-clicking the DisplayFind icon. Refer to Figure 8.
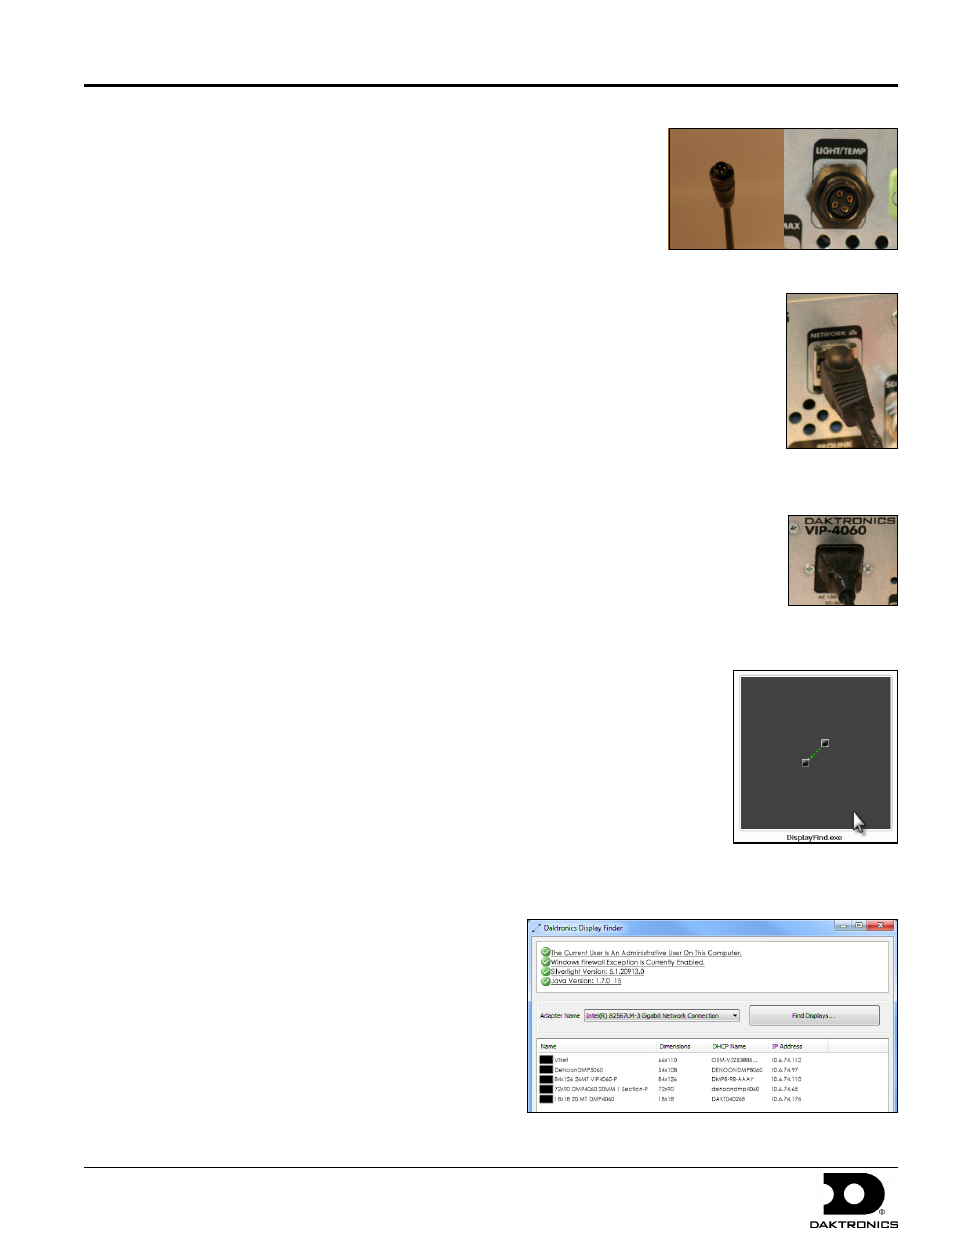
3. Connect to the display using the DisplayFind utility.
a. Select the appropriate Network Adapter.
b. Click Find Displays to detect displays. Refer to Figure 9.
c. Click the desired display to launch the configuration utility within a
web browser.
Note: If multiple displays are found, use the IP
address or name to confirm the identity of the
correct display.
Figure 5: Sensor Cable and Port
Figure 6: Network
Input
Figure 7: Power
Input
Figure 8: DisplayFind Icon
Figure 9: Daktronics Display Finder