Brightauthor and the brightsign app 8, Diagnostic and local web servers, Player setup process – BrightSign App User Guide v. 1.0.1 User Manual
Page 10: Enable update notifications, Brightauthor and the brightsign app
8
BRIGHTAUTHOR AND THE BRIGHTSIGN APP
This chapter details how to create BrightAuthor
presentations that work with the BrightSign App. The
following sections are intended as quick setup
instructions. For a more comprehensive explanation of
BrightAuthor features, please see t
Diagnostic and Local Web Servers
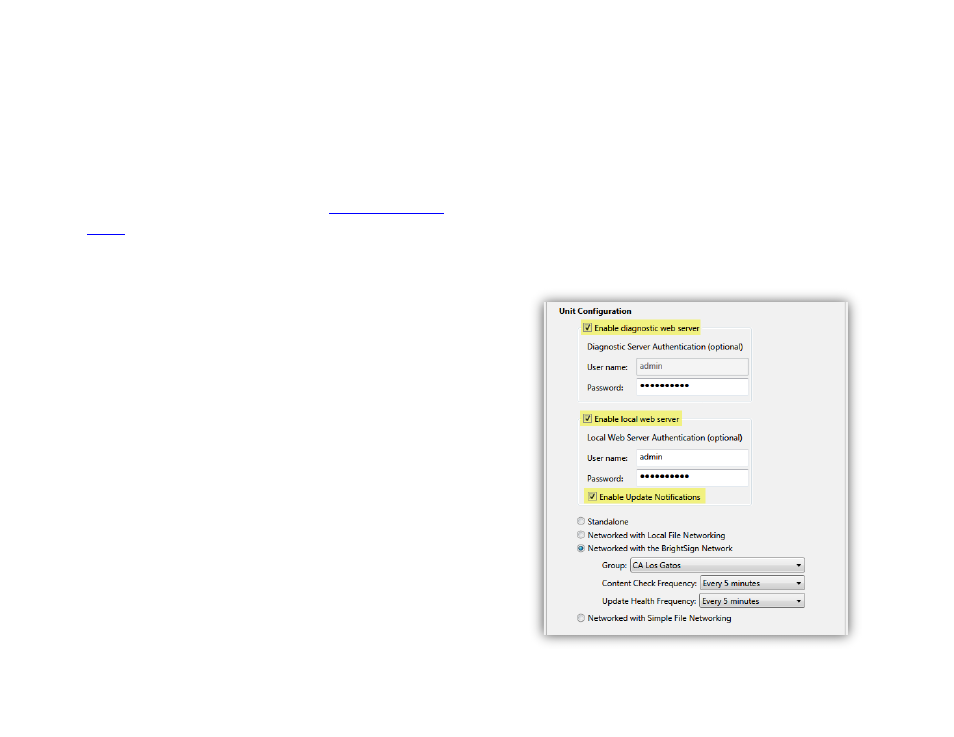
In order to use the Diagnostic Web Server and User
Variables pages in the BrightSign App, you will need to
make sure they are enabled during the setup process in
BrightAuthor.
1. Create new setup files for a BrightSign player by
navigating to
Tools > Setup BrightSign Unit.
2. Check the
Enable diagnostic web server box.
3. Check the
Enable local web server box. By
default, this enables the User Variables webpage.
If you would like to disable the User Variables
webpage or use a custom webpage, navigate to
File > Presentation Properties > Variables.
4. (Optional) Enter a
Password for the Diagnostic
Web Server and a
User name and Password for
the Local Web Server.
5. (Optional) Click
Enable Update Notifications to
have the player automatically refresh the User
Variables webpage when variable values change
on the player.
Note: This feature is only available in BrightAuthor
versions 3.7.0.16 and later.
6. Specify other settings for the BrightSign player as
needed.
7. Click
Create Setup Files to publish the setup files
to an SD card.
Enabling the Diagnostic Web Server and Local Web Server