ThunderMax PN#309-385 - GenII Sportster User Manual
Page 3
www.Thunder-Max.com
309-385 Installation / Setup Guide V2012.06.28
3
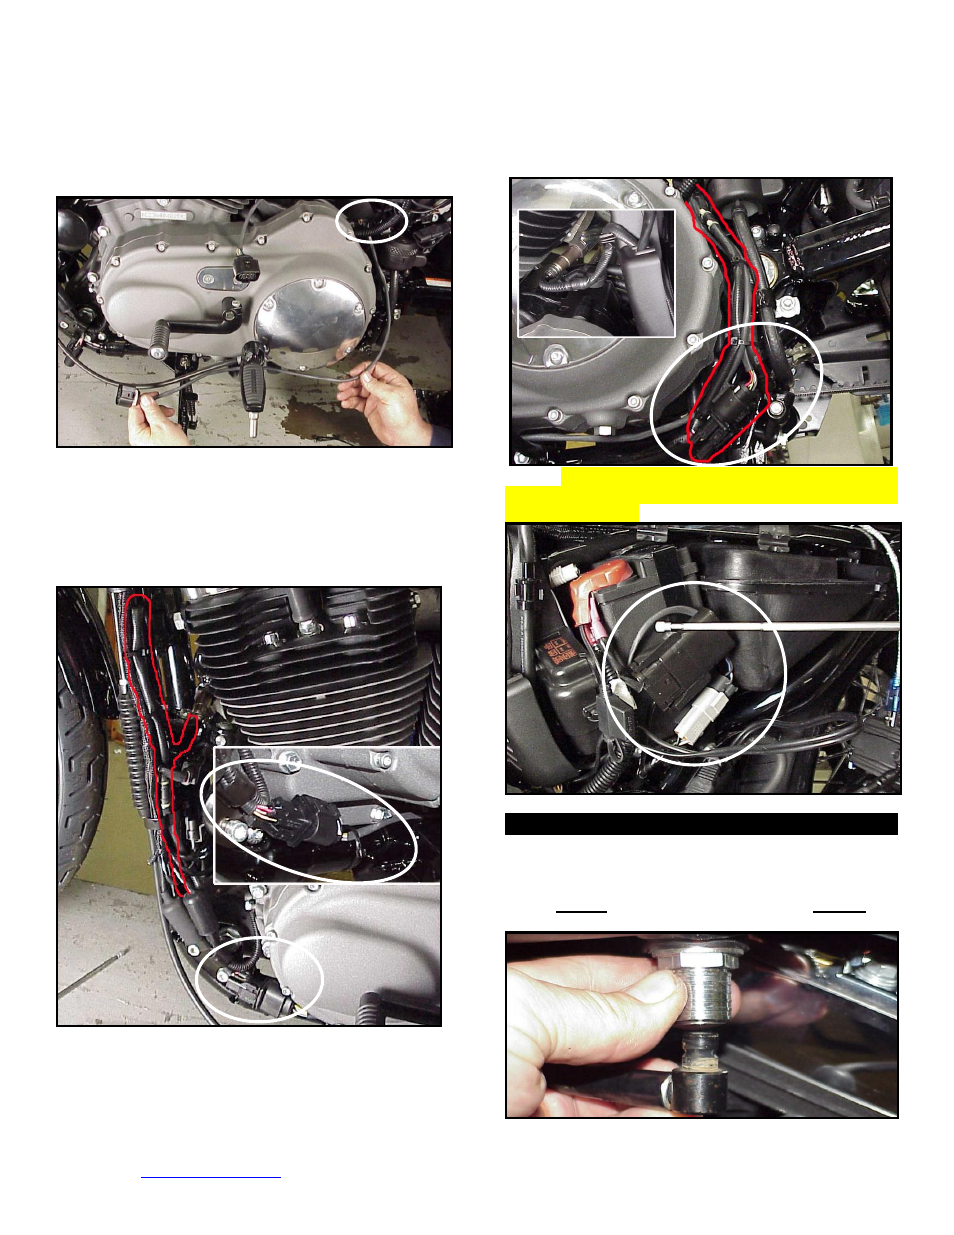
XL-I:
Unplug and remove both factory O
2
sensors.
Route the front sensor lead behind the battery positive
cable, then between the primary cover and footpeg
mount to just in front of the kickstand mount.
XL-J:
Install the front O
2
sensor into the exhaust pipe.
Plug sensor connector into the ECM sensor lead. Tie
the sensor wires to the frame with wire ties, positioning
the connector along the frame tube as shown. Extra
wire from the sensor must be routed up and back down
the frame tube and secured with the factory wire clamps
and wire ties. Carefully tie wires to avoid chaffing.
XL-K:
Install the rear sensor into the exhaust pipe and
connect the sensor to the ECM harness. Route the rear
sensor harness loop behind battery positive cable and
along the brake line the rear of the primary housing.
Position the connector as shown; sensor harness will
double-back along frame tube to exhaust location.
Secure wires to brake line with wire ties.
XL-L:
Re-install main fuse. Route and plug AutoTune
power harness into 4-pin (gray) data port plug as shown.
Advance to Step 3.
Dyna® Models
FXD-A: Remove seat. Disconnect fuel line from fuel
tank by carefully pushing up the ribbed quick disconnect
ring on the tank fitting while gently pulling the fuel line
down. Loosen front fuel tank mounting bolt; remove rear
mounting bolt, prop up tank rear 4-
5” with a wood block.