Mounting options, Assembly, Mounting options 1.5. assembly – d&b Z5402 Wall mount User Manual
Page 5
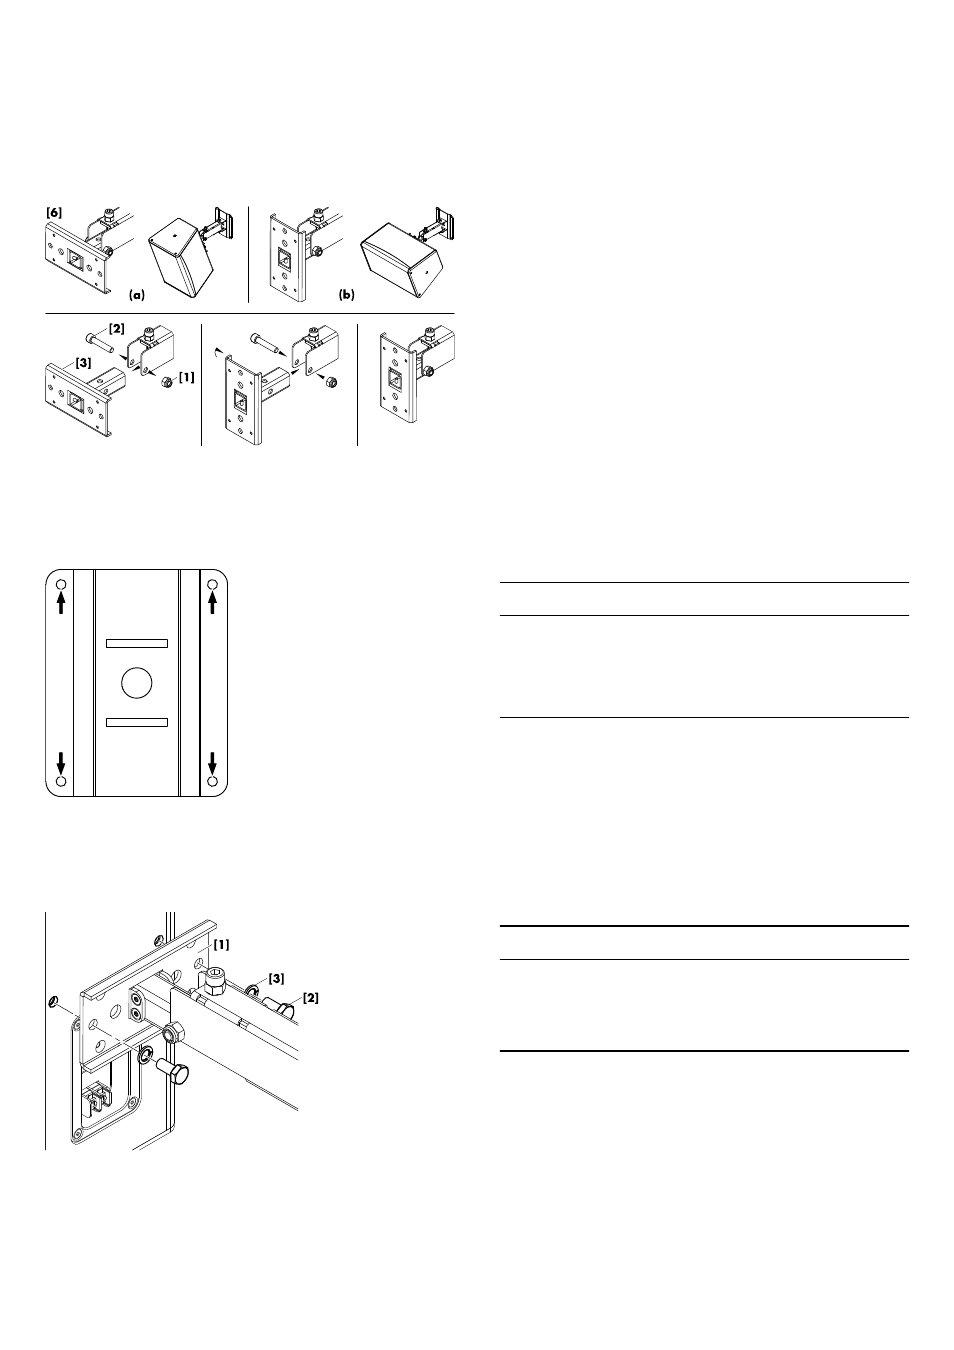
1.4. Mounting options
Mounting options
The tilt unit
[6] of the wall mount can be rotated through 90°
allowing the cabinet to be mounted either vertically
(a) or
horizontally
(b).
To change the orientation of the tilt unit, proceed as follows:
Tools required:
– Open-ended spanner/wrench (size #13)
– Allen hex key (6 mm)
1. Slacken and undo the self-securing nut
[1] and remove the
fixing bolt
[2].
2. Remove the tilt unit
[3] and turn it through 90°.
3. Refit the tilt unit in reverse order.
1.5. Assembly
Mounting plate
NOTICE!
Only use mounting parts (fixing anchors and screws) that are
suitable for the intended application.
Observe the occurring extraction forces acting on the fixing
anchors and screws. The rated extraction force is
350 N.
A corresponding fixing template is supplied with these mounting
instructions. Refer to Þ Chapter 2. "Fixing templates"
An additional 20 mm (0.8") centered hole is provided on the
mounting plate as a feed-through for the connection cable. The
cable can be fed through the mounting plate into the boom arm
that acts as a cable run.
Attaching the cabinet to the wall mount
NOTICE!
– Only use the supplied and specified screws
[2], otherwise
there a risk of damaging the threaded inserts.
– Always use the supplied spring washers
[3] to prevent the
bolts from slackening.
Tools required:
– Open-ended spanner/wrench (size #13)
1. Attach the wall mount to the two M8 threaded inserts on the
rear panel of the cabinet.
2. Insert the screws together with the spring washers and tighten
them.
d&b Z5402/Z5403 Wall mount M/L, Mounting instructions (1.3 EN)
5