Casella CEL CEL-360S User Manual
Page 14
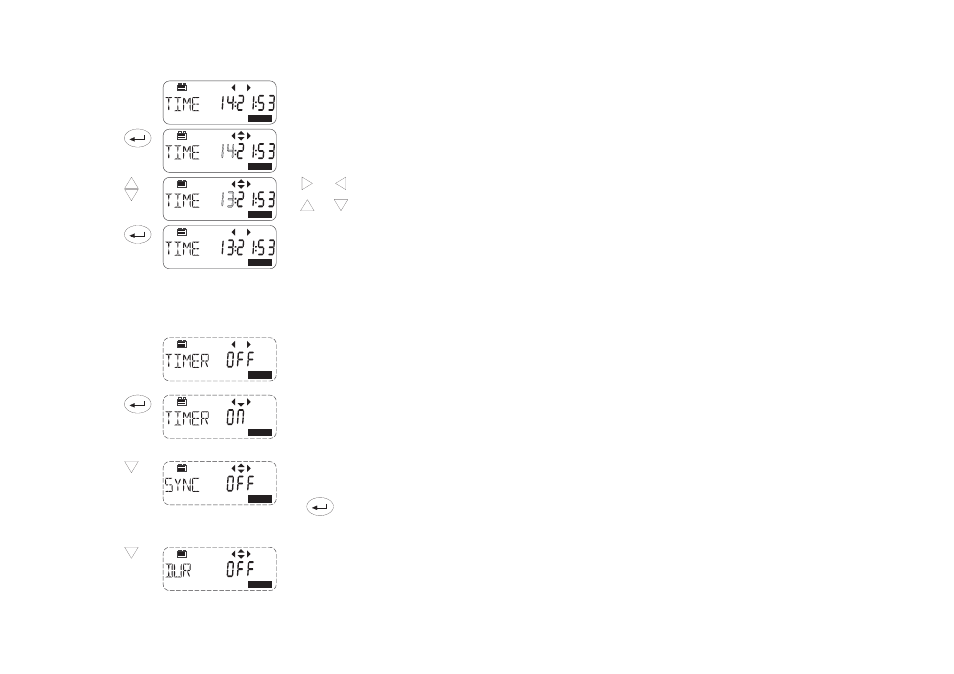
8.2
Set Time & Date
Operation
Press
Display Shows
Comments
1.
Select Time
Option
Follow on from Step 3 in
Section 8.1.
2.
Enable Time
Change
Cursors are enabled and the
hours entry blinks to show it
can be edited.
3.
Change the
entry
or
Use
and
to highlight
an entry.
Use
and
to change the
entry.
4.
Save the
Changes
The new time setting is stored.
Repeat this process in the Date Option to set the date: PLEASE NOTE
that the date format is dd mm yy.
8.3
Change Timer & Run Duration (CEL-360 series)
Operation
Press
Display Shows
Comments
1.
Select Timer
Option
Follow on from Section 8.1.
Displays that are found only on
CEL-360 series instruments
are shown with a dashed
outline - - - -.
2.
Switch Timer
ON
The Timer is now ON so that
any start and stop times
loaded via dB10 or dB12 will
be used, UNLESS
Synchronisation (SYNC) or
Duration (DUR) settings are
enabled as in steps 3 and 4.
3.
Review Timer
settings
SYNC allows synchronisation
to the next profile boundary,
i.e to whatever interval has
been set by the PC software.
Press
to enable or
disable.
The profile interval will also be
shown.
4.
Review
Duration
setting
DUR allows the user to select
a run Duration time.
When a run duration period is
shown here or SYNC is ON,
these take precedence over
the Timer settings so that any
preset start and stop times
WILL NOT BE used.
OPTION
OPTION
OPTION
OPTION
OPTION
OPTION
OPTION
OPTION
Page 14 - CEL-320/360 Getting Started