2 operation, 2-1 setting the dip switches, Rev. 1.00 – BIXOLON SRP-F310 User Manual
Page 9
Rev. 1.00
- 9 -
SRP-F310/312
2-2 Operation
2-2-1 Setting the DIP switches
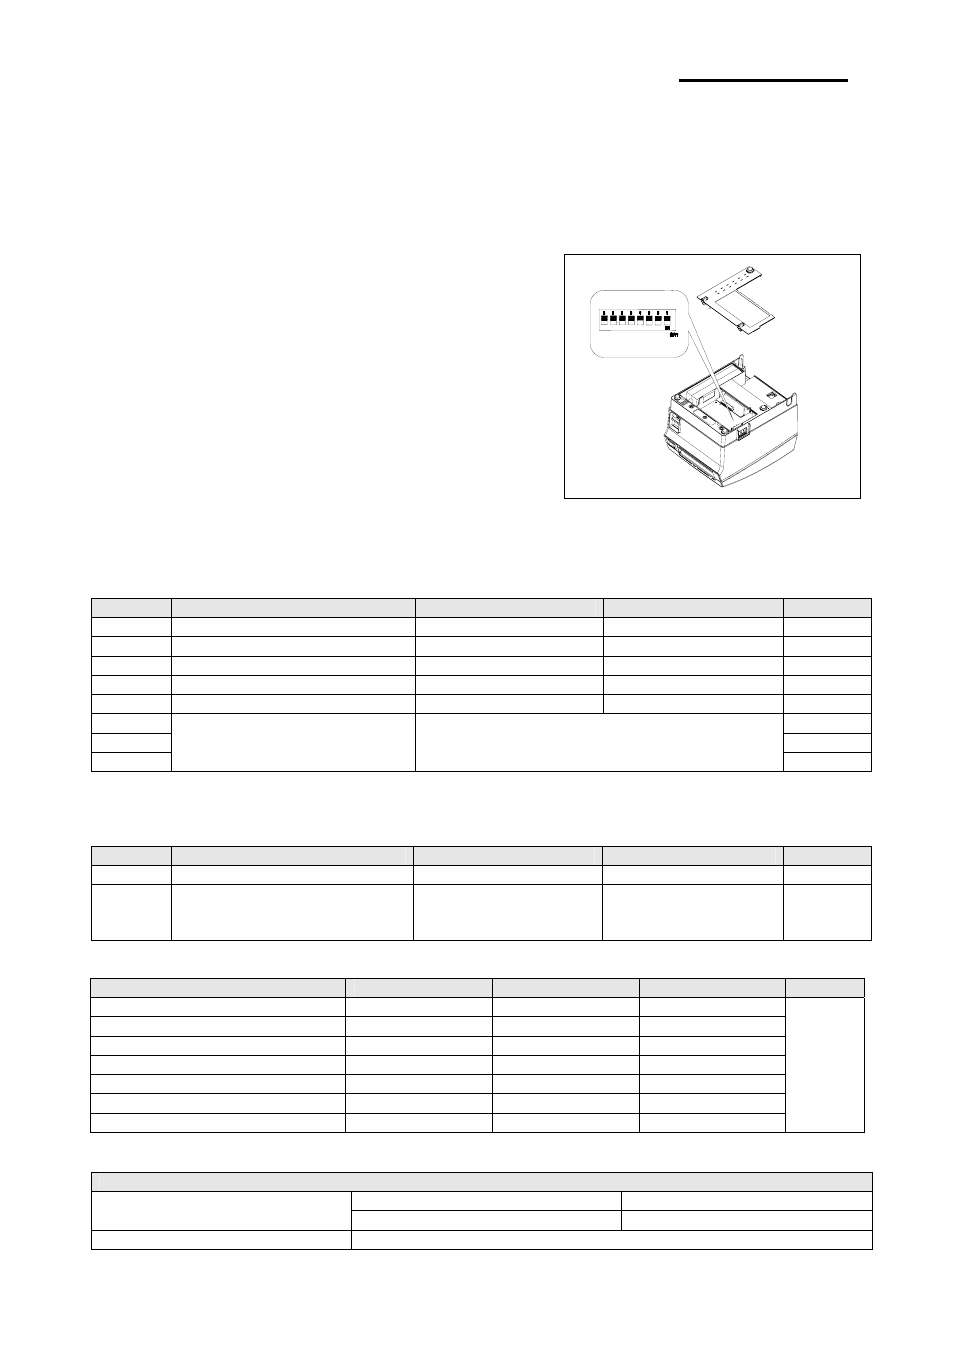
The DIP switches are located on the bottom of the printer. The DIP switches are used to set the printer to perform various
functions. Follow these when changing DIP switches setting:
1. Turn the printer power switch off.
Open the Cover .
2. Flip the DIP switches using tweezers or another marrow-ended
tool. Switches are in when up and off when off down in the
Figure 2-9.
3. The new setting takes effect when you turn on the printer.
Note: Always change DIP switch settings only when the
printer is turned off. Change made with the power on
have no effect and then on again.
Figure 2-9 Setting the DIP switches
2-2-2 Setting the DIP switch (RS-232C Serial Interface)
• DIP Switch
SW
Function
ON
OFF
Default
1-1 Auto-Cutter
Selection
Disable
Enable
OFF
1-2 Handshaking
XON/XOFF
DTR/DSR
OFF
1-3 Data
Length
7bits
8bits
OFF
1-4 Parity
Check
Yes
No
OFF
1-5 Parity
Selection
EVEN
ODD
OFF
1-6
OFF
1-7
ON
1-8
Baud Rate Selection (bps)
Refer to the following table
OFF
2-2-3 Setting the DIP switch (IEEE1284 Parallel, USB Interface)
• DIP Switch
SW
Function
ON
OFF
Default
1-1 Auto-Cutter
Selection
Disable
Enable
OFF
1-2
~
1-8
Reserved - -
OFF
• Table – Baud rate (bps) Selection
Transmission Speed
SW 1-6
SW 1-7
SW 1-8
Default
2400 ON
OFF
OFF
4800 ON
OFF
ON
9600
OFF ON OFF
19200 OFF
OFF
OFF
38400 OFF
ON
ON
57600 OFF
OFF
ON
115200
ON ON ON
9600
※
Auto Cutter Enable / Disable selection
Dip Switch Set 1
ON
Auto Cutter Disabled
SW 1-1
OFF
Auto Cutter Enabled
Application
Ignores Auto Cutter error for continuous printing.