Nexen RSTC1100 964528 User Manual
Page 12
FORM NO. L-21204-C-0908
12
SETUP
RSTC TO PERSONAL COMPUTER USB
COMMUNICATION
In order to setup the RSTC, a USB cable and the
RSTC Communications Software are required. A Type
A to mini Type B 2.0 USB cable is provided with the
RSTC. RSTC Communications Software is available by
download from Nexen’s website,
www.nexengroup.com
.
Enter RSTC product number (See PART NUMBER
section) in the product number search window and
press Go; next select Software from the Accessories
menu and fi nally pick the appropriate software link.
Instructions for installing the software can also be
found here and the instructions for using the RSTC
Communications Software can be accessed in the Help
menu.
1. Connect 24 VDC power supply to Power Input
terminals (Refer to Figure 4).
2. Power up the computer.
3. Connect the USB cable between computer and
RSTC (Refer to Figure 9).
4. Turn on 24 VDC power supply, Power indicator will
be on (Refer to Figure 9).
Note: Refer to the RSTC Communications Software
Help menu for instructions on navigating the program
and accessing its functions. The steps below describe
using the functions to confi gure the RSTC.
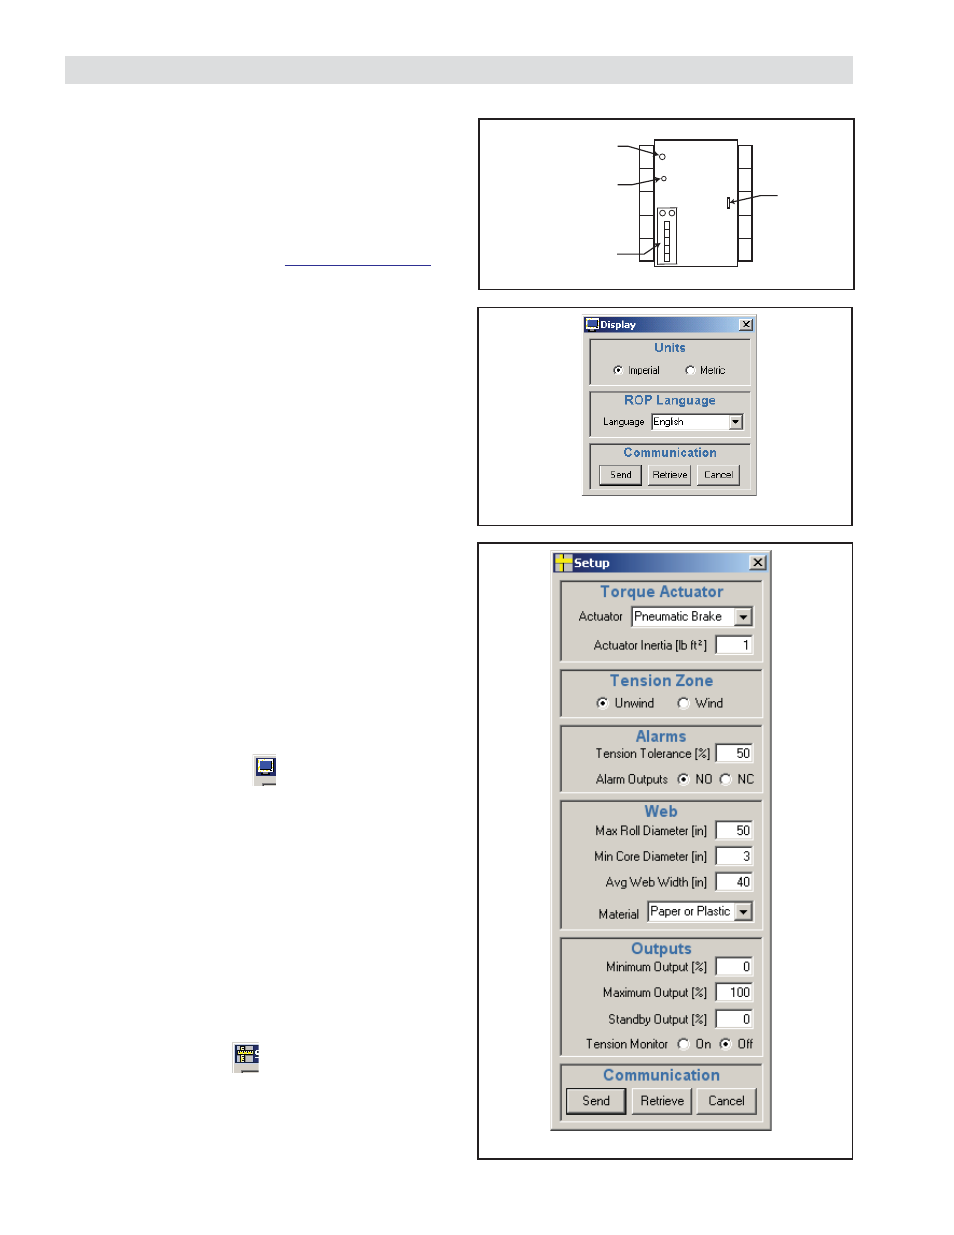
DISPLAY WINDOW
Select the DISPLAY icon from the toolbar (See Figure 10).
Units: Select IMPERIAL if tension and diameter are to be
displayed in units of pounds and inches; Select METRIC
if tension and diameter are to be displayed in units of
newtons and millimeters.
ROP Language: Select the language from the drop-down
menu that the ROP will display.
Press SEND to update the RSTC.
SETUP WINDOW
Select the SETUP icon from the toolbar (See Figure 11).
Note: After changing values, the SEND key must be
pressed to send the values to the RSTC.
Figure 11
Setup Screen
Figure 9
Figure 10
Display Window
RS
T
C
USB
Power Indicator
Reset
Network Port and
Indicators