Nexen SE-200 806000 User Manual
Page 9
9
FORM NO. L-20084-G-1209
FRICTION FACING REPLACEMENT
Refer to Figure 7.
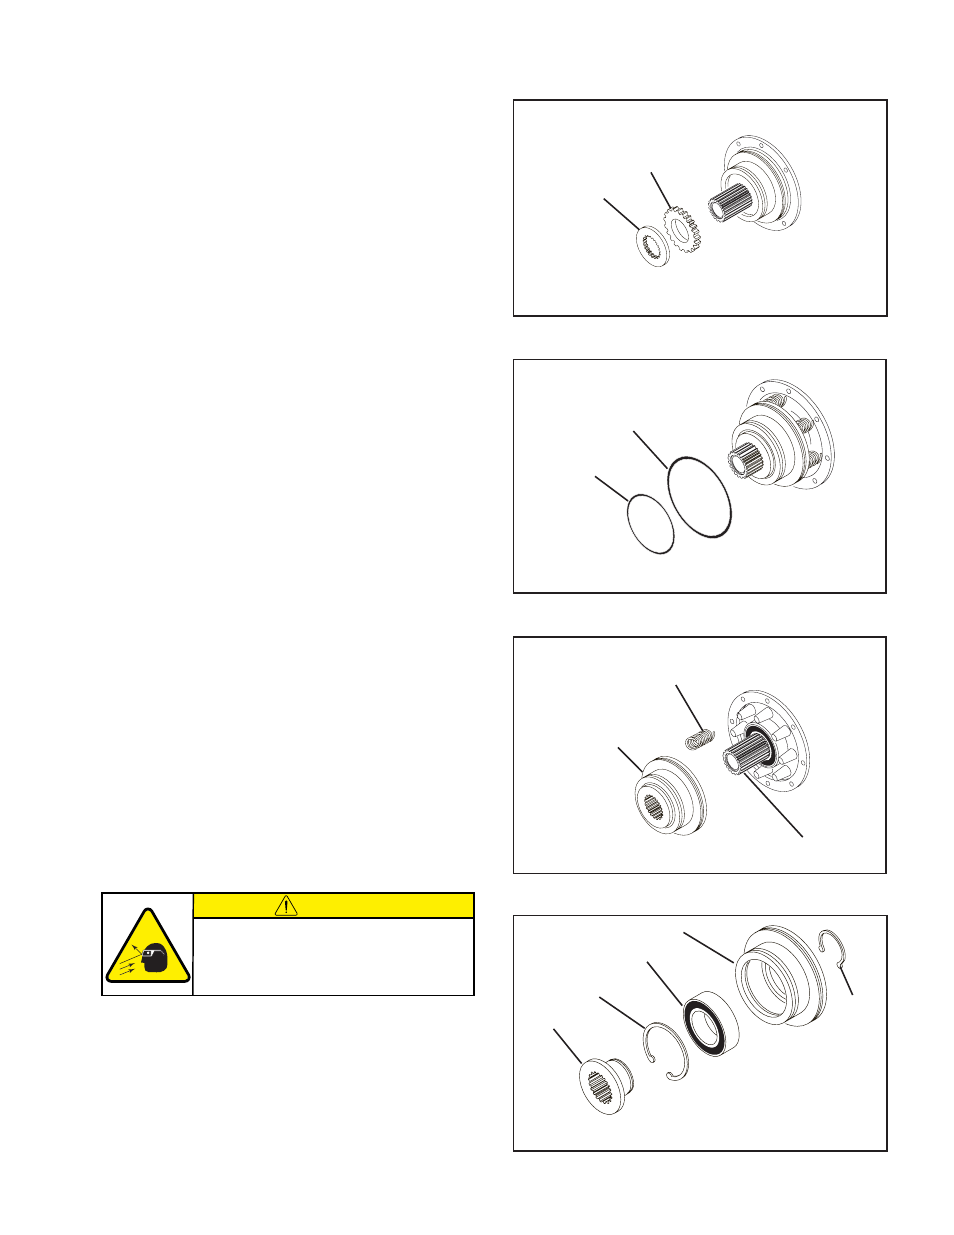
1. Remove the Friction Plates (Item 5) and Friction Facings
(Item 7).
NOTE: SE Brakes Models SE-100-1 , and SE-200-
1 have one Friction Plate and Friction Facing, while
Models SE-500-1 and SE-1000-1 have three Friction
Plates and Friction Facings.
2. Install the new Friction Facings (Item 7).
O-Rings (ITEMS 12 and 13).
Refer to Figure 8.
1. Remove old O-Rings (Items 12 and 13).
2. Clean O-Ring contact surfaces of the Piston (Item 3)
and Air Chamber Housing (Item 2) with fresh safety
solvent.
3. Lubricate new O-Rings (Items 12 and 13) and O-Ring
contact surfaces with fresh O-Ring lubricant.
4. Install new O-Rings (Items 12 and 13).
BEARINGS (ITEMS 21 and 22).
Refer to Figures 9 & 10.
1. Slide Friction Disc (Item 6) and Piston (Item 3) off Hub
(Item 1).
NOTE: Inspect Engagement Springs (Item 19) for
signs of wear or fatigue. Replace if worn or if signs
of fatigue exist.
Engagement Spring
(Item 19)
Friction Disc (Item 6)
and Piston (Item 3)
Hub
(Item 1)
FIGURE 9
15
16
21
3
6
FIGURE 10
5
7
FIGURE 7
12
13
FIGURE 8
2. Remove Retaining Ring (Item 15) and press Friction
Disc (Item 6) out of Bearing (Item 21).
3. Remove the Retaining Ring (Item 16) and press the
Bearing (Item 21) out of the Piston (Item 3).
4. Clean the bearing bore of the Piston (Item 3) with fresh
safety solvent.
CAUTION
Working with spring loaded or tension
loaded fasteners and devices can cause
injury. Wear safety glasses and take the
appropriate safety precautions.
PARTS REPLACEMENT (continued)