Stair rail installation – TAMKO Marquee Railing User Manual
Page 6
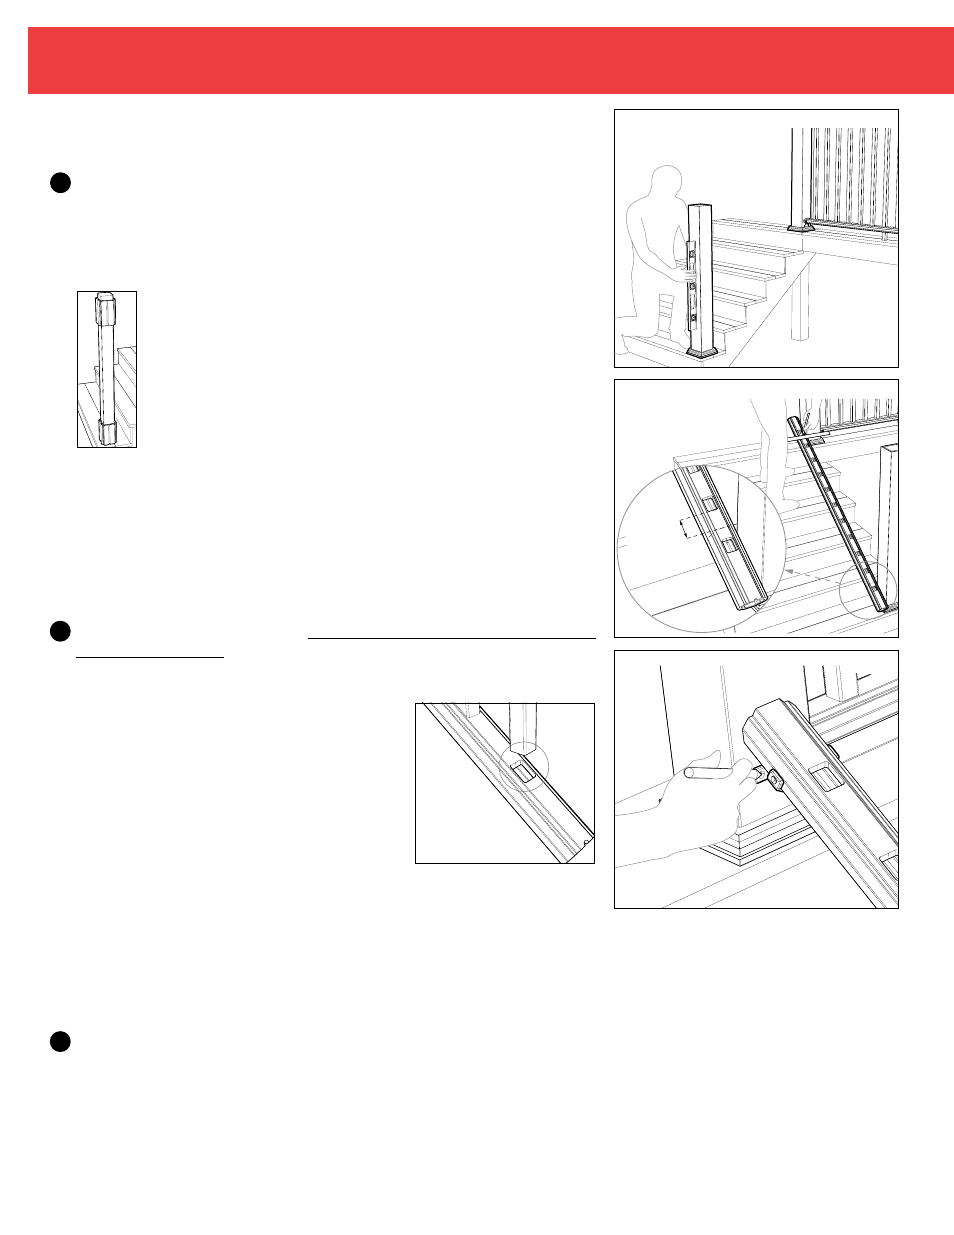
INSTALLATION STEPS:
1
Install and prepare posts or other mounting surfaces for Marquee
Railing
®
installation.
Ensure mounting surfaces are level and plumb.
(Fig. 1)
TAMKO
®
recommends using
Marquee Post Mount systems or wood posts covered with our matching Marquee
Post Sleeve and Marquee Wood Post Spacers.
TO INSTALL MARQUEE POST SLEEVE WITH A NOMINAL 4" X 4" WOOD POST:
IMPORTANT: Use of the Marquee Wood Post Spacer is required for 4" x 4" wood
post applications. Failure to follow these instructions may lead to an
unsafely installed product and will adversely affect coverage under the
Limited Warranty.
To install the Marquee Post Mount Kit, see the full post mount instructions on
pages 7-10.
2
Lay the bottom rail beside the posts with the notched end of the rail on the lower
end of the stair section, pre-routed baluster holes facing upward.
(Fig. 2)
The rail
should extend past the post sleeves on each side. Mark both ends of the rail where
they cross the post sleeve.
NOTE: Routed baluster holes are angled and must
be installed with the notched end of the rail in the
proper direction. For the bottom rail, be sure the
notched end of the rail is on the lower end of
the stair section .
IMPORTANT: A minimum of at least 2-1/2" rail length is required from the
end of rail to the first baluster on both ends of the rail . Check to make sure end
spacing is even; if required, shift the position of the rail before cutting. Ensure that
the gap between posts and balusters will not exceed 4".
When marked properly, cut the bottom rail .
3
To install the bottom rail brackets, position the bottom rail between posts at the
desired height and angle, being sure to leave at least 2" clearance from the stair
treads. Hold the bracket in place on the rail so that it is centered on the post and
mark the locations on the post.
(Fig. 3)
2-1/2" MINIMUM
DISTANCE FROM
FIRST BALUSTER
HOLE TO POST
FIGURE 2
Fig. 2
FIGURE 1
FIGURE 3
Fig. 1
Fig. 3
STAIR RAIL INSTALLATION
5
1
Slide the first Marquee Wood Post Spacer over the 4" x 4" wood
post and secure in place flush with the deck surface using the
screw provided.
2
Next, slide the second Marquee Wood Post Spacer over the 4" x 4"
wood post and secure in place with the bottom of the Wood Post
Spacer 29-1/2" above the deck surface for a 36" rail height, or
35-1/2" for a 42" rail height.
3
Finally, place the Marquee Post Ring on the bottom of the Marquee
Post Sleeve and slide post sleeve over the wood post.