Horizontally angled rail installation – TAMKO Marquee Railing User Manual
Page 5
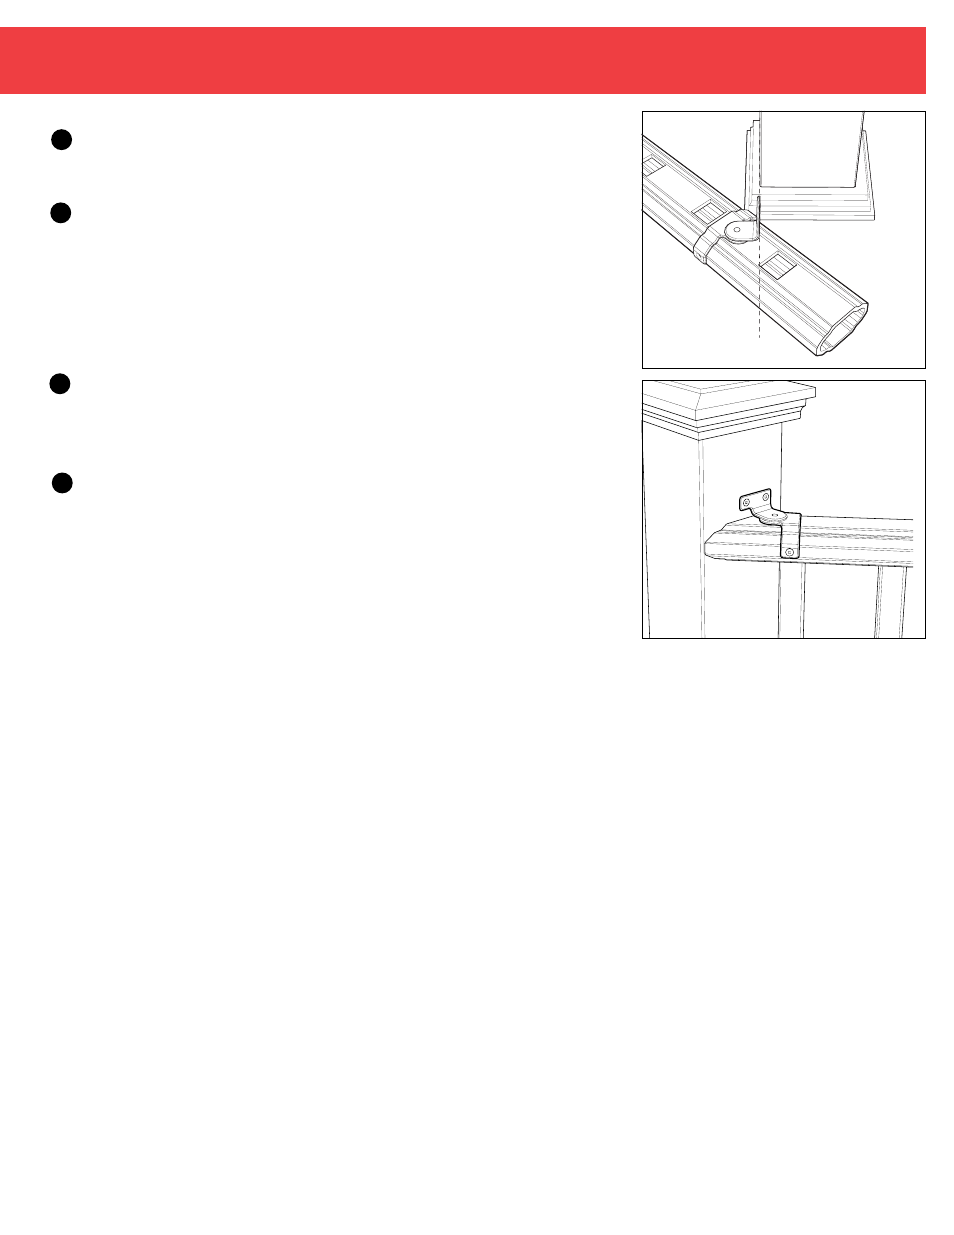
FIGURE 1
FIGURE 2
Fig. 1
Fig. 2
4
1
2
3
This installation is limited to use with nominal 4" x 4" wood posts only. Not for use with
wood/composite or concrete post mount kits.
Follow steps 1 and 2 of the Straight Rail
Installation Instructions on page 2 to prepare the area for installation.
Mark and cut the top and bottom rail to the desired angle.
NOTE: Fit the Left or Right Multi-Angle Bracket onto the rail at the desired angle from the
end of rail to first baluster hole on both ends of the rail before cutting. Check end spacing
and shift the position of the rail before cutting if required. Ensure that the gap between
posts and balusters will not exceed 4”.
(Fig. 1)
If the baluster interferes with the installation of the bracket, the top rail bracket may also
be installed on top of the rail instead of underneath the rail.
(Fig. 2)
To install the bottom rail brackets, place the bottom of the bracket on the top edge of
the Marquee Post Ring and rest the rail onto the bracket. Center the rail on the post as
shown in figure 2 and secure the bracket to the post using two of the screws provided in
the Marquee Straight Bracket Kit. Use 2" screws when mounting to a wood post. Repeat
on post at opposite end of rail section.
Complete installation by following steps 6 – 13 of the Straight Rail Installation Instructions
on page 3.
HORIZONTALLY ANGLED RAIL INSTALLATION
4