Taser Evidence-Mobile User Manual
Page 5
EVIDENCE Mobile App
QuickStart Guide
TASER International, Inc.
Page 5 of 11
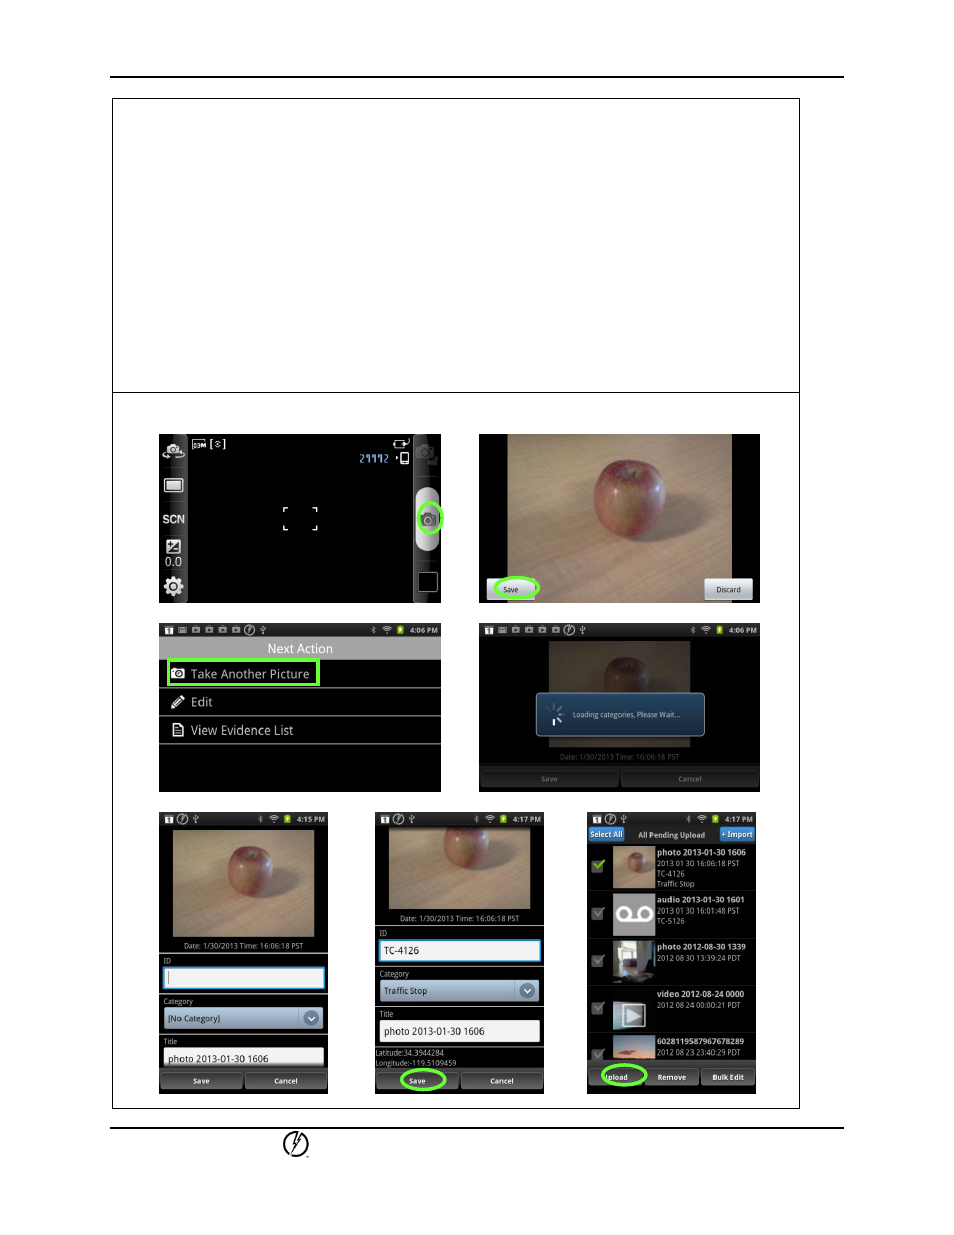
4. Once you tap Save, the picture will be saved to your phone’s picture gallery. Then you can
either click another picture, edit the recently saved picture, or go to the evidence list. See
Screen 3 below.
5. If you tap Edit, you can add ID, Category, and Title to the picture. See Screen 4 below.
6. The ID, Category, and Title screen will be displayed. Enter appropriate ID and Title values,
select a Category from the Categories dropdown options, and tap the Save button to save
the picture to your smartphone. See Screens 5 and 6 below.
Note: The Date and Time stamps are automatically generated for each photo.
7. If you tap Take Another Picture (on Screen 3), the most recently clicked picture would get
automatically saved without Title or ID and the smartphone camera would open again.
8. If you tap View Evidence List (on Screen 3), all evidence currently saved, i.e., photos, audio,
and video recordings will be displayed. See Screen 7 below.
Note: The evidence upload process is described later in this document.
Photos
Screen 1 Screen 2
Screen 3 Screen 4
Screen 5 Screen 6 Screen 7