Basic on/off wiring – Star Headlight & Lantern Optimax-DH RP242 User Manual
Page 5
4
Connecting the power plug for Star Pak Systems
(RP310, RP320, & RP330 Series)
BASIC ON/OFF WIRING:
(This setup is typically used for most “On/Off” applications)
A. The black wire should be connected to a good chassis ground.
B. The red wire from your power plug should be connected to +12VDC through your on/off
switch (optional).
C. If you are only operating your power pak with an On/Off switch, you may run on high power all
the time by hooking the white or purple wire to the black wire (good chassis ground).
-----------If you intend to utilize the HI/LO option follow the instructions below -----------
For HI/LO Operation: Make your connections as illustrated on the following page in
Figure 1, using the optional #SP3860-2H switch available from your dealer.
A. The black wire from your power plug on the pak should be connected to a good chassis
ground, as should the black wire from terminal 3 of SW1 on the switch panel.
B. The red wire from your power plug will connect to the red wire extending from terminal 2
of SW1.
C. The fused lead from terminal 1 of SW1 will connect to your +12 VDC power supply.
D. The white or purple wire from the power plug allows utilization of the HI/LO (Day/Night
Mode) option. It will be connected to the purple wire from terminal 2 of SW2 on the switch
panel. When the white w ire is connected to ground through SW2 the pak will operate
under high power.
E.
When properly wired, SW1 will be on the left side (Front View) and switch the pack on and
off. SW2 will be located on the right side of the switch panel and will be used to select
between low or high power
F.
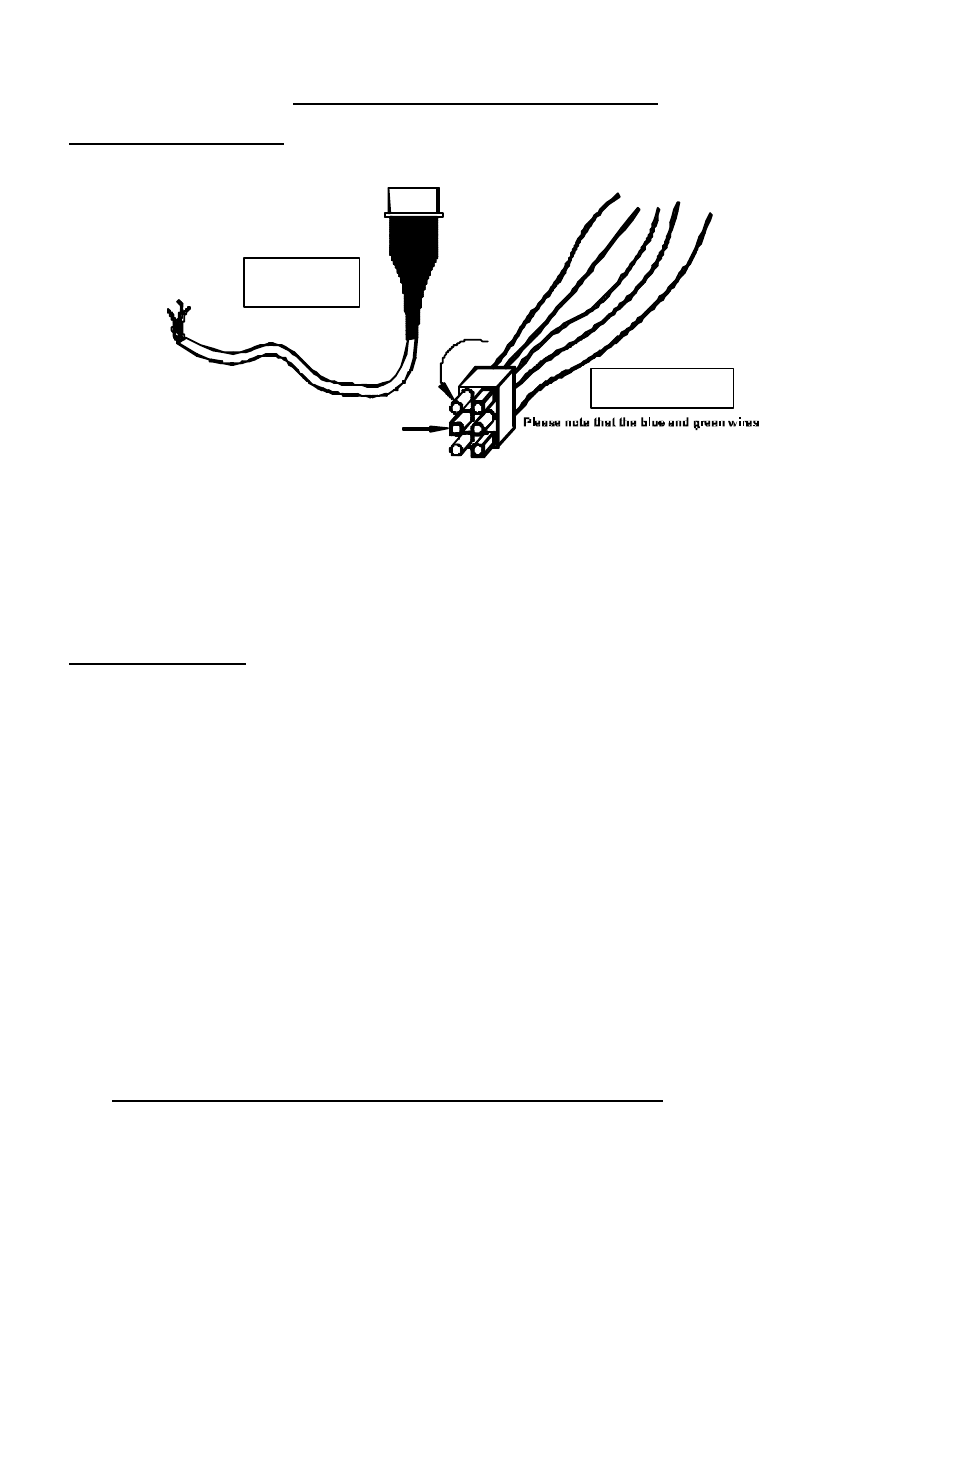
Please note that the blue and green wires only come with the four-outlet Star paks
that have a switching feature (RP330S-A, RP330S-S, RP330SQ-A, and RP330SQ-S).
These terminals are not present on the RP310 and are left empty for the RP320,
RP330, and RP330Q.
G. For RP330S-A, RP330S-S, RP330SQ -A, and RP330SQ-S only: For proper utilization of
the independent switching feature on these paks, please use in conjunction with a
#SP3860-4H-10 switch panel (shown on the following page). One of the switches will
operate heads 1 & 2, while another will operate heads 3 & 4. The main power switch
(SW1) must be on for ether pair of heads to flash. SW1 will turn the system on, SW2 will
control whether you are running under HIGH or LOW power, SW3 will switch heads 1 & 2
on or off, and SW4 will switch heads 3 & 4 on or off. In the “-A” models, heads 1 & 2 will
flash alternately when power is applied to the blue wire, and heads 3 & 4 will flash
alternately when power is applied to the green wire. In the “-S” models, heads 1 & 2 will
flash simultaneously when power is applied to the blue wire, as do heads 3 & 4 with power
applied to the green wire. You will be connecting the blue and green wires from the pak
with the corresponding blue and green wires on the switch panel. Refer to Figure 2 on the
next page for proper wiring.
BLUE
GR
EE
N
BLUE
PU
RP
LE
BLACK
RE
D
POWER PLUG FOR
RP320/330 SERIES
only come with the RP330S-A, RP330S-S,
RP330SQ-A, and RP330SQ-S.
(Connect to Ground for High Power)
POWER PLUG
FOR RP310
Red = Power
Black = Ground
White or Purple = HI/LO Option
PWR
CONNECT0R