Mounting plastic base models – Star Headlight & Lantern 400A-LED User Manual
Page 3
-2-
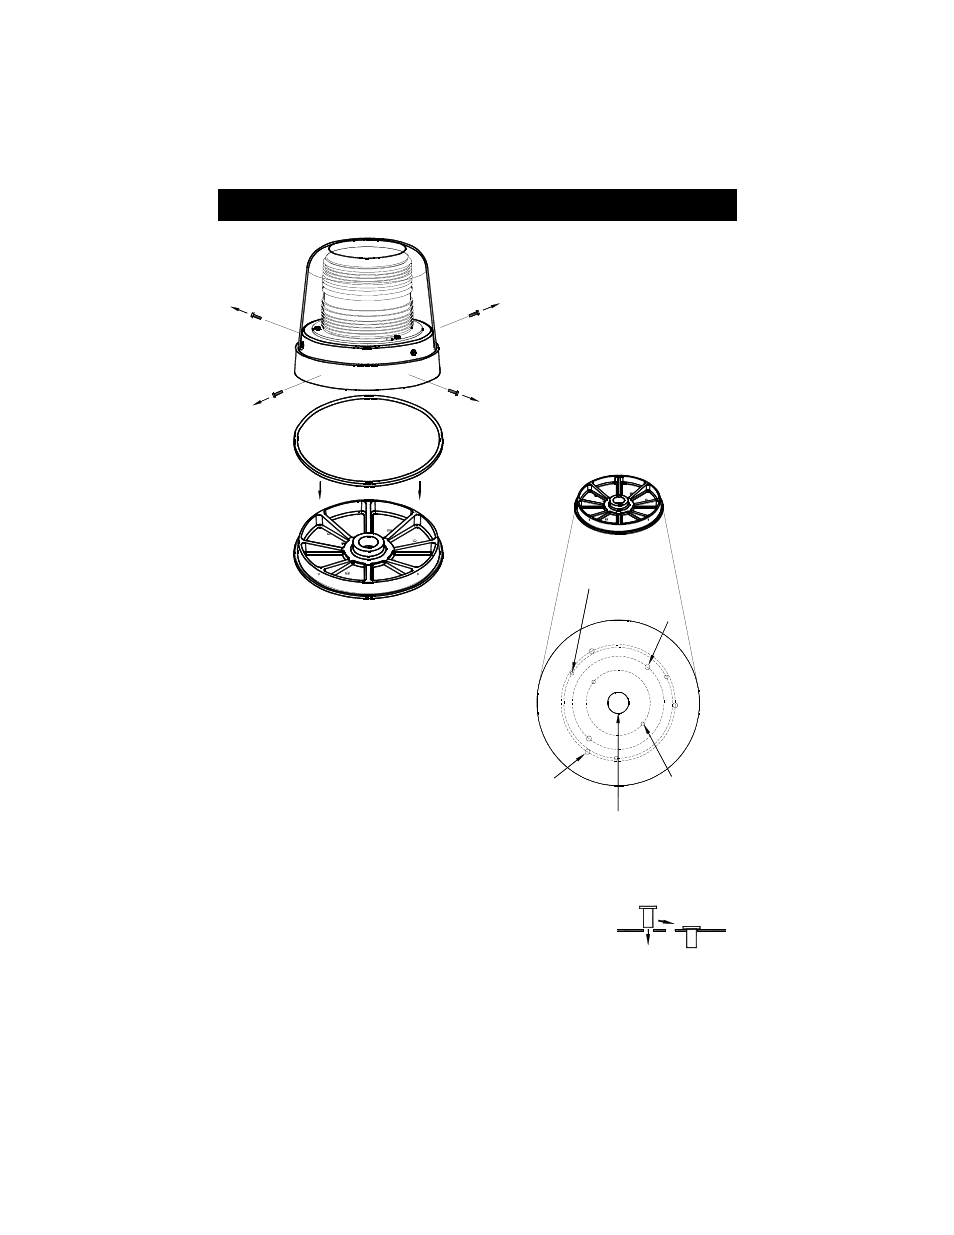
Mounting Plastic Base Models
Gasket
Remove the 4 screws in the
side of the Aluminum housing
and slide the plastic base out
Plastic Mounting Base
1. Remove the four screws in the side
of the aluminum housing.
2. Slide the plastic base out of the
aluminum case. Take care not to
damage the gasket when separating
the plastic base from the aluminum
case.
0.189" Diameter
on 1.75" Radius
2 @ 180°
1" NPT THREADED
PIPE MOUNT
0.261" Diameter
on 3.125" Radius
3 @ 120°
101-AP
0.196" Diameter
on 2.975" Radius
3 @ 120°
0.264" Diameter
on 2.5" Radius
2 @ 180°
5. Remove the plastic mounting base and drill a 3/8" hole in the marked locations. Then, if
applicable, drill a 3/8" hole for the wires in the center of the outer holes.
CAUTION: Take care not to drill through the headliner of the vehicle below.
6. Push the enclosed rubber well nuts through the outer holes until the
bottom side of the wider lip rests on the surface of the vehicle.
7. Route the wires through the center hole, if applicable and align the holes with the well
nuts. Install the screws through the base, into the well nuts, and tighten until snug.
8. Once the plastic mounting base is installed on the vehicle, you may replace the light on
the base and reinstall the four screws that affix the light to the plastic mounting base.
3 Locate the various knockouts on the bottom
of the base and determine which mounting
holes will work best for your application.
Clear the knockouts using a punch or other
appropriate tool.
4. Using the plastic mounting base as a
template, mark the appropriate holes on the
mounting surface. Take care to ensure that
the base does not move while you are
marking each of the holes.