Rear panel connections – Simaudio Neo 220i Integrated Amplifier User Manual
Page 9
220i Integrated Amplifier
____________________________________________________________________________________
9
Rear Panel Connections
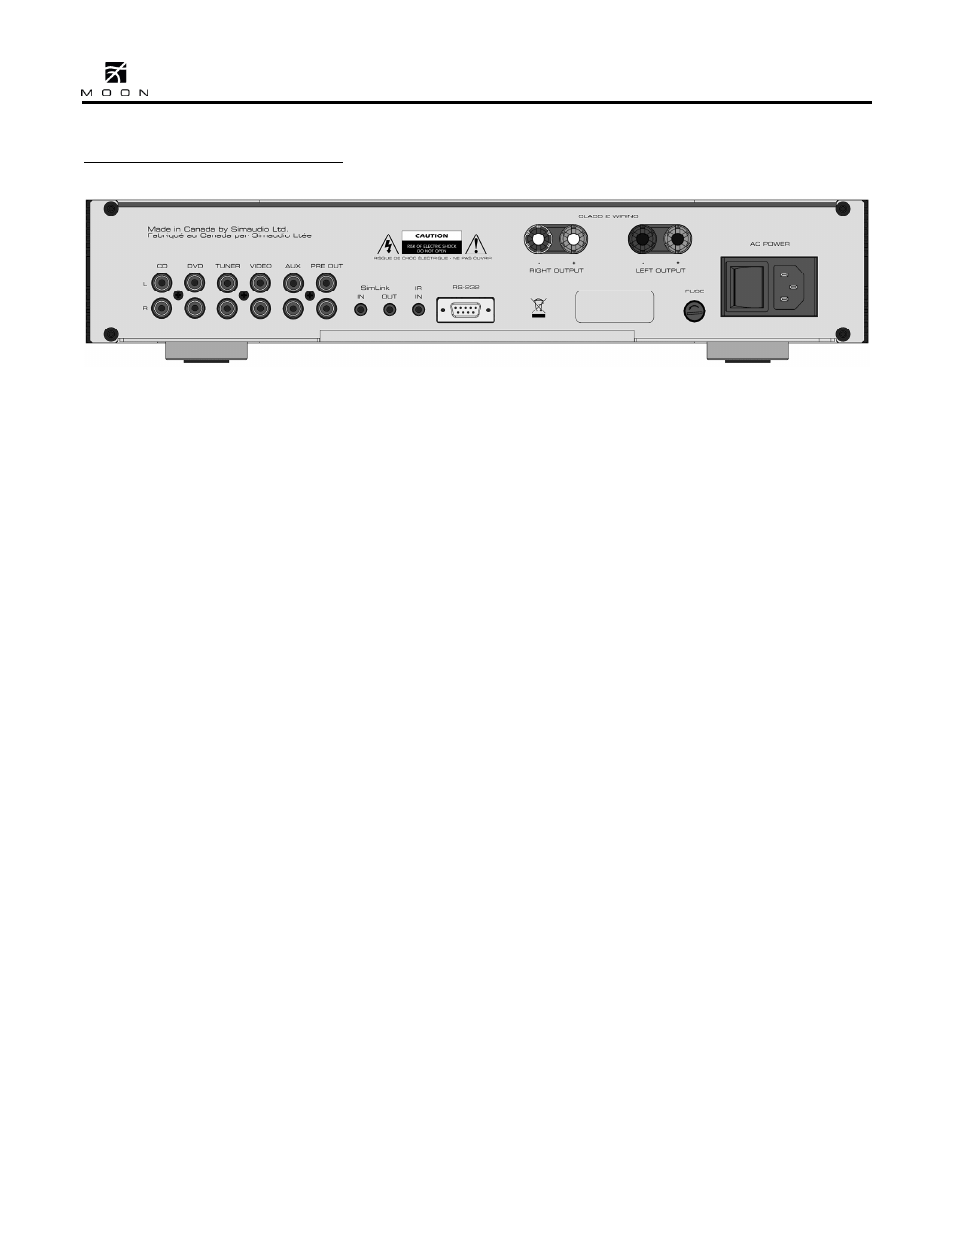
Figure 2: Nēo 220i Rear panel
The rear panel will look similar to Figure 2 (above).
There are five (5) pairs of single-ended inputs on
RCA connectors labeled CD, DVD, TUNER. VIDEO
and AUX. The RCA input connectors on the rear
panel have been color coded: ‘white’ for the left
channel and ‘red’ for the right channel.
The Nēo 220i integrated amplifier also has one pair
of non-amplified outputs labeled ‘PRE OUT’, located
next to the AUX input, and is designated for output
to a power amplifier with single-ended RCA inputs in
the event that you wish to use your 220i as a
preamplifier only. The output level on the ‘PRE OUT’
is variable and is adjusted by volume control.
Don’t hesitate to use high quality interconnect
cables*. Poor quality interconnect cables can
degrade the overall sonic performance of your
system.
To the right of the input and “PRE OUT” section are
a series of input/ouput connectors for external
communication. From left to right there are two (2)
“SimLink™” connectors labeled “in” and “out” on
1/8” mini jacks. Please refer to the next section
entitled SimLink™ for more details. Next, there’s a
1/8” mini-jack input for use with aftermarket
infrared remote control receivers. Finally, there’s a
full-function bi-directional RS-232 port control and
status for custom integration or automation on a
DB9 connector.
The Nēo 220i is equipped with a pair of gold-plated
binding posts. Connect your speakers, with the
cables of your choice, to the 220i’s speaker binding
posts. Take care to respect the polarity (“+” , “-” )
of the outputs. Once again, don’t hesitate to use
high quality speaker cables*. Poor quality speaker
cables can degrade the overall sonic performance of
your system.
Finally on the far right side is the main power switch
(“0”=off, “1”=on), the IEC receptacle, labeled “AC
Input” for the included AC power cord, and the “AC
Fuse” socket cover. Connect the supplied AC power
cable to the IEC receptacle. Ensure that the AC wall
outlet you use has a functioning ground. For the
best sonic performance, it is preferable that you
plug your 220i directly into a dedicated AC outlet
and avoid using an extension cord. If you have the
time and willingness, consider installing a superior
quality AC wall outlet such as a hospital grade
Hubbell*.
* Please speak with your MOON Authorized Retailer about
the benefits of high quality cables for your system, and
superior quality AC wall outlet.