Peachtree Audio iDecco User Manual
Page 8
5
R e m o t e
C o n t r o l
1
2
3
4
5
6
7
8
9
10
11
12
13
14
15
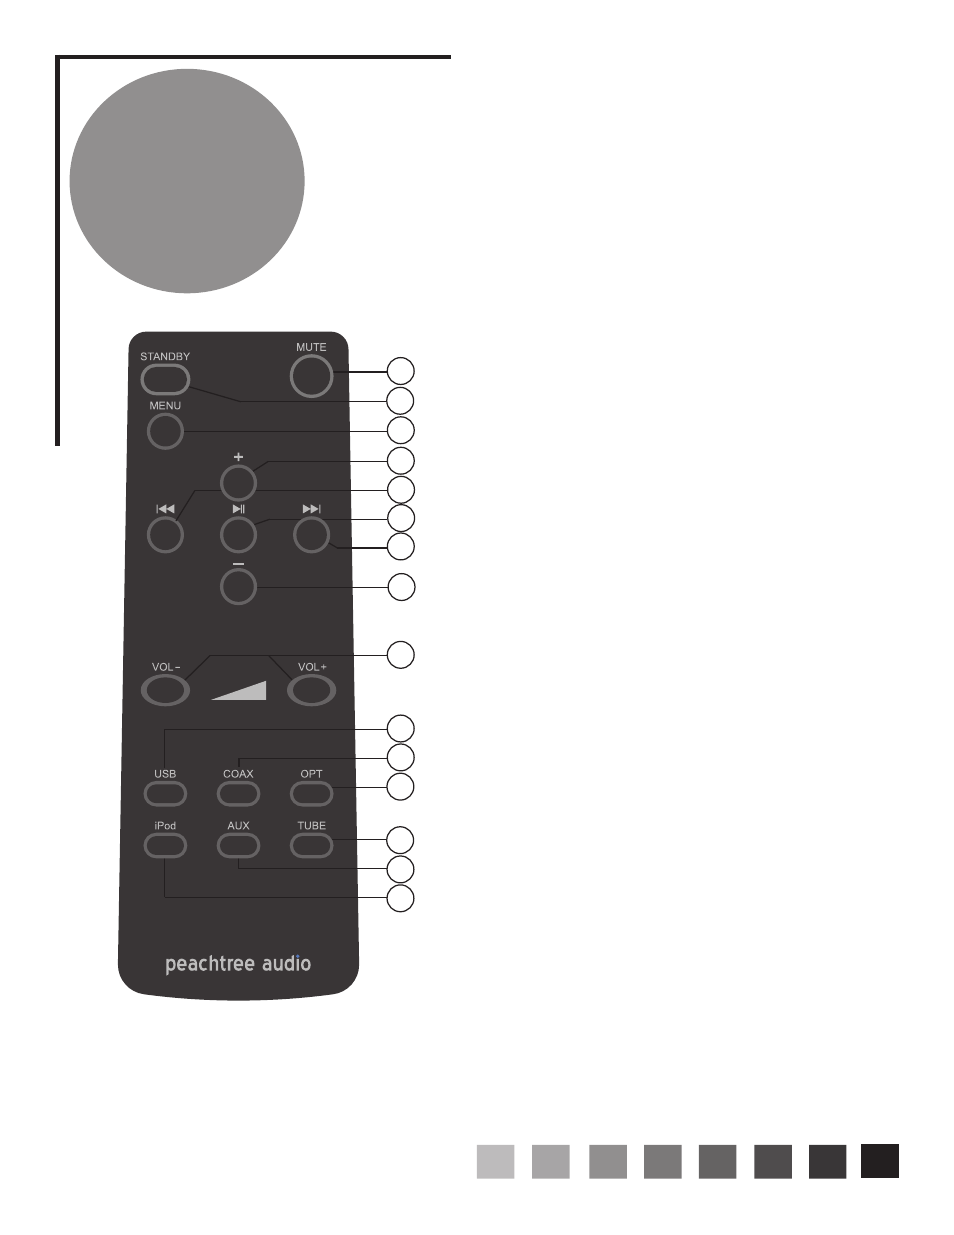
The iDecco remote control is straightforward, easy to use, and designed for simpli-
fication. We suggest that after you manually turn the iDecco “on”, that standby be
your default position when the iDecco is not in use. It will not damage the unit or
wear the parts out more quickly than being completely “off”.
On/Standby
Mute: This button will mute the iDecco.
Buttons 3-8 are for control of your
iPod docked in the iDecco
Menu: This button currently serves no function but may
have an application at a later date.
+: This button currently serves no function but may have
an application at a later date.
Skip back: This button skips back to the beginning of a
music or video selection except when the track has played
for less than 10 seconds. Then it will skip back to the be-
gining of the previous track.
Play/Pause: Play/Pause : This button will start (“Play”) or
stop (“Pause”) your music or video selection. They operate
in sequence. After activating “Play” the next push of the
button activates “Pause.”
Skip Forward: This button skips ahead to the next music
or video selection.
- : This button currently serves no function but may have
an application at a later date.
Buttons 9-16 are for control of the iDecco
Volume - / Volume +: These buttons reduce and increase
volume level
USB: This button selects a digital audio source at the USB
connection.
Coax: This button selects a digital audio source at the Co-
axial digital connection.
Opt: This button selects a digital audio source at the Opti-
cal (or Toslink) connection.
Tube: This button allows the user to choose either solid
state or tube-hybrid operation of the iDecco’s preamp
stage. The blue LED will turn on when the tube is acti-
vated.
Aux: This button selects an analog audio source at the Aux
connection.
iPod: This button selects the iPod docked in the iDecco as
your audio source.
1)
2)
3)
4)
5)
6)
7)
8)
9)
10)
11)
12)
13)
14)
15)