Assembling the 5500 retro-fit – Parr Instrument 5500 HPCL User Manual
Page 2
2
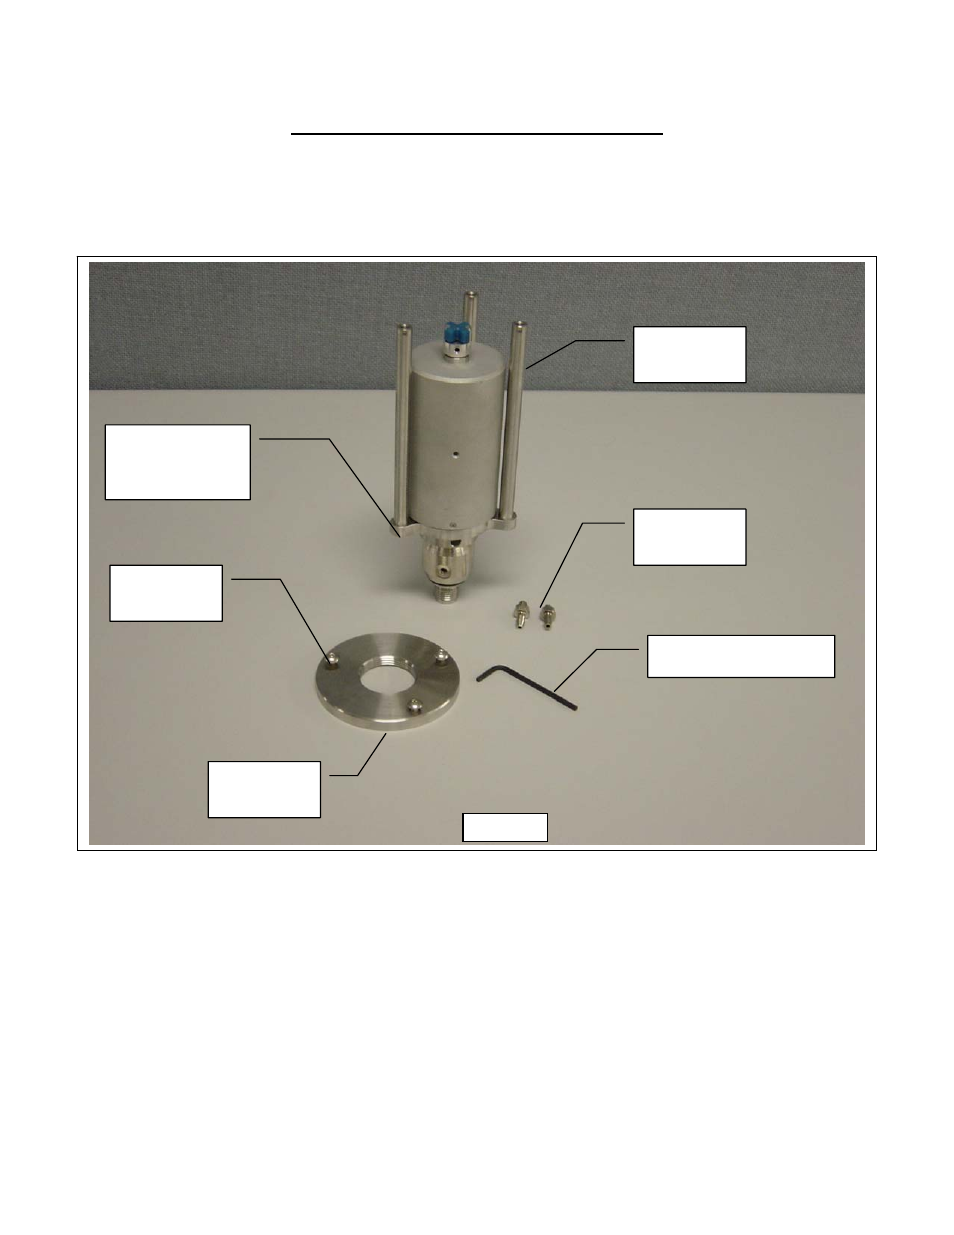
ASSEMBLING THE 5500 RETRO-FIT
1. Unscrew the (3) 8-32 x 3/8 BHSCS from the Top Cap (3078HC) to separate the Top Cap from
the (3) support rods (3080HC) using the 3/32” socket screw key provided. See Picture 2.
2. Remove the (2) Hose Barbed Connectors from the Cooling Sleeve. This will help with
installation of the Retro-Fit Assembly into the head.
3. Loosen the (2) 8-32 x 1/4 SHSS in the Bottom Cap (3079HC) to allow Bottom Cap and rods to
move freely around magnetic drive assembly body.
4. Screw the Retro-Fit Assembly (A3086HC_) into the head of the existing reactor making sure
the ears of the bottom cap are clear of any external fittings. Again some external fitting may
have to be removed for easier installation. See picture 3.
Hose Barbed
Connector
(3) 3080HC
Support Rod
3/32 Socket Screw Key
(3) 8-32 X
3/8 BHSCS
3078HC
Top Cap
3079HC
Bottom Cap
w/(2) set screws
Picture 2
- 1341 (16 pages)
- 1108 (20 pages)
- 1901 (2 pages)
- 1104 (12 pages)
- 1121 (4 pages)
- 1755 (2 pages)
- 1552 (1 page)
- DP8340R Series (52 pages)
- Attaching Platinum Fuse Wire (1 page)
- 1281 (2 pages)
- 1271 (2 pages)
- Performa Therm Liquid Calorimetric Thermometers (2 pages)
- 1108P (20 pages)
- 1356 (41 pages)
- 6300 (130 pages)
- 6200 (94 pages)
- 6200 (88 pages)
- 6100 (82 pages)
- 6510 (16 pages)
- 1564 (12 pages)
- 6400 (103 pages)
- 6400 (110 pages)
- 6772 (70 pages)
- 6725 (76 pages)
- 6755 (52 pages)
- 6750 (36 pages)
- 1108V (4 pages)
- 1108R (20 pages)
- Safety Rupture Disc Assemblies (8 pages)
- Magnetic Drive (16 pages)
- 44HC5 Metal Gaskets (1 page)
- Flexible Graphite Gaskets (1 page)
- Pressure Relief Valves (2 pages)
- Series 5100 (32 pages)
- Series 4520 (32 pages)
- Series 4530 (28 pages)
- Series 4540 (32 pages)
- Series 4550 (28 pages)
- Series 4560 (28 pages)
- Series 4570 (28 pages)
- Series 4580 (28 pages)
- Series 4590 (28 pages)
- Series 5000 (20 pages)
- Series 4555 (48 pages)
- 4575/76 HP/HT (24 pages)