Installing the fixed landing gear – ParkZone PKZ7150 User Manual
Page 9
EN
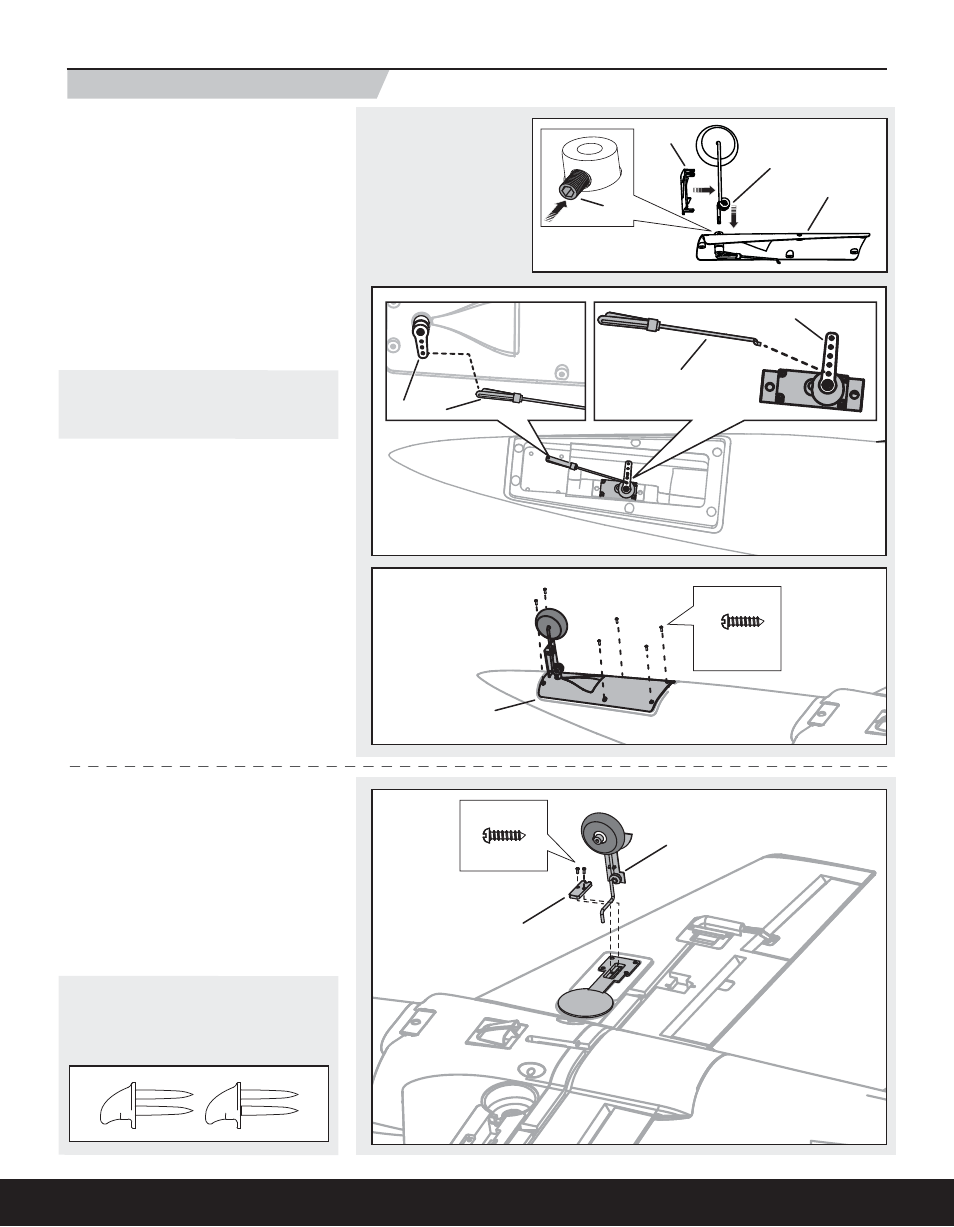
Nose Gear Installation
1. Insert the nose strut (A) into the post in the
nose gear plate (B) while aligning the fl at spot
on the strut with the set screw (C). The coil on
the nose strut should be facing rearward.
2. Connect the nose gear linkage (D) to the inner-
most hole in the steering servo arm (E) in the
fuselage.
3. Attach the clevis (F) to the outer most hole in
the nose gear steering arm (G).
4. Attach the nose gear plate (H) to the fuselage
with the 6 included screws (I).
5. Tighten the set screw on the strut. Where
needed, apply a small amount of threadlock to
the set screw.
Tip: If desired for scale appearance, install the
nose gear cover (J) on the strut.
Tip: For increased steering travel, move the push-
rod out on the servo arm one hole at a time.
NOTICE: Adjust the clevis on the nose wheel steer-
ing arm so that the aircraft rolls straight when the
rudder control on your transmitter is at neutral.
Main Gear Installation
1. Install each main landing gear strut (K) on the
installed doors using 2 screws (L) and a strut
cover (M). The coils on the struts should be fac-
ing rearward as shown.
Tip: For scale appearance, install the left and right
main gear doors on the respective struts.
Tip: For belly landings, install the nose gear cover
plate using the included 6 screws. We recommend
that you install the 2 included skids in the fuselage
behind the nose gear plate and in front of the
exhaust nozzle.
Installing the Fixed Landing Gear
K
L
I
2.5 X 8mm
H
2.5 X 8mm
A
C
J
B
F
G
E
D
M
9