Mounting the control box, Step 13 – Mighty Mule FM500 Green Board User Manual
Page 21
17
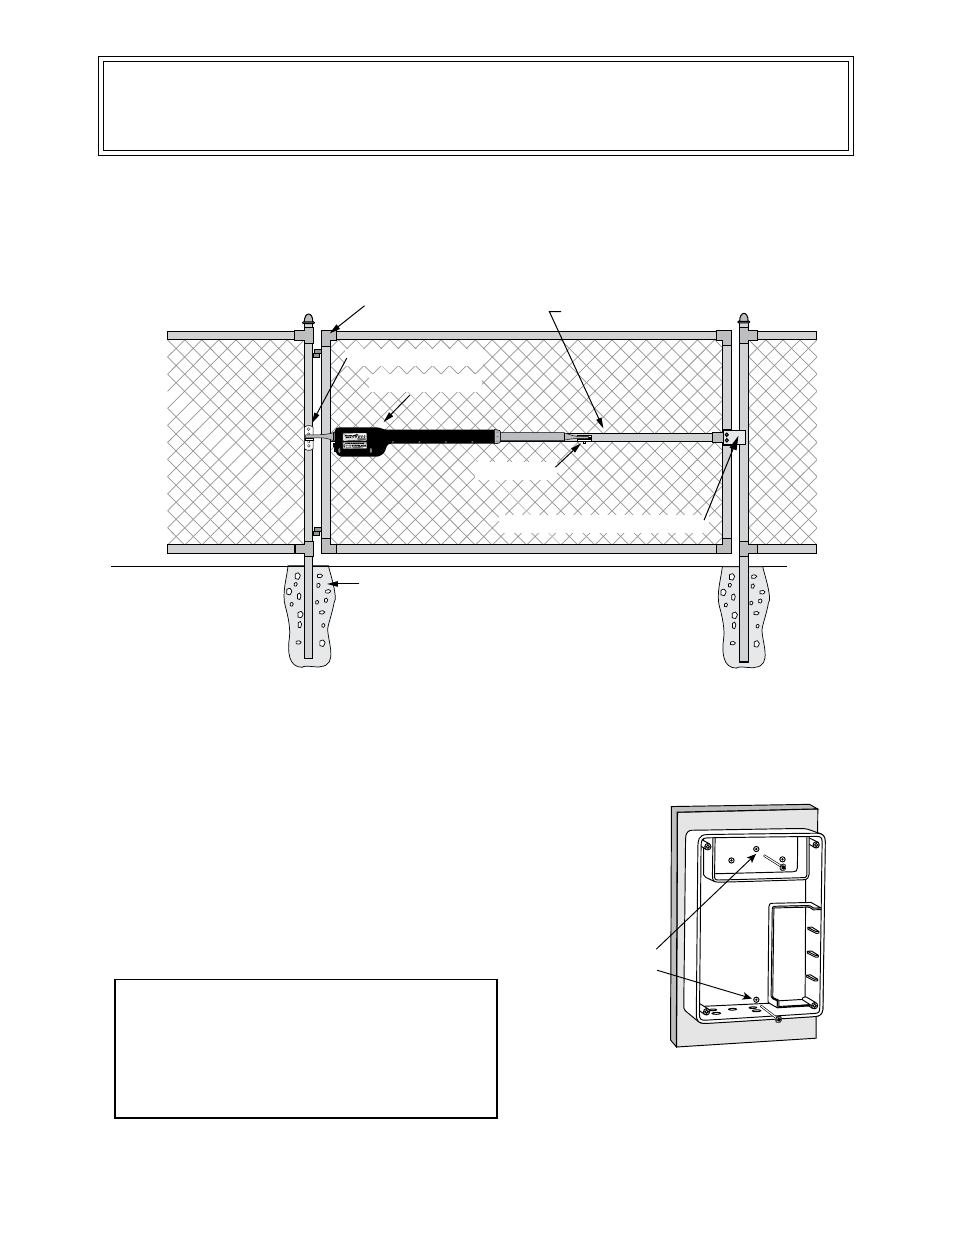
At this stage of the installation, the opener should be installed on the
gate and the closed position stop should be in place.
Check List
• The gate is plumb, level, and swings smoothly on its hinges.
• A plate or support was added for the gate bracket (if necessary).
• The opener is level and mounted on the centerline of the gate.
Mounting the Control Box
Step 13
Mount the control box using the screws (provided) or another
secure mounting method. The control box must be mounted at
least 3 feet above the ground to protect it from rain splash, snow,
etc., and at least 3 feet from an AC power source to prevent
electrical interference.
Use mounting
holes and screws
provided to mount
control box to a
secure surface.
NOTE:
The battery that came with your Mighty
Mule®, MUST be placed in the top (horizontal)
battery slot with the terminals on the RIGHT. The
extra (vertical) battery slot is for an optional second
battery. An optional second battery can be used for
solar and/or high traffic applications, if needed..
Horizontal Cross Member
Gate Swings Evenly and Freely
Hung Firmly and Plumb
Post Bracket Assembly
Gate Bracket
Single Gate Opener
Fence Post Set in Concrete
Closed Position Positive Stop Plate
500