Mounting the opener, Installation of the closed position stop, Step 11 – Mighty Mule FM500 Green Board User Manual
Page 20: Step 12
16
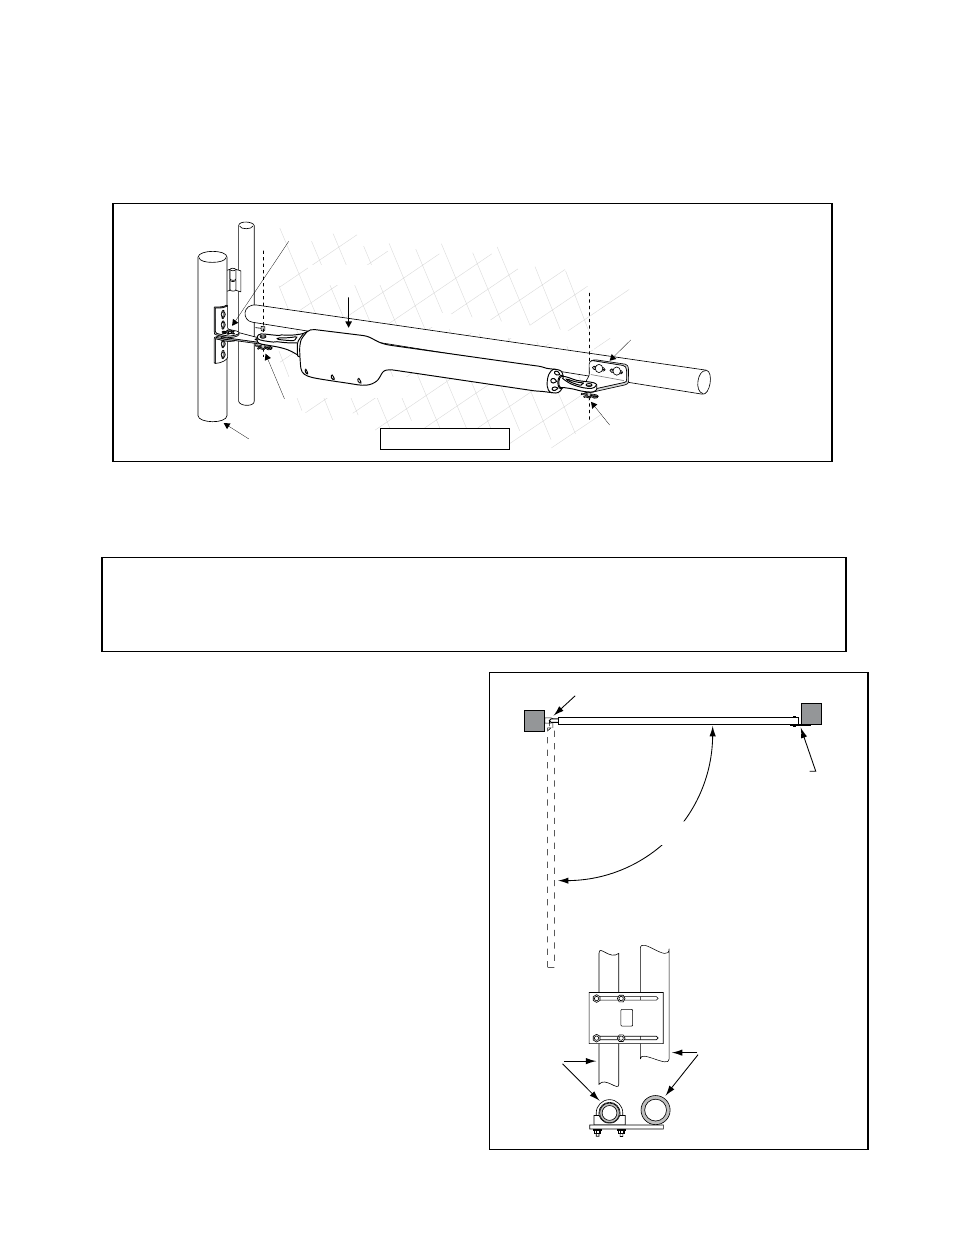
Mounting the Opener
Step 11
Attach the opener to the securely bolted post bracket assembly and gate bracket using clevis pins, bushings, and hairpin
clips, or optional Pin Locks (see Accessory Catalog). Verify that the opener is level and adjust the post bracket assembly if
necessary.
Installation of the Closed Position Stop
The Mighty Mule® Gate Opener firmly holds the gate in the closed position using the positive stop plate. The
positive stop helps stabilize the gate leaf in the closed position. To further enhance the stability and security of
your gate, install the optional Mighty Mule® Automatic Gate Lock (see Accessory Catalog).
Step 12
Remove hairpin, clevis pin, and bushing from front mount
and close the gate (remember to support opener). Fasten
the closed position stop plate to the end of the gate frame on
the gate centerline, but do not tighten it completely. Slide
the stop plate toward the fence post until they touch (see
illustration
). Once you have moved the stop plate to the
correct position, tighten its hardware completely.
Use the appropriate hardware for your type of gate (use
U-bolts if you have a tube or chain link gate; wood or
lag screws for wood gates; etc.). This hardware is not
provided.
Level Opener
Gate In Open Position
LEVEL horizontal cross member
Post Bracket Assembly
bolted to fence post
Clevis Pin, Bushing, and Hairpin Clip
Clevis Pin, Bushing, and Hairpin Clip
Gate Bracket bolted
to gate cross member
Fence Post
Closed Position
Stop Plate
Closed Position Stop Plate mounted
on metal post with U-bolts.
Gate Hinge
The gate can open
up to 110º (max.)
Fence Post
Gate Post
TOP VIEW
SIDE VIEW