System configuration examples – Lumagen Radiance 2143/2123 User Manual
Page 16
Section 4 – Basic Commands
Copyright 2009-2014 Lumagen, Inc.
Radiance 2123 and 2143, Rev 041614
8
System Configuration Examples
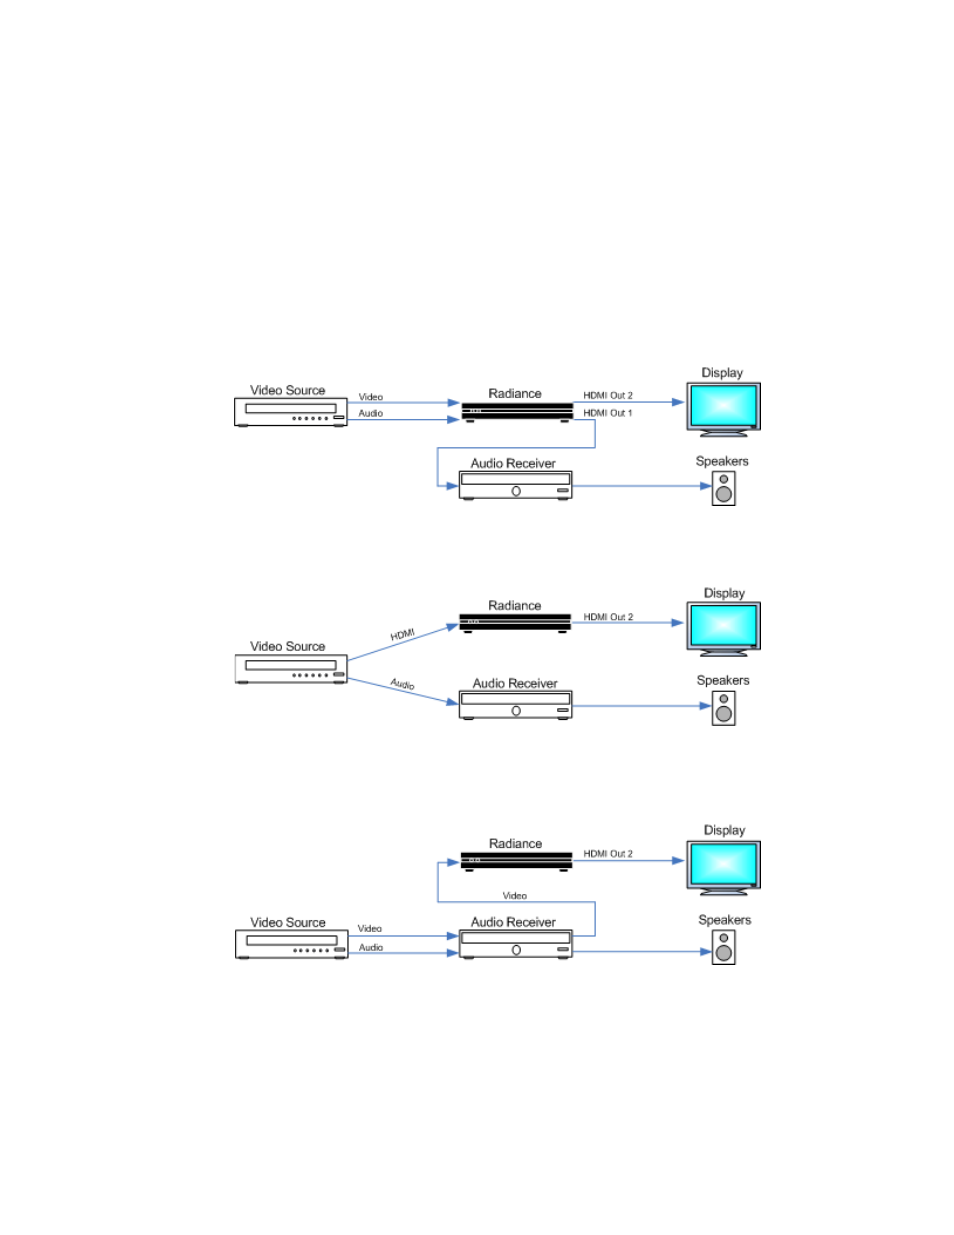
The most common configurations using the Radiance are shown below.
1. Receiver after Radiance.
The default configuration is to connect all the video sources to an input of the Radiance. Connect your receiver, or
preamp, to Radiance HDMI Out 1, and your display/projector to Radiance HDMI Out 2. Only after all audio and
video connections have been made, connect the power cable and turn everything on. The Radiance automatically
detects the video EDID and the audio EDID and reports the EDID modes back to the source devices.
This configuration can improve switching delays by using the Radiance’s fast input switching and guarantees that
the receiver does not degrade the video. It also minimizes the work needed to configure the Radiance since, for
output 2, audio is turned off by default. Note: Some amplifiers do not accept audio for non-standard video rates,
such as 768p, or at any rate above 720p/1080i, and some amplifiers will not report EDID back to the Radiance
unless the amplifier’s HDMI output is turned off, or is driving a display.
2. Audio and Video routed separately.
Route the audio and video separately to the Radiance and a receiver. Connect the display to Radiance HDMI
Output 2. This output has its audio turned off by default and so is correct by default for this case.
3. Receiver in front of Radiance.
Use a receiver in front of the Radiance to switch the video sources. Lumagen recommends against using this
configuration because some receivers add artifacts to the video. Connect the display to Radiance HDMI Output 2.
This output has its audio turned off by default and so is correct by default for this case.