Lingenfelter L650090206 Lingenfelter C6 Z06 Corvette Air Intake 2006-2013 v3.04 User Manual
Page 4
To remove the radiator shroud you need to temporarily disconnect and remove the engine oil cooler.
• Remove the left wheel house extension and left brake cooler
duct. To do this you will need to remove the three 7 mm
head screws from underneath the vehicle, remove the five
T-15 Torx head screws along the vertical wall of the wheel
well and remove the three push fasteners in the wheel well.
• Install oil drain pan under vehicle.
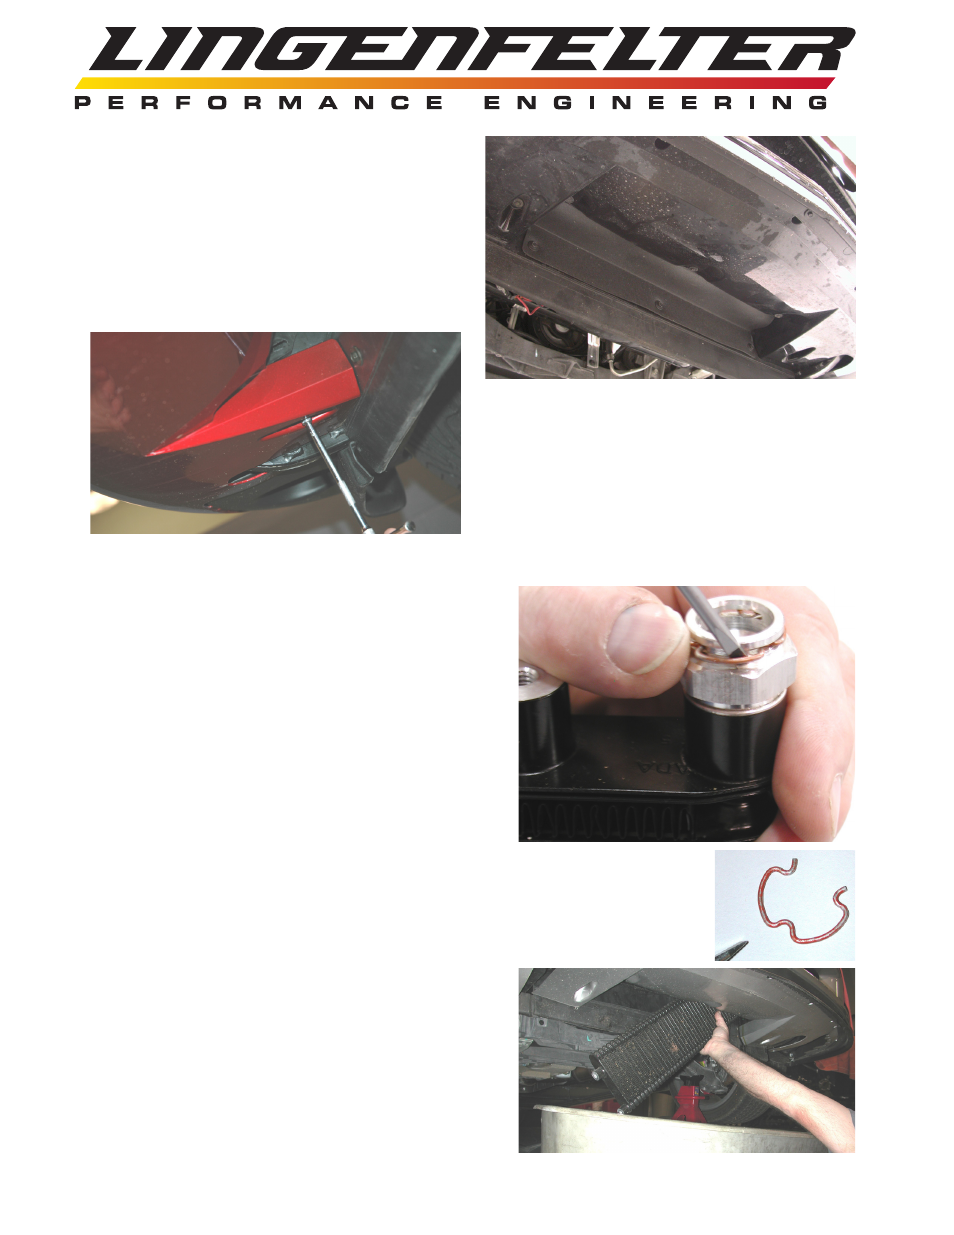
• Using a small pick tool, carefully remove the two retaining
clips holding the oil lines to the oil cooler. Do NOT pull the
oil lines from the cooler at this time. The pictures show the
clips and the fittings on the oil cooler. The oil cooler is shown
removed from the vehicle to make it easier to see the parts
involved.
• Using a 13 mm socket, remove the four screws retaining
the oil cooler. Allow the right side of the cooler to drop (see
picture).
• Disengage both oil lines and remove the oil cooler from the vehicle. Keep the ports aimed
upright to prevent additional oil spills. Be sure to reinstall the oil line retaining clips on
the oil cooler so that you don’t loose them. When you reinstall the oil lines later on, you
will not need to remove these clips - the lines simply push on.
• Cover the oil cooler ports and the oil lines to avoid contamination.
Remove the two plastic push pins holding the radiator shroud
to the bumper beam. Remove two plastic retainers from each
side of the radiator shroud.
Guide the side wings of the radiator shroud around the lower
brackets. Remove the shroud from the top side, pushing
condenser rearward as necessary for clearance. If the shroud
does not clear the bumper during removal, it may be easier to
free it from the under side of the vehicle.
Page 3 0f 9
The following steps need to be performed from
underneath the vehicle:
• Remove the three 10 mm screws holding the lower
radiator air inlet block-off cover in position
• Remove the three 7 mm screws holding the front fascia
inside the radiator opening.
• Next, remove the 7 mm screws on either side (one on
each side). These are the screws holding the bottom of
the bumper cover - see picture.