Filter leak test, Purpose – Labconco XPert Nano Enclosures 38876 Series User Manual
Page 35
Chapter 6: Maintaining the Nano Enclosure
Product Service 1-800-522-7658
30
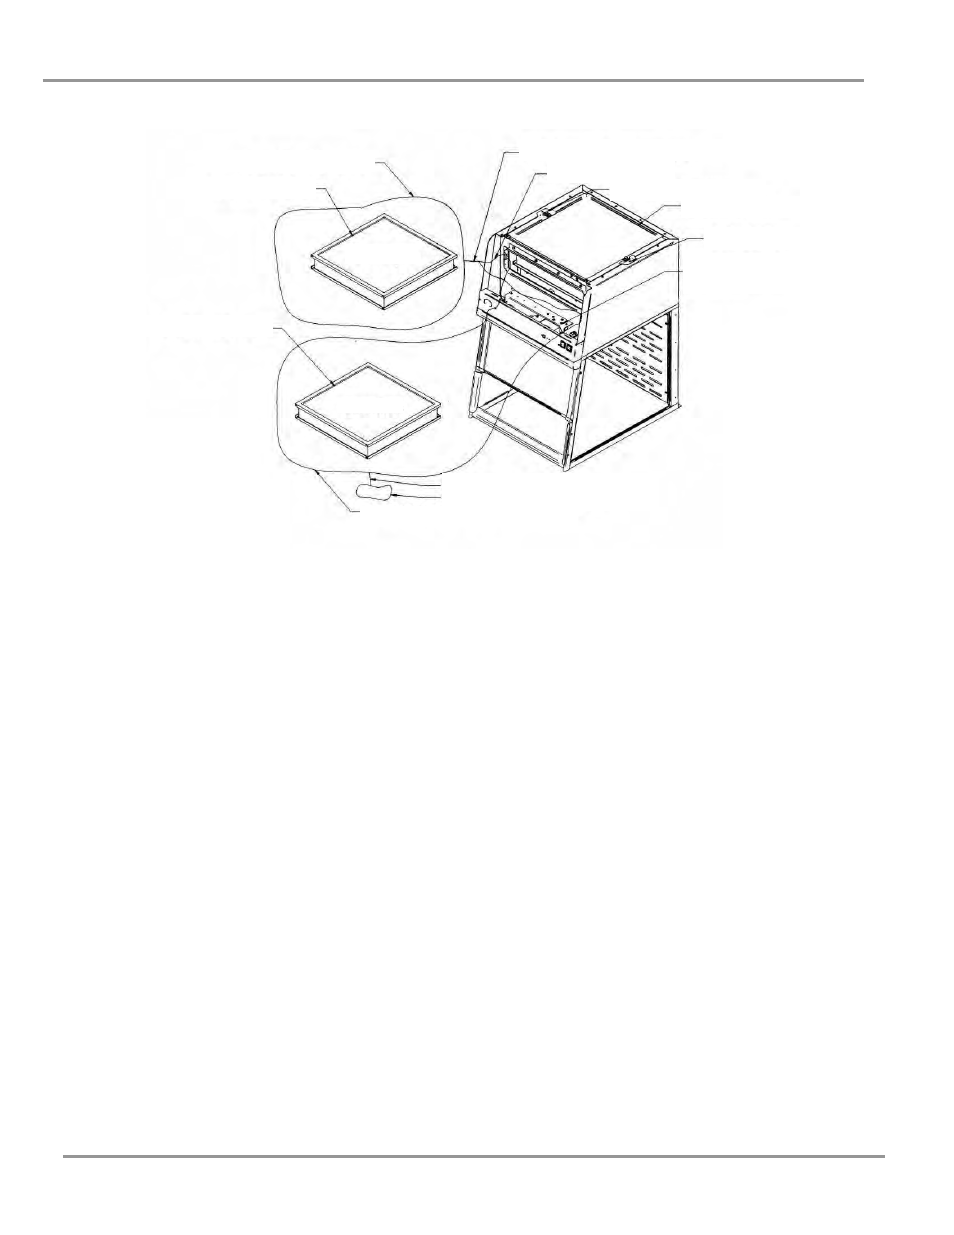
Figure 6-1
Bag-In/Bag-Out Filter Changing Procedure Diagram
& Filter Leak Test Diagram
Filter Leak Test
Purpose
After installing the new ULPA filter, the filter should be leak checked. This test is
performed to determine the integrity of the ULPA filter, the filter housing, and the
filter mounting frames. Leak testing is to be done by a qualified technician with
calibrated equipment. Remove the top perforated exhaust cover by using a Phillips
screwdriver to unfasten the (2) screws used to secure (2) clips. See Figure 6-1. The
filter passes the leak test at .01% or better. Reference Leak Testing and Photometer
scanning from the Institute of Environmental Services (IES-RP-CC001.3)
Apparatus
1. An aerosol photometer ATI model 2D, 2E, 2G or equivalent. Air
Techniques Hamilton Associates Inc., 11403 Cronridge Dr., Owings Mills,
MD 21117
Old Filter
New Filter
Old ULPA Filter Sealed in Old Bag
Filter Gasket Up As Shown
Filter Gasket Up As Shown
Create Two Seals & Cut Here After Sealing
Bag Stub from Old Bag
Clip to Hold Perforated Cover
Perforated Top Cover
Screw (One Each Side)
Speed Control Adjustment
Screw Location
Create Two Seals & Cut Here After Sealing
Old Bag Stub Sealed in Glove of New Bag
New ULPA Filter Shown in New Bag