English – Konig Electronic Indoor pan-tilt IP camera remote video surveillance User Manual
Page 6
ENGLISH
6
4
Press the WPS button on your IP camera
Wait until the status LED flashes between red and green, then press
and hold the WPS/RESET button on your IP camera for about 2
seconds to enter WPS mode. The status LED will be flashing green.
5
Enter WPS mode on the Wi‑Fi router
Press the WPS button on the Wi-Fi router
6
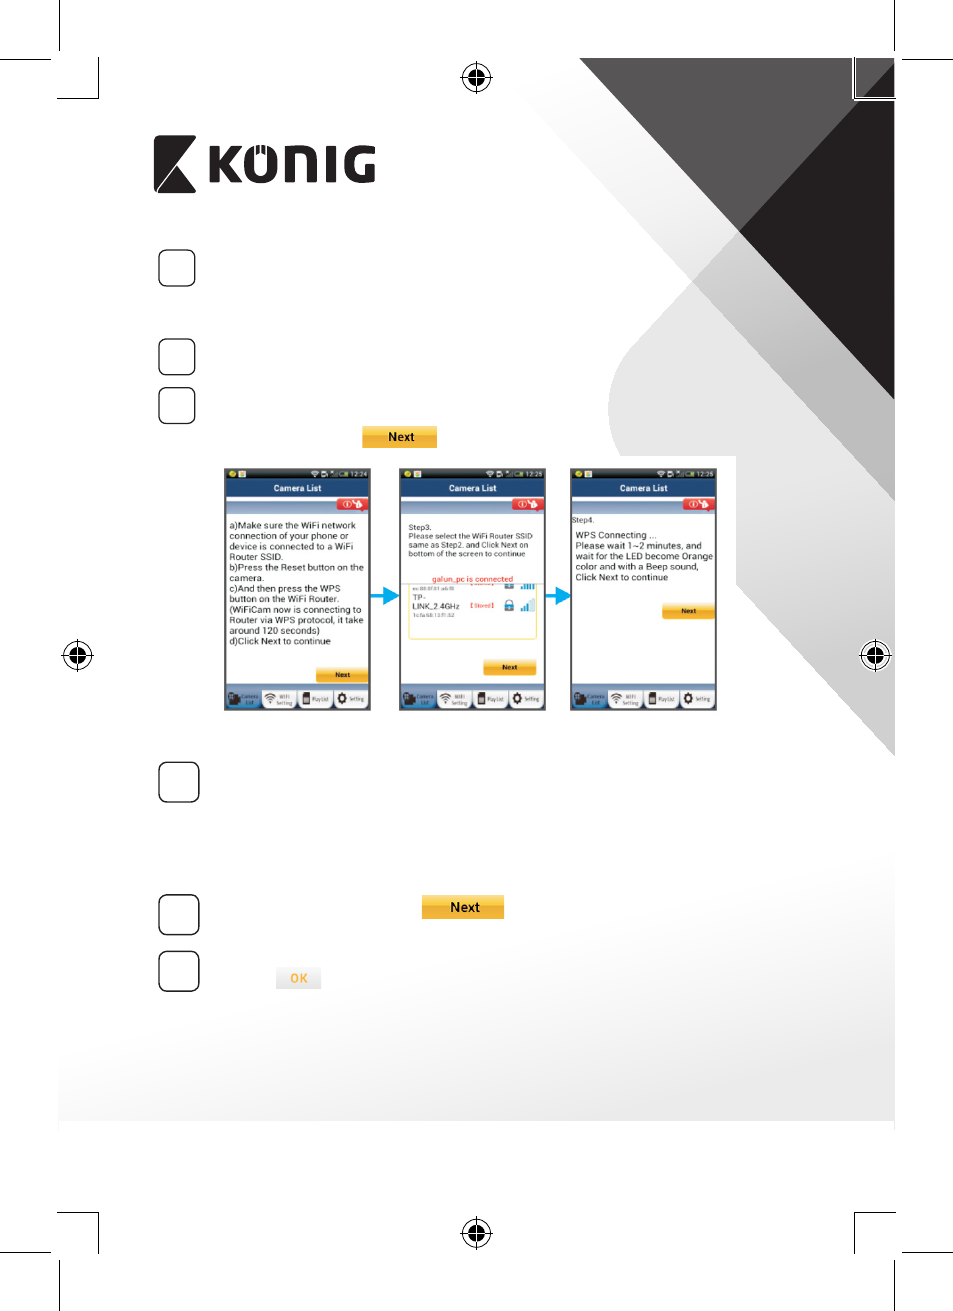
Selecting the Wi‑Fi router
Select the Wi-Fi router of your choice in the screen (see “Figure 9”).
Then select the tab
to enter next step (see “Figure 10”).
Figure 8
Figure 9
Figure 10
7
IP camera connects with Wi‑Fi router
Wait about 1-2 minutes. If the IP camera is successfully connected to
the Wi-Fi router, the status LED will become orange.
Otherwise the status LED will become a flashing red light. If the
setup is not successful, please go back to Step 1 and try again.
8
If successful, select the tab:
(see “Figure 11”), and follow
the instructions.
9
Please enter a camera name and password for security and select
the tab:
(see “Figure 13”).
The IP camera will automatically enter the viewing screen (see
“Figure 14”).