Hanna Instruments HI 96725 User Manual
Page 9
16
17
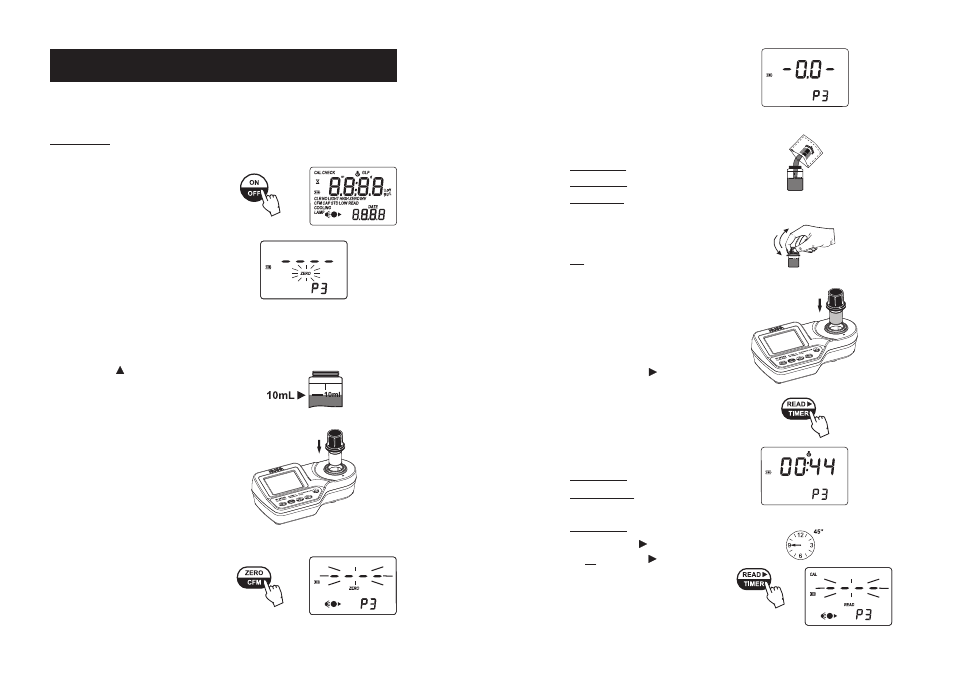
• After a few seconds, the display will
show “-0.0-”. The meter is now zeroed
and ready for measurement.
• Remove the cuvette.
• Add the specific test reagent for each
parameter:
Free Chlorine:
1 packet of HI 93701-0
Total Chlorine:
1 packet of HI 93711-0
Cyanuric Acid:
Fill a beaker with 25 mL
of sample, add 1 packet of HI 93722-0
and swirl gently. Fill a second cuvette
with 10 mL of reacted sample.
pH:
5 drops of HI 93710-0
• Replace the cap and swirl the solution.
• Replace the cuvette into the holder and
ensure that the notch on the cap is
positioned securely into the groove.
• Press and hold READ/ /TIMER
for three
seconds.
The display will show the
countdown prior to measurement. The
beeper is playing a beep at the end of
the countdown period.
• Alternatively, wait for:
Free Chlorine:
1 minute
Total Chlorine:
2 minutes and 30
seconds
Cyanuric Acid:
45 seconds
Then press READ/ /TIMER.
For pH press READ/ /TIMER directly.
In both cases, the lamp, cuvette and
detector icons will appear on the display,
depending on the measurement phase.
To compensate the meter for the sample turbidity or color, the measurement takes place in two
phases. First, the meter is zeroed using the unreacted sample. After the reagents are added the
reacted sample is measured.
Important note:
Free and Total Chlorine have to be measured separately with fresh unreacted
samples if both values are requested.
MEASUREMENT PROCEDURE
• Turn the meter on by pressing ON/OFF.
The display briefly shows all tags on.
• When the beeper sounds briefly and the
LCD displays dashes, the meter is ready.
The blinking “ZERO” indicates that the
instrument needs to be zeroed first.
• Pay attention to the selected range.
To change the range, simply press
RANGE/GLP/
.
• Fill the cuvette with 10 mL of unreacted
sample, up to the mark, and replace the
cap.
• Place the cuvette into the cuvette holder
and ensure that the notch on the cap is
positioned securely into the groove.
• Press ZERO/CFM and the lamp, cuvette
and detector icons will appear on the
display, depending on the measurement
phase.
or