Validation procedure – Hanna Instruments HI 96725 User Manual
Page 10
18
19
The reading should be within specifications as reported in the CAL CHECK
TM
Standard
Certificate. If the value is found out of the specifications, please check that the cuvettes are free
of fingerprints, oil or dirt and repeat validation. If results are still found out of specifications,
then recalibrate the instrument.
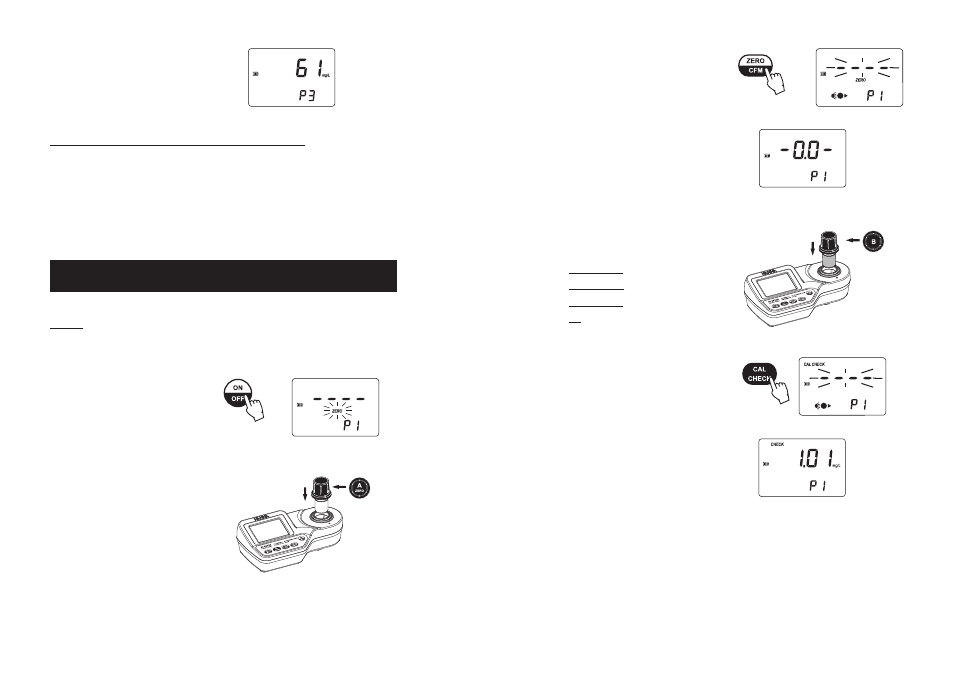
• Press ZERO/CFM and the lamp, cuvette
and detector icons will appear on the
display, depending on the measurement
phase.
• After a few seconds, the display will
show “-0.0-”. The meter is now zeroed
and ready for validation.
• Remove the cuvette.
• Place the specific CAL CHECK
TM
Standard
Cuvette B into the cuvette holder, for:
Free Chlorine:
B, HI 96701-11
Total Chlorine:
B, HI 96711-11
Cyanuric Acid: B, HI 96722-11
pH: B, HI 96710-11
Ensure that the notch on the cap is
positioned securely into the groove.
• Press CAL CHECK
TM
and the lamp, cuvette
and detector icons together with “CAL
CHECK”
will appear on the display,
depending on the measurement phase.
• At the end of the measurement the display
will show the validation standard value.
• At the end of measurement, the instrument
directly displays concentration in mg/L of
free chlorine, total chlorine or cyanuric
acid or the pH measured value and the
range number on the LCD.
INTERFERENCES FOR FREE CHLORINE AND TOTAL CHLORINE
Bromine, Oxidized Manganese and Chromium, Chlorine dioxide, Ozone and Iodine.
Alkalinity above 250 mg/L CaCO
3
or acidity above 150 mg/L CaCO
3
will not reliably develop the
full amount of color or it may rapidly fade. To resolve this, neutralize the sample with diluted
HCl or NaOH.
In case of water with hardness greater than 500 mg/L CaCO
3
, shake the sample for approximately
2 minutes after adding the powder reagent.
VALIDATION PROCEDURE
Use the validation procedure to ensure that the instrument is properly calibrated.
Warning:
Do not validate the instrument with any standard solutions other than the HANNA CAL
CHECK
TM
Standards, otherwise erroneous results will be obtained.
Note: The validation is performed only for the selected parameter. For full validation of the
instrument, the following procedure must be performed for each parameter.
• Turn the meter on by pressing ON/OFF.
• When the beeper sounds briefly and the
LCD displays dashes, the meter is ready.
• Place the CAL CHECK
TM
Standard
Cuvette A into the cuvette holder and
ensure that the notch on the cap is
positioned securely into the groove.