Calibration, Operational guide – Hanna Instruments HI 8033 User Manual
Page 4
7
6
The instrument should be re-calibrated at least once a month, or
after probe or battery replacement.
For more accurate results, it is recommended to use a calibration
solution with a conductivity value close to the range to be measured.
See the "Accessories" section for a wide selection of conductivity
solutions.
PROCEDURE FOR HI 8033
• Pour the conductivity calibration solution
(e.g. HI 7030) into a beaker while mak-
ing sure that the holes on the probe are
completely submerged. If possible, use
plastic beakers to minimize any EMC in-
terference.
• Immerse the conductivity probe and the
ChecktempC in the solution.
• Wait a couple of minutes for the thermal
equilibrium to be reached.
• Tap the probe on the bottom, then shake it while rotating to
make sure no air bubbles remain trapped in the sleeve.
• Measure the temperature of the calibration solution with the
ChecktempC, and adjust the °C knob accordingly.
• Turn the rotary knob to select the 19990 µS/cm range.
• Turn the k% calibration knob until the display shows the
conductivity reading at 25°C (see "Conductivity vs. temperature
chart "), e.g. 12880 µS/cm (= 12.88 mS/cm), and all
subsequent measurements will be compensated to 25°C (77°F).
• If you prefer to standardize the temperature compensation to
20°C (68°F), adjust the trimmer to read "11.67 mS" (see
"Conductivity vs. temperature chart "). All subsequent measure-
ments will be compensated to 20°C.
• The calibration is now complete and the meter is ready for use.
PROCEDURE FOR HI 933000
• Pour the conductivity calibration solution (e.g. HI 7030) into a
beaker while making sure that the holes on the probe are
completely submerged. If possible, use plastic beakers to minimize
any EMC interference.
HI 7030
°C
CALIBRATION
• Each meter is supplied complete with a 9V battery. Slide off the
battery compartment cover on the back of the meter and install
the battery while paying attention to its polarity (see "Battery
Replacement" section for details).
• Connect the probe to the meter by aligning the pins with the
socket and pushing the plug in. With HI 933000, tighten the
threaded ring.
• Make sure that the meter has been calibrated before taking any
measurements (see "Calibration" section for details).
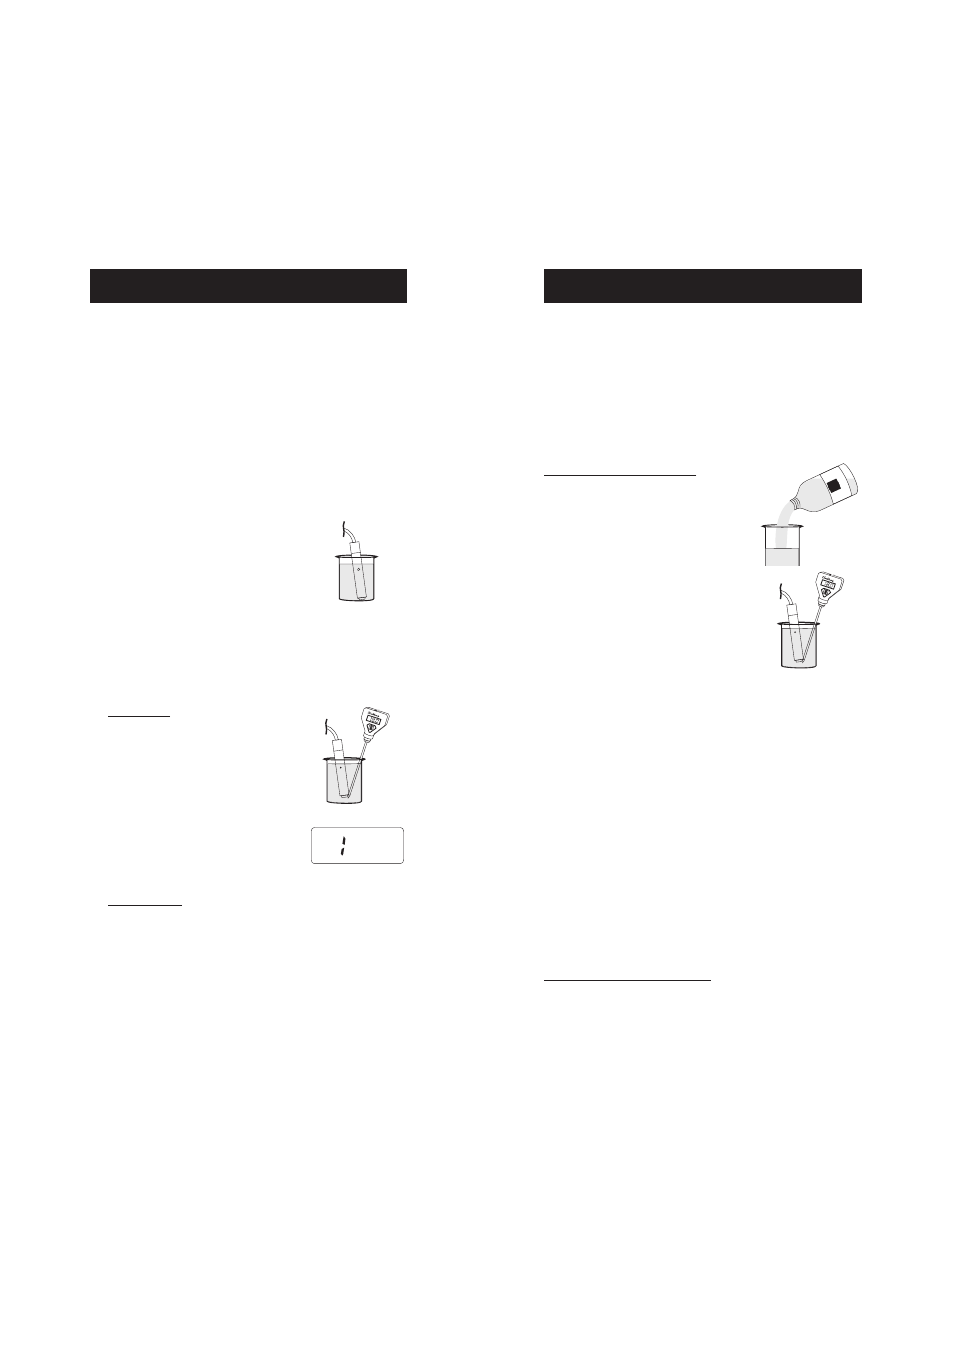
• Immerse the conductivity probe into the
sample, making sure that the holes on
the shaft are completely submerged.
If possible, use plastic beakers to minimize
any EMC interference.
• Tap the probe lightly on the bottom of the beaker to remove any
air bubbles which may be trapped inside the sleeve.
• Turn the instrument on by pressing the ON/OFF key or by setting
the rotary switch (HI 8033) to the desired measurement range.
• For HI 8033:
Measure the solution temperature with a
ChecktempC or another accurate ther-
mometer, and set the temperature knob
to the measured value (e.g. 20°C).
• Select the appropriate measurement range.
Note: If the display shows only a "1", the
meter is out of range. Select the next
(higher) range.
• For HI 933000:
Before taking any measurement, wait a couple of minutes for the
temperature sensor to reach thermal equilibrium with the sample.
When the temperature of the sample is lower than 20°C or higher
than 30°C, allow more time for the thermal equilibrium to be
achieved.
• After measurements, switch the instrument off and clean the
probe (see "Probe Maintenance" section for details).
OPERATIONAL GUIDE
°C