Hanna Instruments HI 9813-0 User Manual
Page 7
13
12
PROBE MAINTENANCE
PERIODIC MAINTENANCE
Inspect the probe and the cable. The cable used for the connection to
the meter must be intact and there must be no points of broken
insulation on the cable or cracks on the probe stem or bulb.
Connector must be perfectly clean and dry. If any scratches or cracks
are present, replace the electrode. Rinse off any salt deposits with
water.
CLEANING PROCEDURE
For better accuracy in measurements and to ensure a good perfor-
mance of the probe, a frequent cleaning is recommended.
For this purpose, soak it in Hanna HI 700661 Cleaning Solution for
5 minutes.
Note: For particular dirty (as for example protein, oil or grease) see
the "Accessories" section for Hanna specific solutions.
HI 9813-6 only:
CAL-CHECK
TM
FEATURE / CLEAN & CAL PROCEDURE
The unique Cal-Check
TM
feature allows the user to check the meter
calibration status at any time. Simply follow the below procedure for
a quick and easy operation.
• Rinse the probe with water.
• Immerse the probe in the HI 50021 check solution.
Note: If the reading is around pH 4.0, the probe is broken and has
to be replaced.
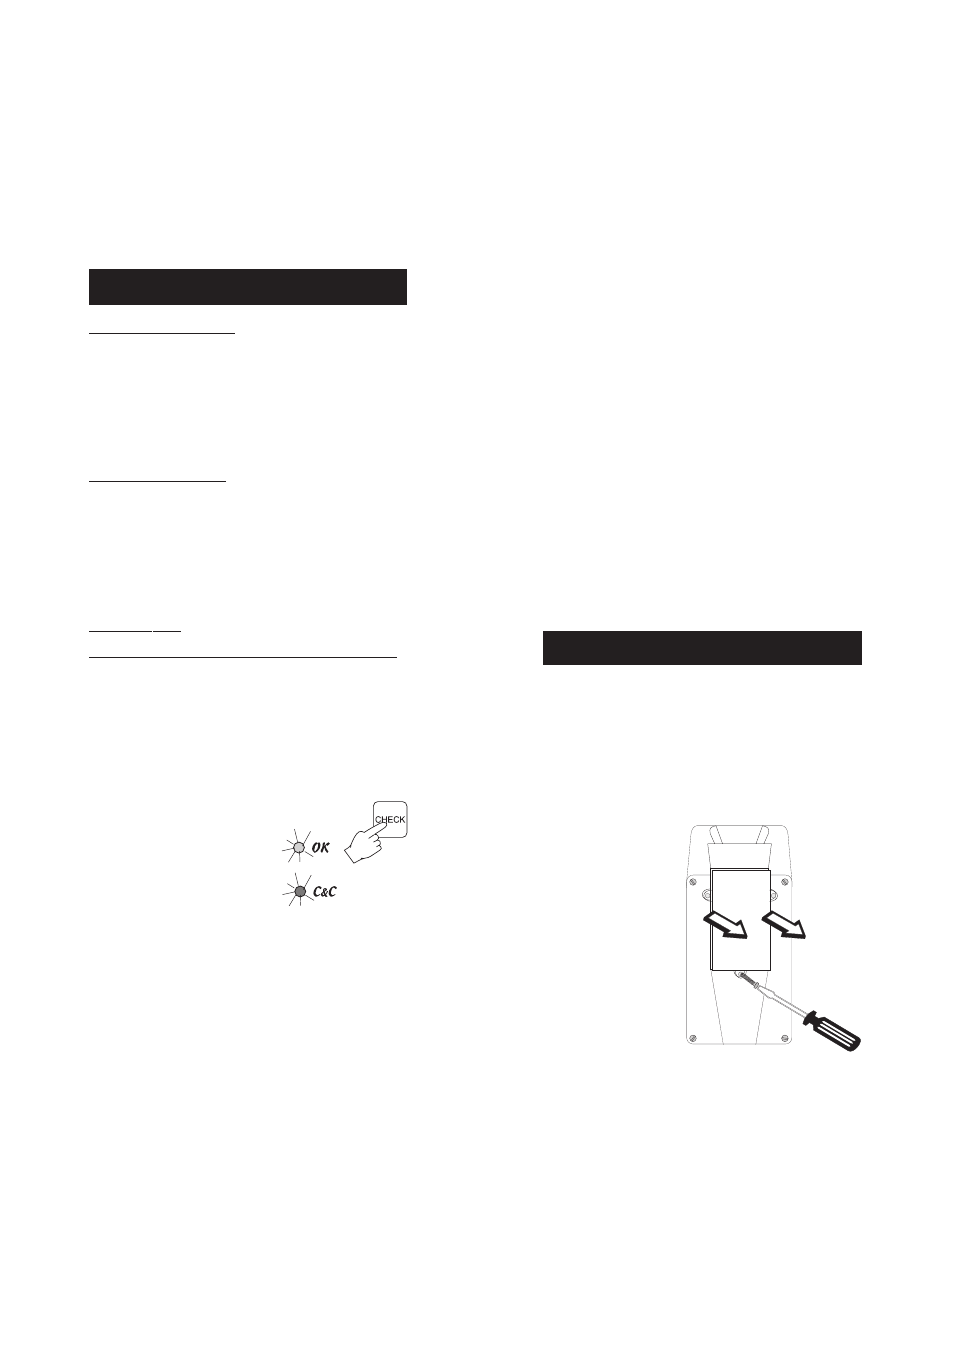
• Press the CHECK key.
• If the green LED lights up, the
meter is calibrated.
• If the red LED lights up, Cleaning
is needed:
1. immerse the probe in the HI 700661 cleaning solution (or in
one of the available specific solutions - see "Accessories" section)
for 5 minutes, then rinse it with tap water
2. immerse again in the HI 50021 check solution and press the
CHECK key
3. if the green LED lights up, the meter does not need calibration
These meters are powered by a 9V battery that is located on the rear
of the instrument.
When the battery level is so low that it may cause unreliable
measurements, the meter turns off.
It is recommended to replace the battery immediately.
Battery replacement must only take place in a nonhazardous area
using a 9V alkaline battery.
Unscrew the three screws
on the rear of the meter,
remove the battery com-
partment cover and
replace the 9V battery
with a new one while
paying attention to its
polarity.
Make sure the battery
contacts are tight and
secure before replacing
the cover.
BATTERY REPLACEMENT
4. if the red LED lights up again, calibration is needed (see "pH
Calibration" section).
Note: If it is not possible to calibrate, the probe has to be replaced
with a new one.
Note: For field applications, it is always recommended to keep a
spare probe handy. When anomalies are not resolved with
simple maintenance, change the probe and recalibrate the
meter.