Validation procedure – Hanna Instruments HI 96753 User Manual
Page 8
14
15
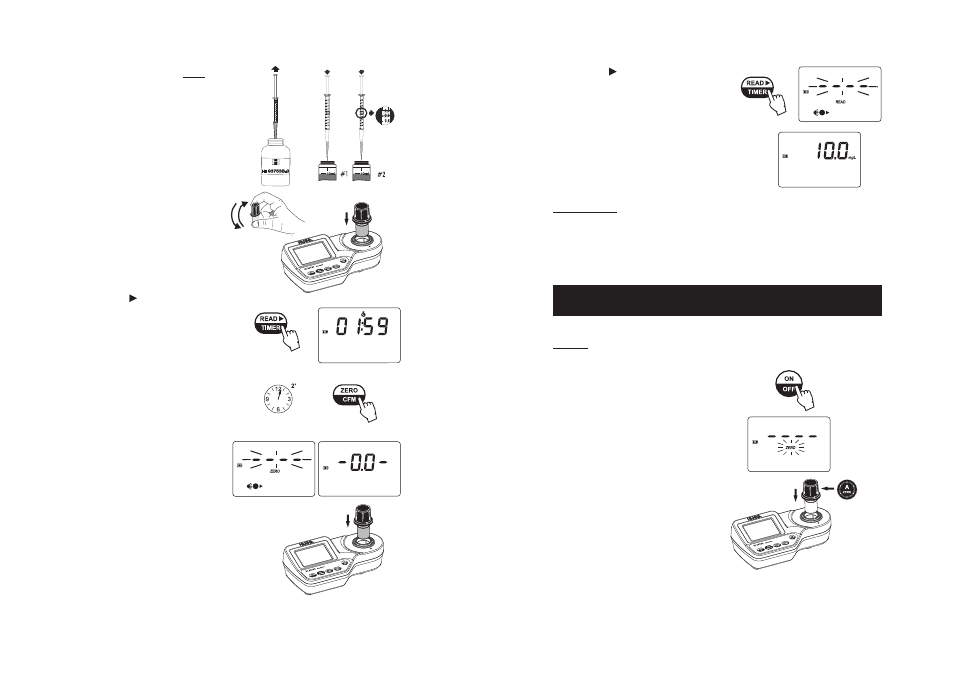
• Remove the caps and use the second 1 mL
syringe to add 0.5 mL of HI 93753B-0
Complexing Reagent to each cuvette.
• Replace the caps and mix each cuvette
by turning the cuvette upside down for
approximately 30 seconds.
• Place the cuvette with the reacted distilled
water (#1) into the cuvette holder and
ensure that the notch on the cap is
positioned securely into the groove.
• Press READ/ /TIMER
.
The display will
show the countdown prior to zeroing. The
beeper is playing a beep at the end of
countdown period.
Alternatively, wait for 2 minutes then just
press ZERO/CFM.
In both cases, the lamp, cuvette and
detector icons will appear on the display,
depending on the zeroing phase.
• After a few seconds, the display will
show “-0.0-”. The meter is now zeroed
and ready for measurement.
• Remove the cuvette.
• Place the other cuvette with the reacted
sample (#2) into the cuvette holder
and ensure that the notch on the cap is
positioned securely into the groove.
# 1
• Press READ/ /TIMER. The lamp, cuvette
and detector icons will appear on the
display, depending on the measurement
phase.
• At the end of measurement, the instrument
directly displays concentration in mg/L of
chloride on the LCD.
INTERFERENCES
The pH of sample after addition of reagents should be about 2. For alkaline samples, neutralize
before adding reagents.
Intensely colored samples will cause interference, therefore they should be adequately treated before
performing the test. Suspended matter in large amounts should be removed by prior filtration.
# 2
VALIDATION PROCEDURE
Use the validation procedure to ensure that the instrument is properly calibrated.
Warning:
Do not validate the instrument with any standard solutions other than the HANNA CAL
CHECK
TM
Standards, otherwise erroneous results will be obtained.
•
Turn the meter on by pressing ON/OFF.
• Place the CAL CHECK
TM
Standard
HI 96753-11
Cuvette A into the cuvette
holder and ensure that the notch on the
cap is positioned securely into the groove.
• When the beeper sounds briefly and the
LCD displays dashes, the meter is ready.