Hanna Instruments pH 211R User Manual
Page 6
11
10
• Press CAL to quit calibration. The meter
will save the one-point calibration data
and return to normal mode.
Two-Point Calibration
Any two of the 5 memorized buffers can be used for this purpose.
However, it is recommended to choose pH 6.86 or 7.01 as the first
point and pH 4.01 (acidic sample) or pH 9.18/10.01 (alkaline
environment) as the second point.
• After the first calibration point is con-
firmed, immerse pH electrode and
temperature probe approx. 4 cm (1½") in
the second buffer solution and stir gently.
The temperature probe should be close to
the pH electrode.
• If necessary, press
▲
°C or
▼
°C to select a
different buffer value.
Note: The meter will automatically skip the buffer used for the first
point. It also skips pH 6.86 if 7.01 was used, and viceversa,
and pH 9.18 if 10.01 was used, and viceversa.
• The "NOT READY" indication will blink on
LCD until the reading has stabilized.
• When the reading is stable, "READY" and "CFM" will blink. Press
CFM to confirm the calibration.
• If the reading is close to the selected buffer, the meter stores the
calibration point, displays the "Stor" message for 1 second and
returns to normal operational mode.
• If the measured value is not close to the
selected buffer, "WRONG
" and "WRONG
" will blink alternately.
In this case check if the correct buffer has been used, or refresh
the electrode by following the maintenance procedure (see "Elec-
trode Maintenance" section). If necessary change buffer or electrode.
Note: Press RANGE to display the temperature reading on the LCD
during calibration.
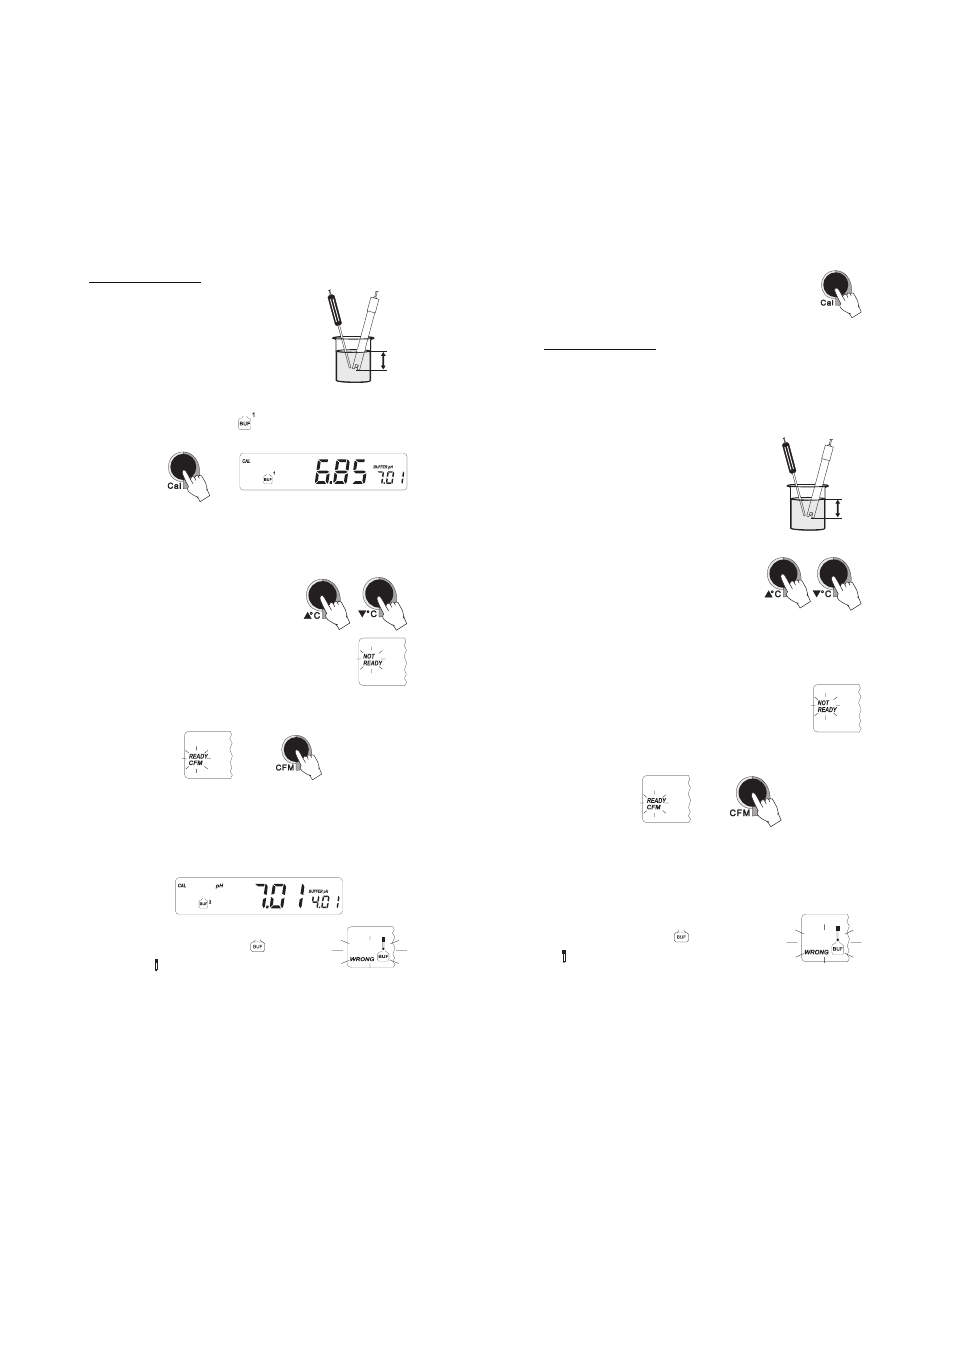
One-Point Calibration
• Immerse pH electrode and temperature
probe approximately 4 cm (1½") into
any of the available buffer solutions (pH
4.01, 6.86, 7.01, 9.18 or 10.01) and
stir gently. The temperature probe should
be close to the pH electrode.
• Press CAL. The "CAL" and "
" indicators, and "7.01" will be
displayed.
Note: The buffer value displayed on the secondary LCD, varies with
temperature. For example, at 20ºC it shows 4.00, 7.03 and
10.06, while at 25ºC it shows 4.01, 7.01 and 10.01.
• If necessary, press
▲
°C or
▼
°C to select
a different buffer value.
• The "NOT READY" indication will blink on
the LCD until the reading has stabilized.
• When the reading is stable, "READY" and "CFM" will blink. Press
CFM to confirm the calibration.
• If the reading is close to the selected buffer value, the meter stores
the calibration point. The "Stor" message appears on the LCD for
1 second, then the buffer value is displayed on the primary LCD
and the secondary LCD displays the second expected buffer value.
• If the measured value is not close to the
selected buffer, the "WRONG " and
"WRONG " symbols will blink alter-
nately.
In this case check if the correct buffer has been used or refresh the
electrode by following the maintenance procedure (see "Electrode
Maintenance" section). If necessary change the buffer or the
electrode.
4 cm
(1½")
4 cm
(1½")