High performance ice fishing gear – Eskimo 69161 User Manual
Page 7
Eskape
™
200 Hardwater Series (69161)
HIGH PERFORMANCE ICE FISHING GEAR
®
Page 7
GetEskimo.com
1-800-345-6007
15. Insert rear hinge upright pole from each hinge into the (1) rear top cross
brace pole (68352 which measures approximately 59.45” x 25.14”).
Making sure the lever side of large, red QRS pole clip is inline with the
push button of hinge poles, push the snap buttons inward to allow cross
brace pole to go over hinge poles and slide them to their shortest height
(transport mode).
SEE fIGuRE 5.
16. Insert (2) hinge upright poles from each hinge and insert them into the
(2) top cross brace poles (68117 which measure approximately 59.45”
x 28.14”). Making sure the lever side of large, red QRS pole clip is inline
with the push button of hinge poles, push the snap buttons inward to
allow cross brace pole to go over hinge poles and slide them to their
shortest height (transport mode).
SEE fIGuRE 5.
NOTE: The (3) top cross brace poles are taller and wider than the
bottom cross brace pole. The (1) top, rear cross brace pole is shorter
in height than the other 2 top cross brace poles.
NOTE: If cross brace poles are not assembled correctly, added
tension will be applied to the fabric skin.
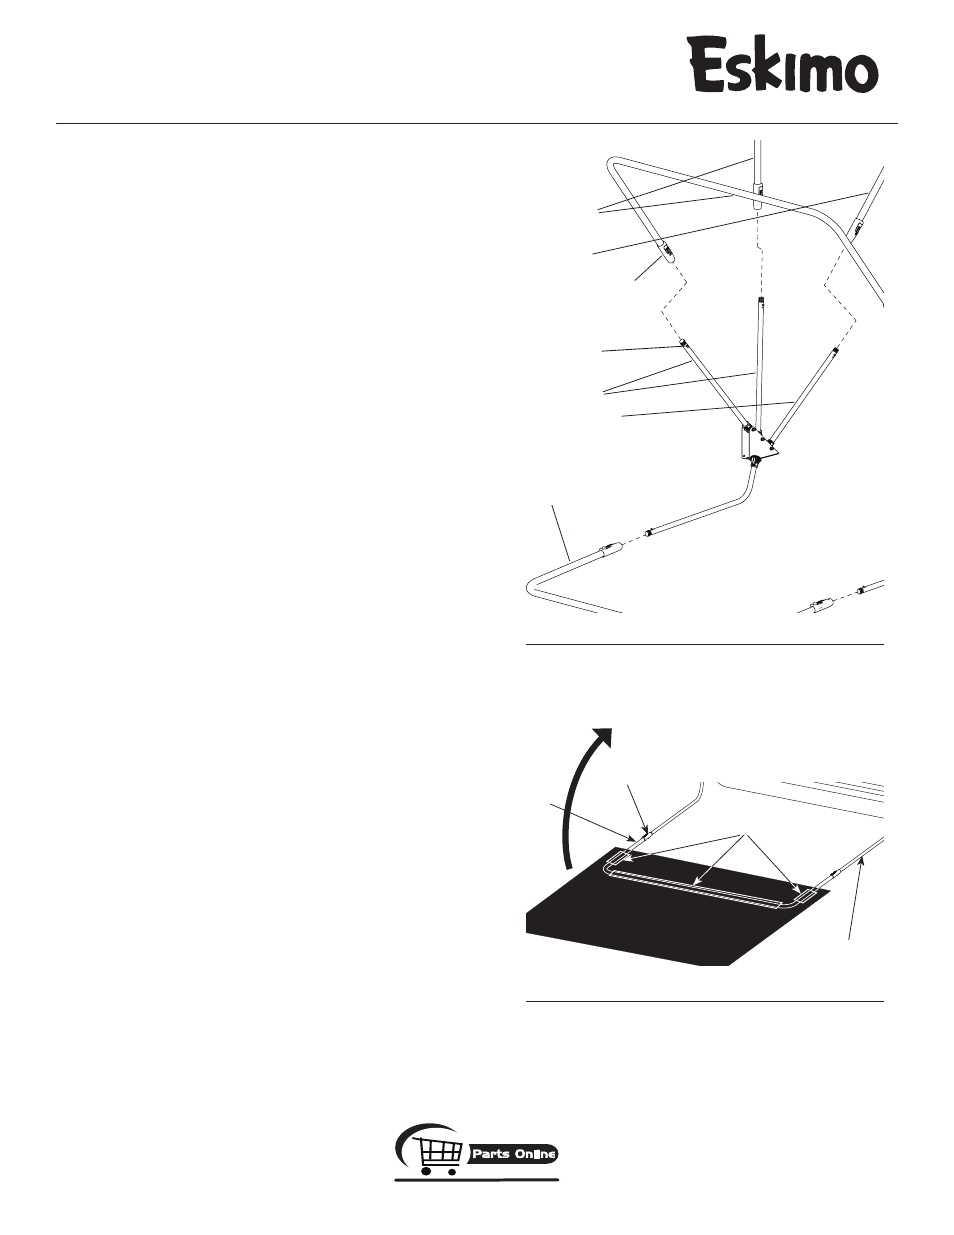
17. Unfold skin and locate the Eskimo Eskape 200 logo near the zippered
door, which is the front of the shelter. With front of shelter skin laying
face down on the ground in front of the shelter, locate the (3) fabric
sleeves sewn to the bottom seam on front side of shelter. Slide bottom
cross brace pole (68106 which measure approximately 55.21” x 26.64”)
through the (3) fabric sleeves. Insert (1) hinge “J” pole from each hinge
into the bottom cross brace pole. Making sure the lever side of large,
red QRS pole clip is inline with the snap button of hinge “J” poles, push
the snap buttons inward to allow cross brace pole to go over “J” poles.
Snap into place for the “in-use position.”
SEE fIGuRE 6.
NOTE: Snap button should align with lever side of large, red QRS
pole clip in cross brace pole. If not, you have feed the cross brace
pole through fabric sleeves incorrectly and the cross brace will
need to be flipped over.
18. Drape the rest of the shelter skin over the shelter sled, seats and poles
and position it the best you can.
fIGuRE 5 (right side shown)
fIGuRE 6
top cross
brace poles
snap buttons
upright poles
snap button
bottom cross brace pole
hinge “J” poles
(3) fabric sleeves
red QRS pole clips
rear top cross
brace pole
bottom cross
brace pole
Pull skin back over the
rest of the ice shelter.
rear upright pole