Project 106 3v audio amplifier, Project 107 mini music player, Project 108 voice echo with light – Elenco Snap Circuits SOUND ® User Manual
Page 59
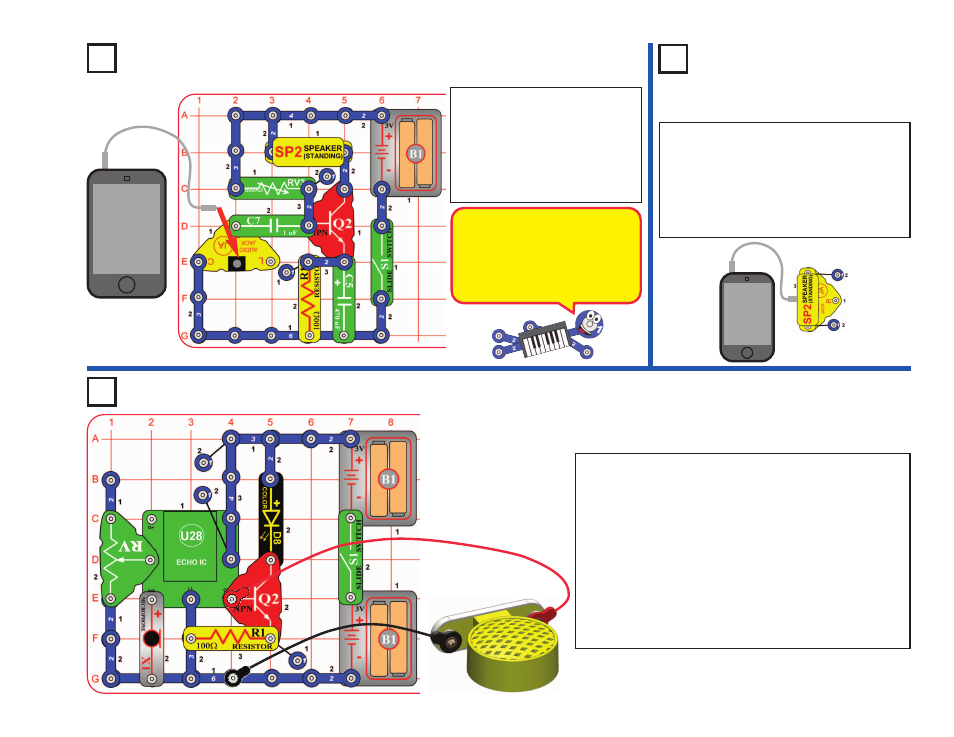
Project 106
3V Audio Amplifier
MP3 player
Build the circuit as shown, and place it in a quiet room.
Connect the speaker (SP2) using the red & black jumper
wires, then hold it away from the microphone (X1). Turn on
the slide switch (S1). Talk into the microphone, and listen the
echo on the speaker, and see it on the color LED (D8). Adjust
the amount of echo using the lever on the adjustable resistor
(RV); move the lever up for more echo or down for less echo.
Try this at different RV settings. You may need to talk loud
directly into the microphone to make the color LED bright.
Note: You must hold the speaker away from the microphone
or the circuit may self-oscillate due to feedback. You also
need a quiet room, with low background noise.
Build the circuit, and turn on the
slide switch (S1). Connect a
music device (not included) to the
audio jack (JA) as shown, and
start music on it. Turn the knob
on the 500k
W
adjustable resistor
(RV3) to adjust the volume.
Project 107
Mini Music Player
To demonstrate how much the transistor was
amplifying the sound, connect the speaker
directly to the audio jack, as shown here, and
start music on your music device. If you don’t
hear anything then hold the speaker next to
your ear, or set the volume control on your
music device higher.
MP3 player
Project 108
Voice Echo with Light
The transistor (Q2) amplifies the
current from your music device, to
make the sound louder. The
resistors (R1 & RV3) and
capacitors (C5 & C7) condition
the signal to minimize distortion.
-58-