Project #684, Vibration led, Project #685 – Elenco Projects 512-692 User Manual
Page 82: Vibration speaker
-81-
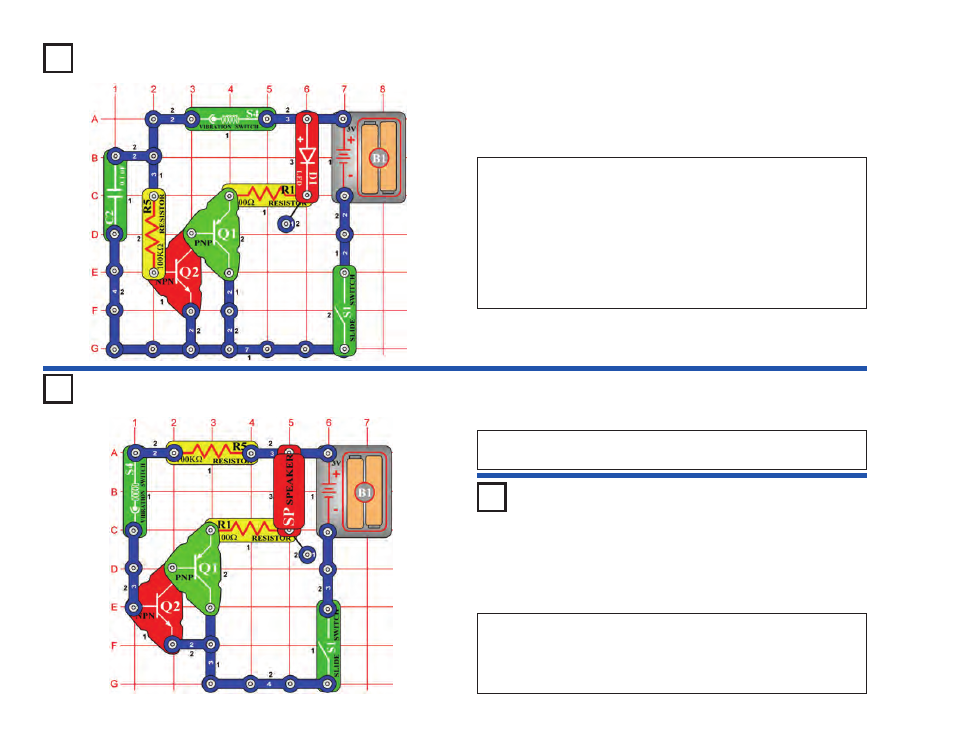
Project #684
OBJECTIVE: Introduction to the vibration switch.
Vibration LED
The vibration switch (S4) contains two separate contacts; a spring is
connected to one of the contacts. A vibration causes the spring to
move briefly shorting the two contacts. This simple circuit
demonstrates how the vibration switch works. Build the circuit and the
LED (D1) does not light. Tap the vibration switch or table and the LED
lights for every tap.
The 100K
Ω
resistor (R5) limits the current to protect the vibration
switch while the transistors allow the vibration switch to control a large
current.
Project #685
OBJECTIVE: To create sound with a tap of your finger.
Vibration Speaker
OBJECTIVE: To use the meter with the vibration switch.
Modify project #685 by replacing the speaker (SP) with the meter (M2).
Place it with the “+” side towards R5 and use the LOW (or 10mA)
setting. Tap the vibration switch (S4) and the meter deflects to the
right. Tap harder on the switch; the switch closes longer and the meter
deflects more to the right.
Measure the Vibration
as You Tap the Switch
Project #686
Build the circuit and turn on the slide switch (S1). When you tap on the vibration switch
(S4), the speaker (SP) sounds. Listen closely because the sound may not be very loud.
To learn more about how circuits work, visit www.snapcircuits.net or page 85 to find out about our Student Guides.