Project #23, Make your own battery, Project #21 one-way light – Elenco R/C Snap Rover® User Manual
Page 21: Project #22 conduction detector
-20-
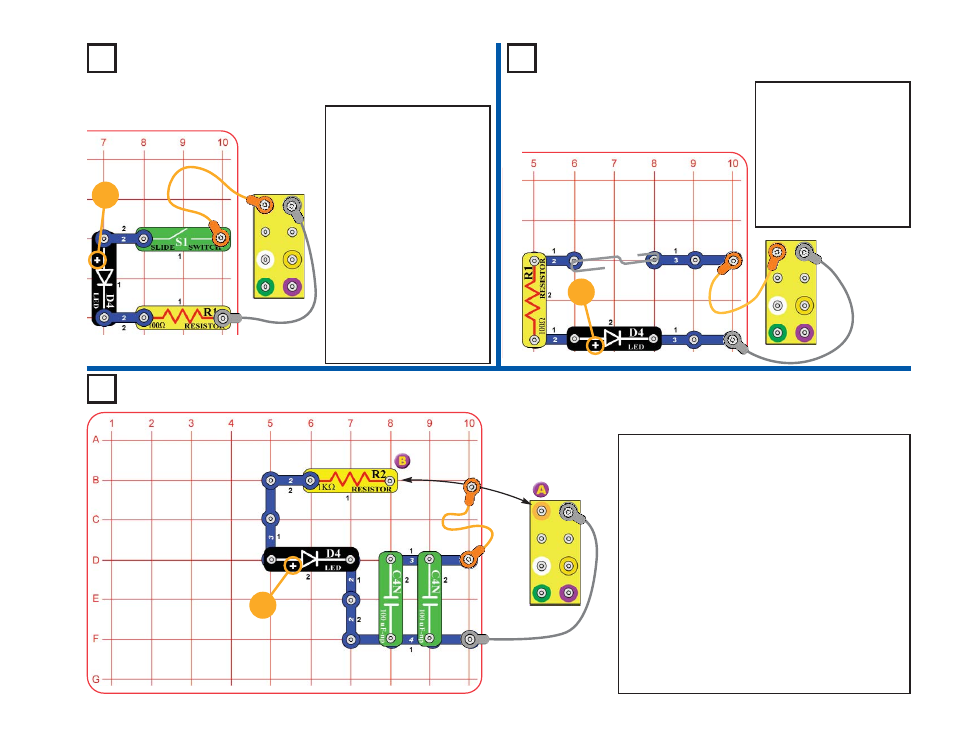
Project #21
One-Way Light
OBJECTIVE: To show how an LED works.
Build the circuit, place the base grid
centered on the Rover body, and
connect the jumper wires as shown.
When you close the slide switch (S1),
electricity flows from the batteries
through the switch (S1), the LED (D4),
the resistor (R1), and back to the battery.
The switch controls the electricity and
the LED•(light emitting diode) converts
electricity into light. The resistor limits
how much electricity can flow - without it
the batteries would overload the LED
and damage it! LEDs are used in all
types of electronic equipment to
indicate conditions and pass
information to the user of that
equipment.
Reverse the position of the LED (so that
the “+” side is next to the resistor). Turn
on the switch - nothing happens. LEDs
only allow electricity to flow in one
direction, so the circuit doesn’t work if
the LED is backwards.
Build the circuit, place the base grid
centered on the Rover body, and
connect the jumper wires as shown. To
complete the circuit, place a paperclip
across the snaps as shown in the
picture. If the paperclip is made of
metal, the LED (D4) will be bright.
Try placing other materials (such as
plastic or wood) across the snaps
instead of the paperclip. If the material
has low resistance, the LED will light.
This circuit can be used to detect which
materials conduct electricity.
Project #22
Conduction Detector
OBJECTIVE: To make a circuit that
detects the conduction of electricity in
different materials.
Project #23
OBJECTIVE: To show how capacitors can store electricity.
Build the circuit and place the base grid centered on
the Rover body. Connect the jumper wires, leaving
one end of the orange jumper off as shown. Touch
the loose end of the orange jumper to point A on the
Rover rear for a moment. This fills up the 100
μF
capacitors (C4N) with electricity.
Now move the orange jumper from point A to point
B on the 1K
Ω resistor (R2). The LED•(D4) lights for
a few seconds using the electricity stored in the
capacitors. Move the orange jumper back to A to
refill with electricity, and then to B several times.
Notice that a capacitor is not very efficient at storing
electricity - compare how long the 100
μFs kept the
LED lit for with how your batteries run all of your
projects! That is because capacitors store electrical
energy while a battery stores chemical energy.
Make Your Own Battery
+
R
O
VER•
R
EAR
+
R
O
VER•
R
EAR
+
R
O
VER•
R
EAR