Rear panel, Remote control – darTZeel Audio CTH-8550 User Manual
Page 8
darTZeel CTH-8550
User Manual, version 1.0
Page 8 of 15
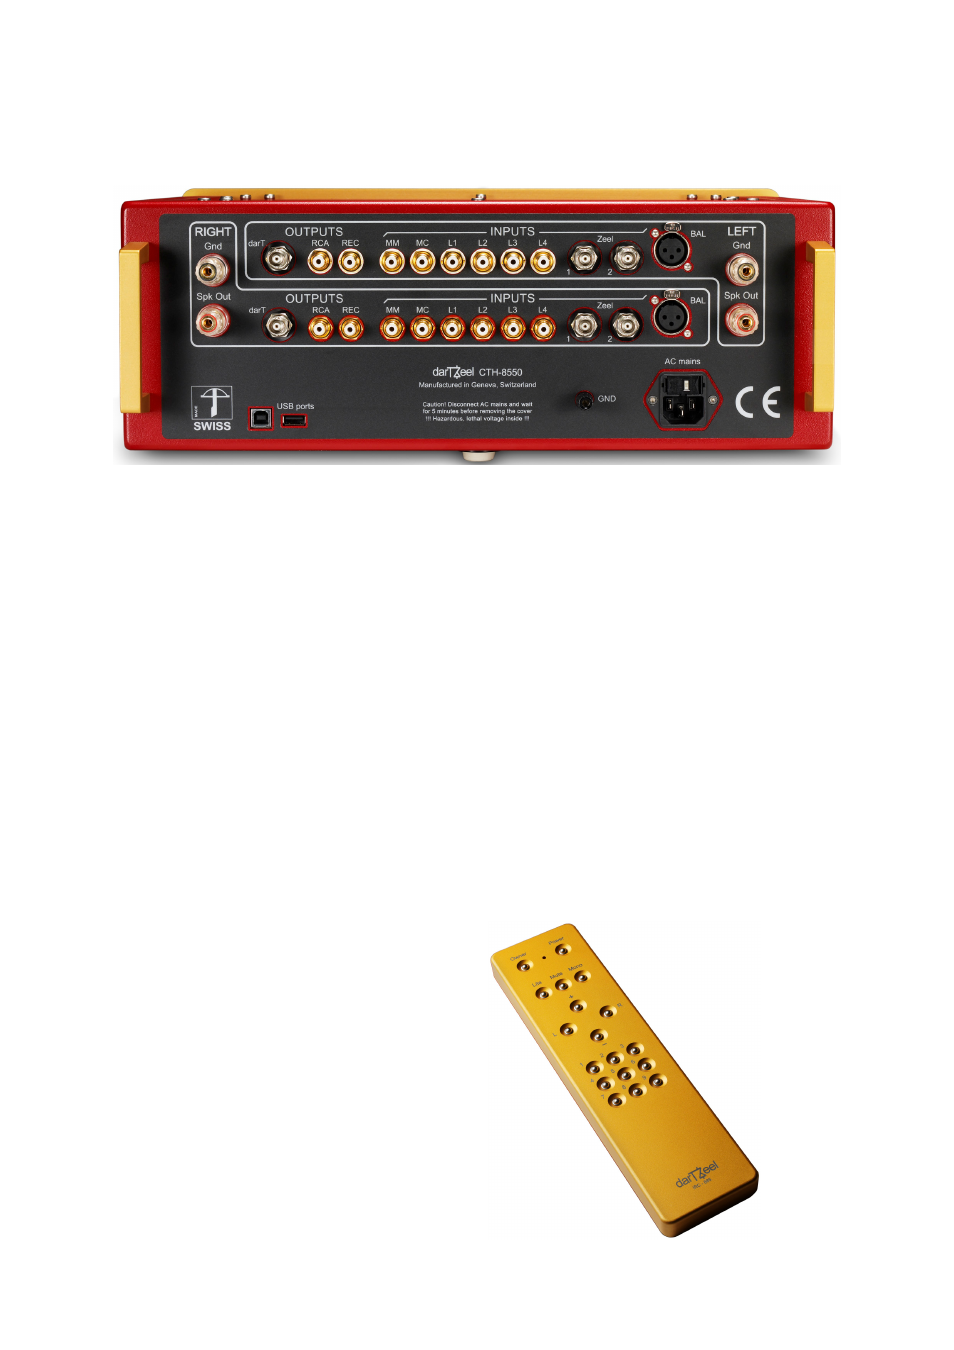
6.2. Rear panel
We think the rear panel labeling speaks for itself.
Nevertheless, we will try to keep you awake, by
providing some general information… .
You will note that we provide two
USB ports
on the
lower left corner. The standard
rectangular port
is
the one into which you will
insert your USB key
when registering, or when a firmware update
becomes available.
When you register your CTH-8550, you will need
to insert your USB key into the rear panel’s
rectangular USB port.
Please carefully read the chapter 7, “Activation key
procedure”, next page.
!!! YOUR MACHINE WILL OPERATE FOR
ONLY 15 MINUTES IF NOT PROPERLY
ACTIVATED !!!
6.2.1 Fuse and voltage settings
The small window above the AC mains connector
indicates the factory voltage setting.
If you move to another country, you may have to
change the voltage setting. Please contact your dealer for
information as to how to proceed.
In this case, a new activation code will be required.
!!! Warning !!!
Improper fuse installation and/or voltage selection
will certainly damage your CTH-8550.
For 100-120 volts AC, proper rating is 8 amperes.
For 200-240 volts AC, proper rating is 4 amperes.
Fuses must be of T (temporized) type.
Do NOT use fuses with wound coil filaments.
In case of doubt, always install Fast Blow types.
6.3. Remote control
The remote control is easy to use.
The nine lower keys (numbered 1 to 9) are for
selecting the source, as described in chapter 6.1
“FRONT PANEL”.
The + and – keys are for adjusting the output
volume level.
The L and R keys are used for direct balance
adjustment.
It is easier to adjust balance from here than from
the front panel, since it allows for direct access.
Resetting the balance to the central position is
accomplished by pressing the L and R keys
simultaneously.
The Lite key functions the same as the “Light”
key on the front panel.
The Owner key functions the same as the
“Name” key on the front panel.
The other keys speak for themselves.