Angelcare AC403 User Manual
Page 13
STEP 6 - ACTIVATING AND DEACTIVATING ADDITIONAL FUNCTIONS
The Angelcare
®
monitor can be used with the pre-program factory settings
or you can also customize your settings to your preference.
All changes and
adjustments made in the
main menu and sub-menu
will not be activated
unless you confirm them
by pressing the
SELECT
button followed by the
EXIT button.
IMPORTANT
When in MENU or SUB-MENU mode
NO sound, alarm or vibration will be
emitted from either the Parent Unit
or the Nursery Unit even if they were
activated before pressing the MENU
or SUB-MENU mode.
6.1 - PAGER
Allows you to locate the Parent Unit.
TO LOCATE THE PARENT UNIT:
Press and release the Nursery Unit
Pager
button on the rear of the Nursery Unit.
The Parent Unit will emit a paging sound.
TO STOP THE PAGING SOUND:
Press the Power button
on the Parent Unit
Slide the
Night Light button
on the Nursery Unit
to turn it
ON or OFF.
6.2 - NIGHT LIGHT
3
4
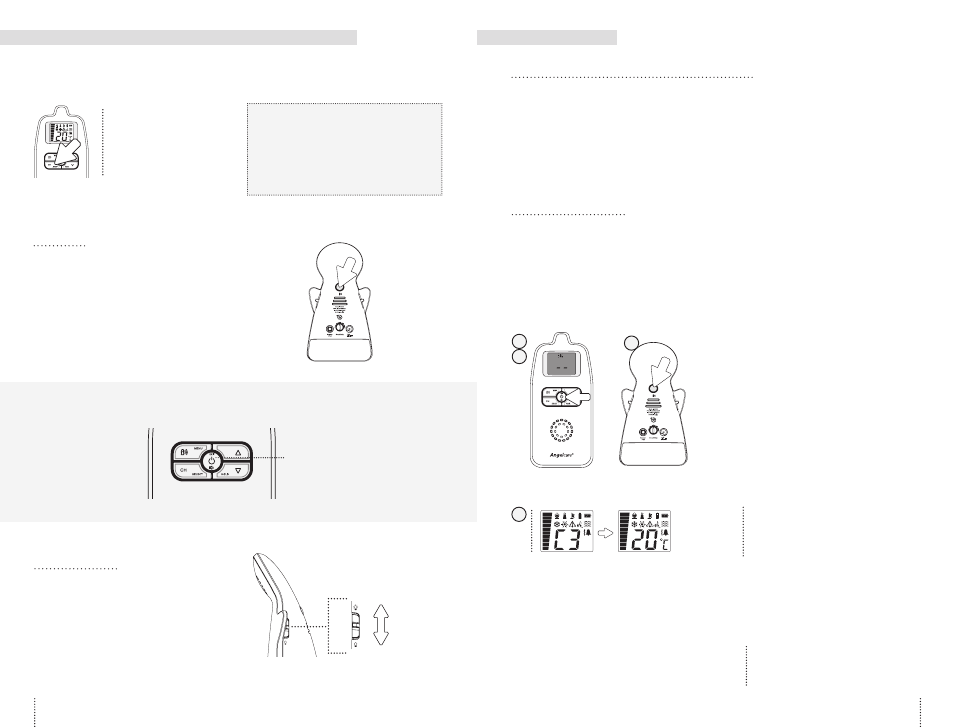
1) Turn OFF the Parent Unit and switch it
back ON. LCD will only show ‘——‘ with
back light on and nursery unit icon
will flash.
2) By pressing and holding for 3 seconds
the Parent Unit “MENU/CONNECT”
button, the Parent Unit will be set in
to connectivity mode (you will hear a
beep tone and the antenna icon will flash
for 15 seconds).
3) To set the Nursery Unit in to connectivity
mode, press and hold the Page button
for 4 seconds (on the back of the
Nursery Unit). The Power LED will light
and a beep tone will be emitted as
the connection procedure should
be completed.
NOTE:
If step 3 is not followed within the duration,
the Parent Unit will exit the connectivity
mode and you will need to start this
process again.
4) When the Parent Unit and Nursery
Unit are connected, the parent unit
emits a confirmation tone and will
show the channel number which will be
replaced by the temperature (normal
screen) a few seconds later.
1
2
NOTE:
If the TIC light is flashing, do not
press the “Page” button or the link may
be interrupted.
LOSS OF CONNECTIVITY
In the case of loss of connectivity, the first step is to bring the Parent Unit and Nursery Unit
closer together and make sure that both units are ON to restore the connection. If there is
still no connection and no out of range warning after the above has been done, then and
only then should the re-connection procedure below be done.
TROUBLESHOOTING
TAKING CARE OF YOUR RECHARGEABLE BATTERIES
• Ensure that you fully charge your batteries for 15 hours before their first use.
• To maintain maximum battery life it is recommended that you fully discharge
your batteries periodically. Battery performance can be diminished by leaving
the batteries constantly charging. If your parent unit is not in use, please turn it off.
• Inadequate battery power can impair the performance of your monitor. If you are
not happy with the performance of your Parent Unit/Monitor please replace the
rechargeable batteries (3 or 6 x NiMH Rechargeable Batteries).
• It is advisable to change the batteries every 6 months.
Re-connection procedure:
25
24