Ambir imagescan pro, 940u quick start guide installation and setup – Ambir ImageScan Pro 940u User Manual
Page 3
Ambir ImageScan Pro
TM
940u
Quick Start Guide
Installation and Setup
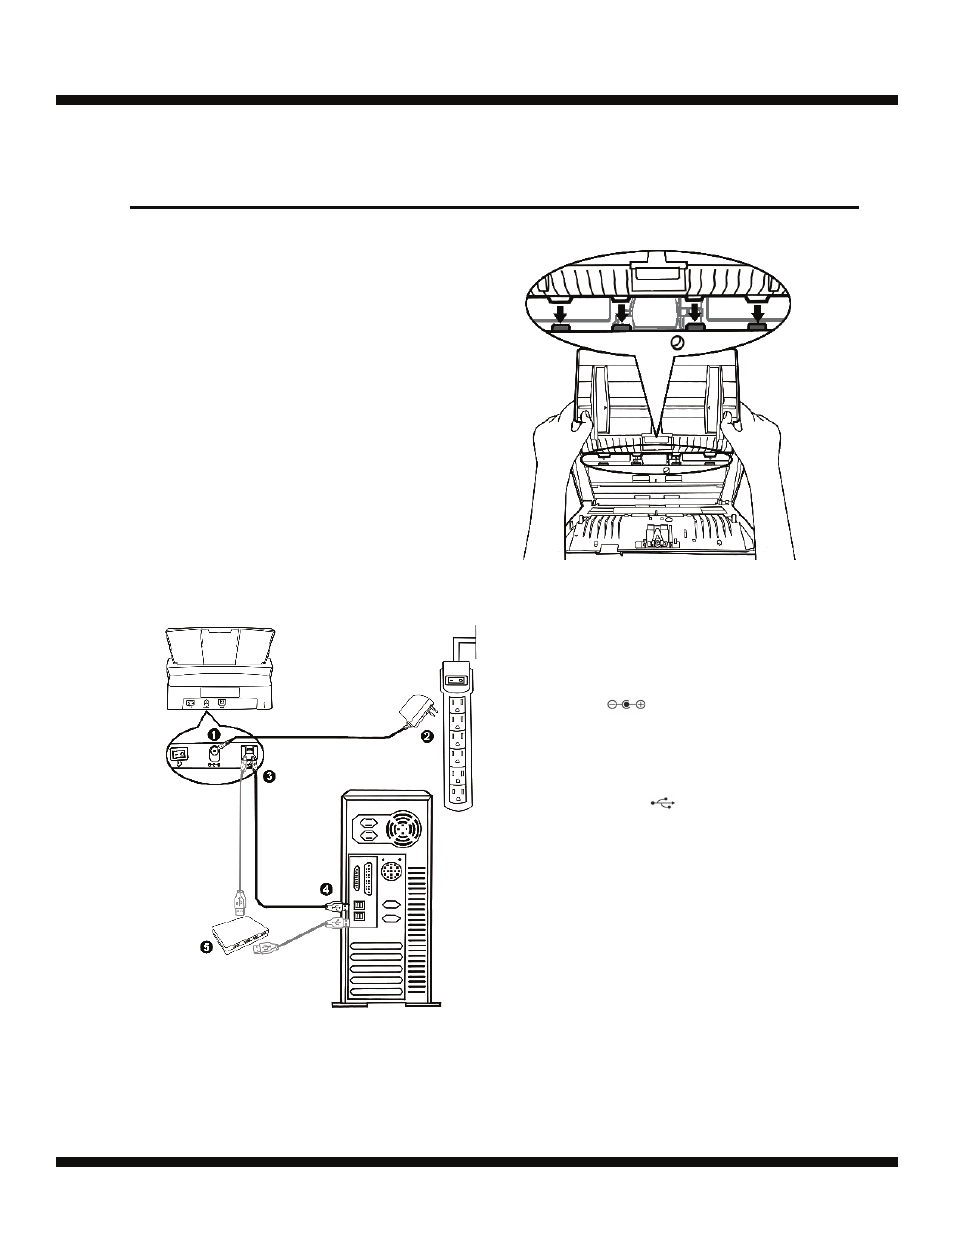
Step 1. Install the Paper Chute
1. Open the ADF cover by pulling the lever.
2. Install the paper chute by aligning and inserting
the tabs of the paper chute into their slots on the
scanner.
3. Close the ADF cover by pushing it back down
until it snaps back into place.
Step 2. Connecting the Scanner to
Your Computer
1. Plug the AC adapter into the scanner’s power
receptor
.
2. Plug the other end of the AC adapter into a
standard AC power outlet.
3. Plug the square end of the included USB cable
to the USB port
at the rear of the scanner.
4. Plug the rectangular end of the USB cable to an
available USB port on your computer.
5. If you plan to connect your scanner to a USB
hub, make sure that the hub is connected to the
USB port in your computer. Next, connect the
scanner to the USB hub.
3