AudioBahn Audiobah XM Ready A1100N User Manual
Page 7
Attention! The text in this document has been recognized automatically. To view the original document, you can use the "Original mode".
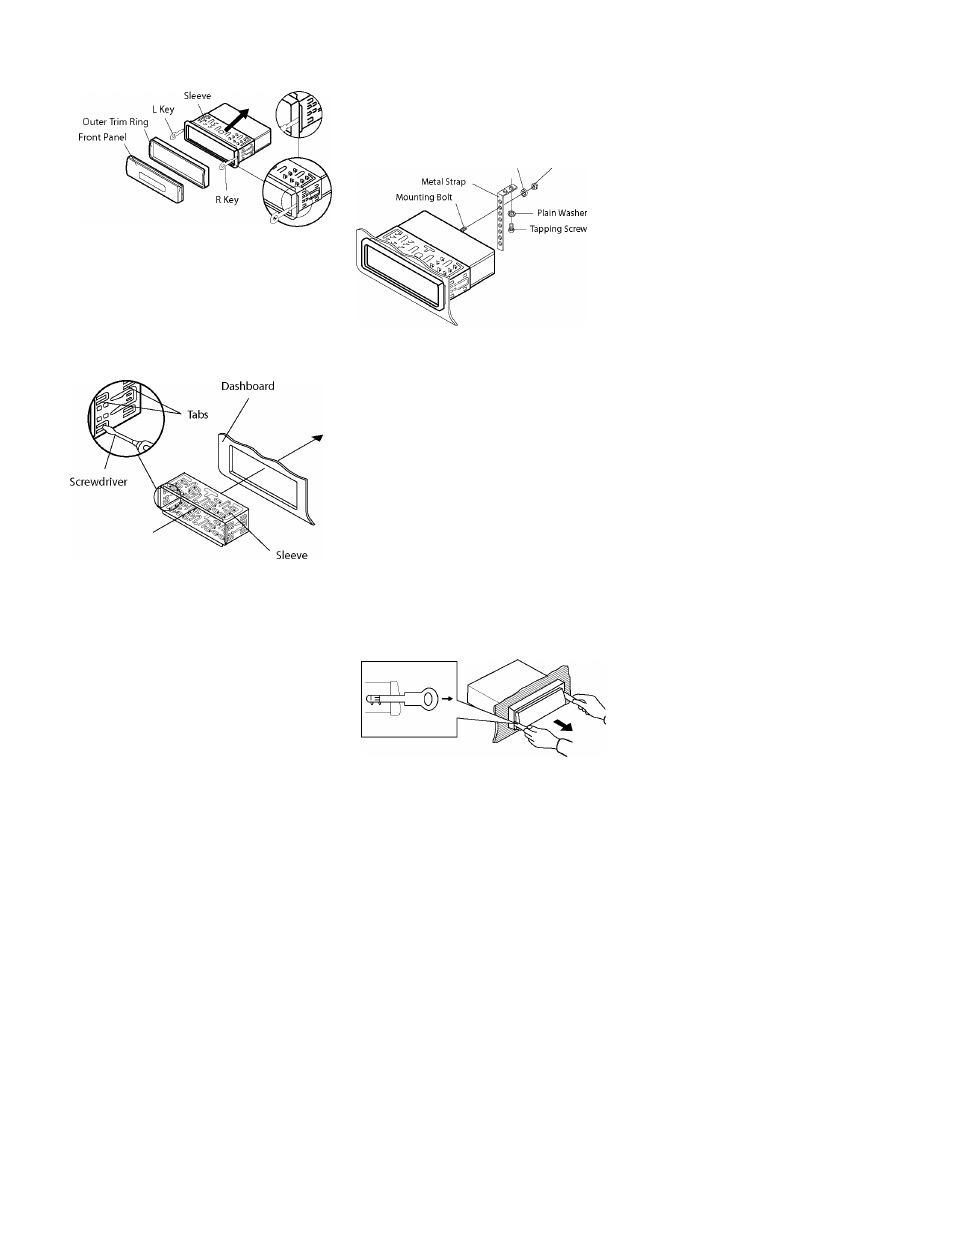
6. Mount the sleeve by inserting the sleeve
into the opening of the dashboard and
bend open the tabs located around the
sleeve with a screwdriver. Notall tabs
will be able to make contact, so
examine which ones will be most
effective. Bending open the appropriate
tabs behind the dashboard to secure
the sleeve in place.
8
9,
7.
Reconnectthewireharnessandthe
antenna and be careful not to pinch
any wires or cables.
Slide the unit into the sleeve until it
locks into place.
To further secure the unit, use the
supplied metal strap to secure the back
ofthe unit in place. Use the supplied
hardware (Hex Nut (MSmm) and Spring
Washer) to attach one end ofthe strap
to the mounting bolt on the back of
the unit. If necessary, bend the metal
straptofityourvehicle's mounting
area. Then use the supplied hardware
(Tapping Screw (5x25mm) and Plain
Washer) to attach the other end of
metal strap to a solid metal part ofthe
vehicle underthe dashboard. This strap
also helps ensure proper electrical
grounding ofthe unit.
Note: toinstalltheshortthreading
terminal ofthe mounting boitto the
back ofthe unitand the other long
threading terminal to the dashboard.
SpringWasher ,,
^
U
qv
N I It
10. Reconnect the cable to the vehicle
battery's negative (-) terminal. Then
replace the outer trim ring and install
the unit's front panel, (see the steps
of"toinstallthefrontpanel ").
Removing the unit
1. Make sure the ignition is turned off,
then disconnect the cable from the
vehicle battery's negative (-) terminal.
2. Remove the metal strap attached the
back ofthe unit (ifattached).
3. Press the release button to remove the
front panel.
4. Liftthetopoftheoutertrim ringthen
pull it outto remove it.
5. Insert both ofthe supplied keys into
the slots at the middle left and right
sides ofthe unit,then pull the unitout
ofthe dashboard.